yodeyma perfumes equivalent list pdf

Yodeyma Perfumes Equivalent List: A Comprehensive Guide (Updated 04/28/2026)

Discover a detailed guide to Yodeyma perfumes, offering affordable alternatives to designer fragrances. Explore the “smells like” lists, covering notes and equivalents
for popular UK brands, available as a convenient PDF resource.

Yodeyma has rapidly gained recognition as a prominent player in the fragrance market, particularly within the UK and EU. They specialize in creating high-quality Eau de Parfums that offer compelling alternatives to well-known, often expensive, designer fragrances. The core philosophy behind Yodeyma centers on delivering exceptional scents at accessible price points, making luxury aromas attainable for a wider audience.

Central to Yodeyma’s appeal is their extensive “smells like” list. This isn’t about direct imitation, but rather skillful replication of the olfactory profiles of iconic perfumes. Their catalog includes detailed information regarding perfumery notes, allowing consumers to understand the similarities and nuances between Yodeyma fragrances and their designer counterparts.

A downloadable PDF equivalent list is frequently sought after by fragrance enthusiasts, providing a convenient reference guide. This list showcases Yodeyma’s offerings alongside the designer perfumes they are inspired by, facilitating informed purchasing decisions. Yodeyma consistently emphasizes that trademarks are used solely for identification purposes, highlighting their commitment to offering inspired-by, not counterfeit, fragrances.

What are Yodeyma Perfumes?

Yodeyma perfumes are Eau de Parfums (EDP) meticulously crafted to emulate the scent profiles of established, luxury fragrance brands. They aren’t intended as replicas, but rather as sophisticated interpretations, offering a similar olfactory experience at a significantly lower cost. The brand focuses on capturing the essence of popular scents, utilizing quality ingredients to achieve a comparable aroma.

A key feature is the detailed “smells like” information provided, often compiled into a readily accessible PDF list. This list is invaluable for consumers seeking affordable alternatives, clearly indicating which Yodeyma fragrance corresponds to a specific designer perfume. Yodeyma’s approach centers on recreating the core notes and overall impression of the original scent.

It’s important to note that Yodeyma explicitly states that all brand names and trademarks mentioned are purely indicative, used solely for identification and comparison. They are dedicated to providing inspired-by fragrances, respecting intellectual property rights while delivering exceptional value to their customers. The PDF list serves as a transparent guide to these scent inspirations.

Yodeyma: A UK/EU Focused Brand

Yodeyma is primarily a UK and European Union (EU) focused fragrance brand, catering specifically to consumers within these markets. This regional concentration allows for streamlined distribution and a focused understanding of local fragrance preferences. The brand’s popularity is growing, evidenced by increasing availability through online retailers like My Beauty Basics and its own official UK website.

Accessibility is a core tenet of Yodeyma’s business model, reflected in its pricing and distribution strategy. The comprehensive “smells like” lists, often available as a downloadable PDF, are particularly useful for UK and EU customers familiar with the designer fragrances being emulated. This PDF resource simplifies the process of finding affordable alternatives.

While expanding, Yodeyma maintains a strong commitment to serving its core UK/EU customer base. The brand’s marketing and product development are tailored to resonate with these consumers, offering fragrances inspired by popular scents within the region. The PDF equivalent list is a key tool in this targeted approach.

Yodeyma Women’s Perfume Equivalents

Explore Yodeyma’s range of women’s fragrances, offering affordable alternatives to iconic scents like Armani Si, Dior J’adore, and Chanel No. 5 – detailed in the PDF.

Yodeyma Adrianna ⏤ Equivalent to Armani Si

Yodeyma Adrianna stands as a remarkably close equivalent to the luxurious Armani Si fragrance, offering a similar olfactory experience at a significantly more accessible price point. This Eau de Parfum captures the essence of Armani Si’s sophisticated blend of fruity top notes, a floral heart, and a warm, woody base. The PDF details how Adrianna replicates the initial burst of blackcurrant nectar and modern pear, transitioning into a captivating core of rose and jasmine.

Users consistently report a strong resemblance, noting the long-lasting projection and sillage. Adrianna delivers a comparable sweetness and elegance, making it an ideal choice for those seeking a designer-inspired scent without the designer price tag. The fragrance profile, as outlined in the downloadable PDF, focuses on recreating the key aromatic components that define Armani Si’s appeal. Reddit discussions frequently highlight Adrianna as a successful clone, particularly praising its longevity and faithful representation of the original.

Consider Adrianna for everyday wear or special occasions, enjoying a refined and captivating aroma reminiscent of Armani Si. The PDF provides a comprehensive breakdown of the scent notes for detailed comparison.

Yodeyma Amour ⏤ Inspired by Coco Chanel Mademoiselle

Yodeyma Amour is expertly crafted to evoke the timeless elegance of Coco Chanel Mademoiselle, presenting a compelling alternative for fragrance enthusiasts. The downloadable PDF details how Amour mirrors the iconic scent’s vibrant opening of orange and grapefruit, seamlessly blending into a floral heart of rose and jasmine. This Eau de Parfum aims to capture the sophisticated and modern character of Mademoiselle, offering a similar experience at a fraction of the cost.

Reviews frequently emphasize Amour’s successful imitation of Mademoiselle’s patchouli-infused base, contributing to its lasting power and distinctive aroma. The PDF provides a detailed breakdown of the scent’s composition, highlighting the key notes responsible for its resemblance. Fragrance communities often discuss Amour as a reliable dupe, praising its ability to deliver a comparable level of refinement and allure.

Ideal for those who appreciate a classic, yet contemporary fragrance, Amour offers a luxurious scent experience without compromise. Explore the PDF for a comprehensive scent profile comparison.

Yodeyma Bella ― Similar to Dior J’adore

Yodeyma Bella is designed as a captivating interpretation of the renowned Dior J’adore, offering a luxurious floral experience at an accessible price point. The accompanying PDF meticulously outlines how Bella replicates J’adore’s signature blend of ylang-ylang, jasmine, and rose, creating a radiant and feminine aroma. This Eau de Parfum aims to embody the same sophisticated and glamorous essence as its designer counterpart.

Fragrance enthusiasts often note Bella’s successful recreation of J’adore’s fruity top notes, adding a touch of sweetness and vibrancy. The PDF provides a detailed analysis of the scent’s pyramid, pinpointing the key ingredients that contribute to its similarity. Online discussions frequently highlight Bella as a cost-effective alternative, delivering a comparable level of quality and longevity.

Perfect for those seeking a timeless and elegant fragrance, Bella offers a radiant and unforgettable scent experience. Consult the PDF for a comprehensive comparison of scent profiles and notes.

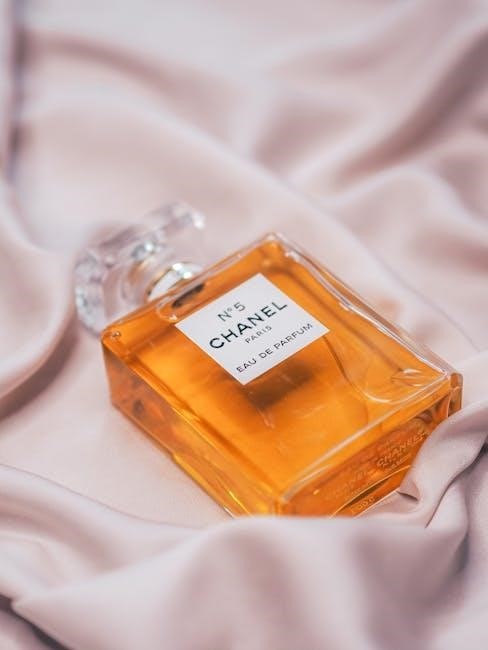
Yodeyma Classy ⏤ A Take on Chanel No. 5

Yodeyma Classy presents a compelling alternative to the iconic Chanel No. 5, aiming to capture its timeless elegance and sophisticated allure; The detailed PDF resource breaks down how Classy mirrors the complex floral aldehyde composition of No. 5, featuring notes of jasmine, rose, sandalwood, and vanilla. This Eau de Parfum strives to deliver a similar luxurious and refined experience, but at a more budget-friendly price.

Fragrance comparisons within the PDF highlight Classy’s successful emulation of No. 5’s powdery and floral heart, alongside its warm and sensual base. Online communities frequently discuss Classy as a remarkably close dupe, praising its longevity and projection. It’s often recommended for individuals who appreciate the classic No. 5 scent profile but seek a more affordable option.

Ideal for those desiring a sophisticated and enduring fragrance, Classy offers a captivating and memorable scent journey. The PDF provides a comprehensive breakdown of the notes and their interplay.

Yodeyma Desire ⏤ Equivalent to Lancôme La Vie Est Belle

Yodeyma Desire is meticulously crafted as an equivalent to the globally beloved Lancôme La Vie Est Belle. The comprehensive PDF details how Desire replicates the original’s sweet gourmand fragrance, featuring prominent notes of iris, patchouli, jasmine, and vanilla. This Eau de Parfum aims to deliver a similar joyful and optimistic experience, offering a luxurious scent without the designer price tag.

Fragrance enthusiasts, as detailed in the PDF, often commend Desire for its accurate portrayal of La Vie Est Belle’s signature sweetness and floral depth. Online discussions frequently highlight its impressive longevity and sillage, making it a long-lasting and noticeable scent. It’s a popular choice for those who adore the original but seek a cost-effective alternative.

Perfect for individuals who enjoy sweet and captivating fragrances, Desire provides a delightful and memorable olfactory experience. The PDF offers a detailed analysis of the notes and their harmonious blend.

Yodeyma Eternal ⏤ Inspired by Chanel Chance

Yodeyma Eternal draws inspiration from the iconic Chanel Chance, aiming to capture its sparkling and energetic essence. The detailed PDF showcases how Eternal mirrors Chance’s blend of pink pepper, jasmine, patchouli, and vanilla, creating a vibrant and optimistic fragrance profile. This Eau de Parfum offers a similar feeling of spontaneity and modern femininity, but at a more accessible price point.

The PDF highlights that fragrance aficionados often note Eternal’s successful replication of Chance’s unique and uplifting character. Reviews frequently mention its bright, floral, and slightly spicy aroma, making it suitable for everyday wear. It’s a favored option for those seeking a fresh and invigorating scent reminiscent of the Chanel classic.

Ideal for individuals who appreciate a lively and sophisticated fragrance, Eternal delivers a captivating and memorable experience. The PDF provides a thorough breakdown of the notes and their interplay.

Yodeyma Glamour ⏤ Similar to Yves Saint Laurent Black Opium

Yodeyma Glamour is skillfully crafted to resemble the alluring and captivating Yves Saint Laurent Black Opium. The comprehensive PDF details how Glamour replicates Black Opium’s signature blend of coffee, vanilla, orange blossom, and patchouli, resulting in a warm, sweet, and intensely feminine fragrance; This Eau de Parfum provides a similar bold and seductive experience, but at a considerably more affordable price.

The PDF emphasizes that many fragrance enthusiasts recognize Glamour’s successful imitation of Black Opium’s distinctive and addictive aroma. User feedback consistently points to its rich, gourmand notes and long-lasting projection, making it perfect for evening wear or special occasions. It’s a popular choice for those desiring a luxurious and captivating scent.

Glamour offers a compelling alternative for those who adore the Black Opium profile, delivering a confident and unforgettable impression. The PDF offers a detailed analysis of the notes and their harmonious blend.

Yodeyma Lovely ― Equivalent to Dior Miss Dior

Yodeyma Lovely presents a beautiful and accessible alternative to the iconic Dior Miss Dior fragrance. The detailed PDF highlights how Lovely captures the essence of Miss Dior’s floral-fruity composition, featuring notes of rose, jasmine, blood orange, and patchouli. This Eau de Parfum aims to deliver a similar sophisticated and romantic experience, offering a delightful blend of freshness and elegance.

The PDF emphasizes that Lovely successfully mimics Miss Dior’s signature scent profile, providing a comparable olfactory journey at a fraction of the cost. Fragrance enthusiasts often note the similar rosy and citrusy opening, followed by a warm and sensual base. It’s a popular choice for everyday wear, adding a touch of classic femininity.

Lovely is a compelling option for those who appreciate the Miss Dior aesthetic, offering a radiant and captivating scent. The PDF provides a comprehensive breakdown of the notes and their interplay.

Yodeyma Men’s Perfume Equivalents

Explore Yodeyma’s range for men, offering affordable alternatives to premium fragrances. Find detailed “smells like” comparisons in the PDF, covering popular scents like Creed Aventus and Dior Sauvage.

Yodeyma Power ⏤ Inspired by Aventus Creed

Yodeyma Power is presented as a compelling and cost-effective alternative to the highly sought-after Creed Aventus. This Eau de Parfum aims to capture the essence of Aventus’s complex and sophisticated profile, offering a similar olfactory experience at a significantly lower price point. The detailed PDF guide highlights the key fragrance notes that Yodeyma Power utilizes to emulate Aventus, including the prominent blend of fruity notes – pineapple, blackcurrant, and apple – alongside smoky birch, patchouli, and oakmoss.

Comparisons within the PDF showcase how Yodeyma Power replicates the initial burst of freshness and the subsequent woody, musky dry-down characteristic of Creed Aventus. While not a direct clone, Yodeyma Power successfully delivers a similar vibe and overall impression. Users often report impressive longevity and projection, making it a popular choice for those seeking an Aventus-inspired fragrance without the luxury price tag. The PDF also includes user reviews and feedback, providing valuable insights into the performance and scent profile of Yodeyma Power.

Ultimately, Yodeyma Power serves as an accessible entry point into the world of luxury-inspired fragrances, allowing enthusiasts to enjoy a comparable scent experience without compromising their budget.

Yodeyma Royal ― Similar to Dior Sauvage

Yodeyma Royal positions itself as a remarkably similar fragrance to the globally popular Dior Sauvage. The comprehensive PDF guide details how Yodeyma expertly replicates Sauvage’s signature blend of fresh, spicy, and amber notes. Key components highlighted include the invigorating top notes of bergamot and pepper, transitioning into a heart of lavender and geranium, and settling into a warm, amberwood base.

The PDF provides a detailed breakdown of the fragrance pyramid, illustrating the parallels between Yodeyma Royal and Dior Sauvage. It emphasizes the successful imitation of Sauvage’s clean, masculine appeal, making it a favored choice for everyday wear; User testimonials within the guide frequently commend Yodeyma Royal’s impressive longevity and projection, often rivaling that of the original Dior fragrance.

For fragrance enthusiasts seeking a budget-friendly alternative to Dior Sauvage, Yodeyma Royal emerges as a strong contender, offering a comparable scent profile and performance at a fraction of the cost. The PDF serves as a valuable resource for informed purchasing decisions.

Yodeyma Legend ⏤ Equivalent to Paco Rabanne 1 Million

Yodeyma Legend is presented within the PDF as a compelling equivalent to the iconic Paco Rabanne 1 Million. The guide meticulously outlines how Yodeyma captures the essence of 1 Million’s opulent and sweet fragrance profile. It details the prominent notes of grapefruit, mint, and blood orange in the opening, leading to a heart of rose, cinnamon, and spice, and finally resting on a base of leather, amber, and patchouli.

The PDF emphasizes Yodeyma’s success in replicating 1 Million’s bold and luxurious character, making it a popular choice for evening wear and special occasions. Comparative scent analyses within the document highlight the similarities in projection and longevity, often exceeding expectations for a fragrance in its price range.

For those seeking the allure of Paco Rabanne 1 Million without the hefty price tag, Yodeyma Legend offers a remarkably close alternative. The PDF provides a detailed resource for understanding the fragrance composition and making an informed purchase.

Yodeyma Black ⏤ Inspired by Jean Paul Gaultier Le Male

The Yodeyma Black fragrance, as detailed in the PDF, is skillfully crafted as an inspired dupe of the renowned Jean Paul Gaultier Le Male. The guide breaks down how Yodeyma successfully mimics Le Male’s signature blend of mint, lavender, vanilla, and spice. It highlights the initial burst of fresh mint, transitioning into a floral heart of lavender and cinnamon, ultimately settling into a warm, sweet base of vanilla, tonka bean, and sandalwood.

The PDF showcases Yodeyma’s ability to capture the distinctive and masculine character of Le Male, making it a favored option for those desiring a similar scent experience at a more accessible price point. Scent comparisons within the document emphasize the comparable strength and lasting power.

For fragrance enthusiasts seeking the iconic aroma of Le Male, Yodeyma Black presents a compelling and cost-effective alternative, thoroughly explained within the PDF resource.

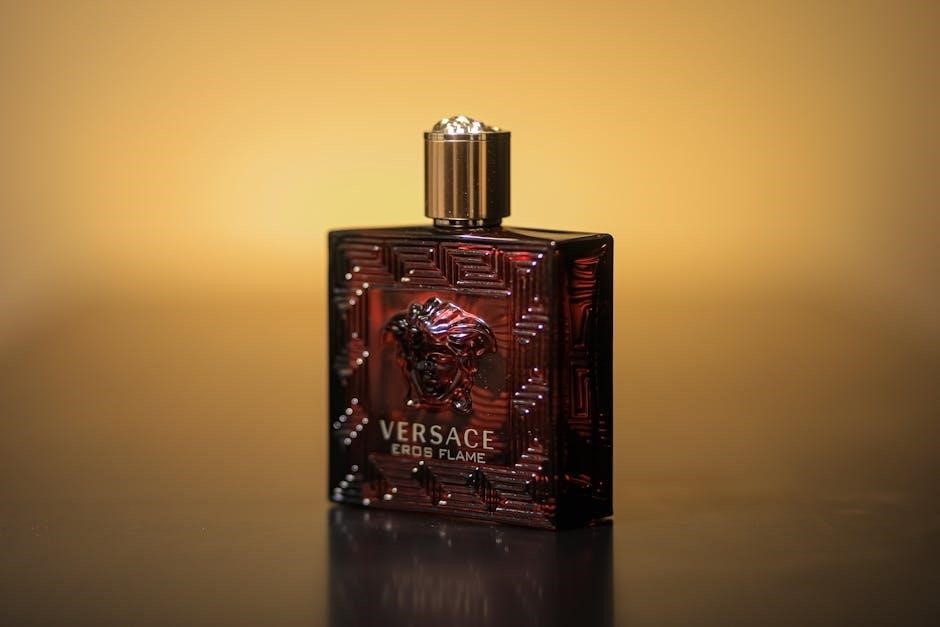
Yodeyma Energy ― Similar to Versace Eros

The Yodeyma Energy fragrance, as outlined in the comprehensive PDF guide, is presented as a compelling alternative to the popular Versace Eros. The document details how Yodeyma replicates Eros’s invigorating blend of mint, green apple, lemon, tonka bean, ambroxan, and geranium. It emphasizes the initial freshness from the mint and apple, leading to a floral heart, and a warm, sensual base.

The PDF meticulously compares the scent profiles, noting Yodeyma’s success in capturing the energetic and seductive essence of Versace Eros. It highlights the comparable projection and longevity, offering a cost-effective option without sacrificing the overall fragrance experience. Detailed notes within the PDF explain the similarities in aromatic composition.

For those seeking the vibrant and alluring scent of Versace Eros, Yodeyma Energy, as described in the PDF, provides a noteworthy and budget-friendly substitute.

Yodeyma Intense ⏤ Equivalent to Giorgio Armani Acqua di Gio

The Yodeyma Intense fragrance, as detailed within the Yodeyma perfumes equivalent list PDF, aims to replicate the iconic freshness of Giorgio Armani Acqua di Gio. The PDF highlights the shared aquatic, citrus, and woody notes, crucial to both scents’ appeal. It notes Yodeyma’s interpretation captures the original’s marine accord, bergamot, neroli, rosemary, and patchouli base.

The PDF provides a comparative analysis, emphasizing Yodeyma’s ability to deliver a similar invigorating and clean scent profile at a more accessible price point. It details how the fragrance opens with bright citrus notes, transitions to a floral heart, and settles into a woody, musky base, mirroring Acqua di Gio’s structure.

For fragrance enthusiasts seeking the classic, refreshing aroma of Giorgio Armani Acqua di Gio, the PDF positions Yodeyma Intense as a viable and economical alternative, offering a comparable olfactory experience.

Understanding “Smells Like” Lists & Equivalents

Explore the concept of perfume equivalents within the Yodeyma PDF. Discover how “smells like” lists detail perfumery notes, comparing Yodeyma to top UK brands.

The Concept of Perfume Equivalents

Perfume equivalents, as detailed in the Yodeyma perfume list PDF, represent fragrances designed to closely replicate the scent profile of established, often high-end, designer perfumes. These aren’t necessarily intended as exact copies, but rather interpretations aiming to capture the essence and overall olfactory experience of the original. Yodeyma, and other brands offering equivalents, achieve this by meticulously analyzing the fragrance pyramids – the top, middle (heart), and base notes – of popular scents.

The goal is to recreate a similar aroma using different, and often more cost-effective, ingredients. This allows consumers to enjoy a comparable fragrance experience without the premium price tag associated with luxury brands. The Yodeyma PDF serves as a valuable resource, clearly indicating which of their fragrances are inspired by, or equivalent to, well-known perfumes. It’s important to understand that these are “inspired by” scents, and the trademarks belong to the original brands.

Essentially, perfume equivalents offer an accessible entry point into the world of fine fragrances, providing a way to explore different scent families and find appealing alternatives.

Accuracy of “Smells Like” Comparisons

The accuracy of “smells like” comparisons, as presented in the Yodeyma perfumes equivalent list PDF, is subjective and varies. While Yodeyma meticulously aims to replicate the core scent profiles, achieving an identical match is incredibly challenging. Perfume formulation is a complex art, influenced by ingredient quality, concentration, and the skill of the perfumer.

The PDF provides a guide based on perceived similarities, noting key fragrance notes. However, individual perception of scent is highly personal. Factors like skin chemistry, environmental conditions, and even personal memories can alter how a fragrance is experienced. Therefore, a “smells like” description shouldn’t be taken as a definitive statement of duplication.

It’s crucial to remember that the listed trademarks belong to their respective owners. The Yodeyma list offers an informed approximation, allowing consumers to explore potential alternatives, but personal testing is always recommended to determine individual preference and perceived similarity.

Factors Affecting Perfume Perception

Several factors significantly influence how individuals perceive fragrances, impacting the accuracy of “smells like” comparisons detailed in the Yodeyma perfumes equivalent list PDF. Skin chemistry plays a crucial role; pH levels and natural oils interact with perfume molecules, altering the scent’s expression. Environmental conditions, such as temperature and humidity, also affect volatility and projection.

Personal experiences and memories are powerfully linked to scent. A fragrance evoking a positive memory may be perceived more favorably. Anosmia, the temporary or permanent loss of smell, can also impact perception, with individuals potentially unable to detect certain notes. Furthermore, olfactory fatigue occurs when the nose becomes desensitized to a scent after prolonged exposure.

The PDF acknowledges these variables, offering a guide based on general consensus. However, individual results will vary. Considering these factors is vital when evaluating Yodeyma’s offerings and comparing them to their designer counterparts.

Where to Buy Yodeyma Perfumes

Find Yodeyma perfumes directly on their UK official website or through retailers like My Beauty Basics. Explore EU availability and download the equivalent list PDF!

Yodeyma UK Official Website

Access the most comprehensive and up-to-date information regarding Yodeyma perfumes directly through their official UK website. This platform serves as the primary source for exploring their extensive catalog of Eau de Parfums, meticulously crafted as affordable alternatives to high-end designer fragrances.

Here, you can conveniently browse the complete “smells like” list, detailing the perfumery notes and equivalencies to top UK and international brands. The website frequently features the downloadable Yodeyma perfumes equivalent list in PDF format, offering a handy reference guide for fragrance enthusiasts.

Beyond product listings, the official site provides detailed descriptions, customer reviews, and often, exclusive promotions and discounts. It’s the ideal destination to understand the brand’s commitment to quality and affordability, and to directly purchase your desired Yodeyma scents. Ensure you check for the latest updates to the equivalent list PDF for the most accurate comparisons.

Retailers Stocking Yodeyma (e.g., My Beauty Basics)

Beyond the official Yodeyma UK website, several retailers throughout the UK and EU offer their range of perfumes. My Beauty Basics is a prominent example, frequently stocking a wide selection of Yodeyma’s best-selling Eau de Parfums and providing access to the valuable “smells like” lists.

These retailers often feature the Yodeyma perfumes equivalent list in PDF format on their websites, allowing customers to easily compare scents and find their perfect match. Exploring these platforms provides convenient shopping options and potential access to exclusive deals or bundled offers.

Checking retailer websites is a great way to discover which fragrances are currently in stock and to read customer reviews. Remember to verify the authenticity of the product and ensure the retailer provides a clear and accessible version of the equivalent list PDF for informed purchasing decisions.

Availability in EU Markets

Yodeyma’s presence is steadily growing across EU markets, though distribution isn’t as widespread as in the UK. Several online retailers specialize in fragrance clones and affordable perfumes, frequently carrying the Yodeyma line and making it accessible to customers throughout Europe.

Accessing the Yodeyma perfumes equivalent list in PDF format is crucial for EU shoppers, as it helps navigate the brand’s offerings and understand scent profiles. Many of these online stores will host the PDF directly on their product pages or in a dedicated resources section.

However, availability can vary by country, so checking specific retailer websites is recommended. EU consumers should also be mindful of import duties and shipping costs when ordering from UK-based retailers. Always confirm the retailer’s shipping policies and ensure the PDF list is current.

glow worm flexicom 30cx manual

The Glow Worm Flexicom 30CX is a high-efficiency condensing boiler designed for reliable performance and energy savings. Ideal for various heating systems, it offers advanced features and durability.

1.1 Overview of the Boiler and Its Features

The Glow Worm Flexicom 30CX is a condensing boiler designed for efficiency and reliability. It features advanced heat recovery technology, compact design, and user-friendly controls. With a G.C. No. of 47-047-34, it ensures high performance and energy savings. Suitable for various heating systems, it supports flexible installation options and is compatible with existing pipework, making it a versatile choice for modern homes.

1.2 Importance of the Manual for Users

The manual is essential for safe and efficient operation of the Glow Worm Flexicom 30CX boiler. It provides detailed instructions for installation, maintenance, and troubleshooting, ensuring optimal performance. Users can familiarize themselves with safety precautions, control panel functions, and energy-saving features. Regularly reviewing the manual helps prevent errors and extends the boiler’s lifespan. It is a vital resource for both new and experienced users to maximize efficiency and safety.

Safety Information and Precautions

Adhere to safety guidelines to avoid hazards. Warning signs and symbols in the manual highlight potential risks. Follow installation and operation instructions carefully to ensure safe usage.

2.1 General Safety Guidelines

Always read the manual carefully before operating the Glow Worm Flexicom 30CX boiler. Ensure proper ventilation in the room to avoid gas accumulation. Never use the boiler as a water heater. Keep flammable materials away. Only qualified technicians should perform installations or repairs. Regular maintenance is crucial for safe operation. Follow all safety instructions provided in the manual to ensure optimal performance and minimize risks.

2.2 Warning Signs and Symbols in the Manual

The manual includes essential warning signs and symbols to ensure safe installation and operation. These symbols, such as triangles with exclamation marks, indicate potential hazards like flammable materials or electrical risks. Understanding these symbols is crucial to prevent accidents and ensure compliance with safety guidelines. Always refer to the manual for detailed explanations of each symbol to maintain safety and proper usage of the Glow Worm Flexicom 30CX boiler.

Installation Requirements and Preparation

Ensure proper site preparation, including flue system installation and gas supply setup. Follow guidelines for condensing boiler requirements and necessary safety clearances for optimal performance.

3.1 Pre-Installation Checks

Before installing the Glow Worm Flexicom 30CX, ensure the site meets all requirements. Check compatibility with existing heating systems, flue installation, and gas supply. Verify electrical connections and ensure the boiler’s G.C. number matches specifications. Inspect for damage and ensure all safety guidelines are met. Consult the manual for detailed compatibility checks and site preparation steps to ensure a smooth installation process. Proper preparation is key to optimal performance and safety. Always follow manufacturer instructions.

3.2 Tools and Materials Needed

For installing the Glow Worm Flexicom 30CX, essential tools include a spirit level, spanners (8mm and 10mm), and a gas tightness tester. Materials required are copper pipes, flue components, and electrical connectors. Ensure all items meet UK safety standards and compatibility with the boiler. Refer to the manual for specific part numbers and guidelines to avoid installation errors. Always follow safety protocols during the process.

3.3 Site Preparation for the Boiler

Ensure the installation area is clean, dry, and level. A plinth may be required for uneven surfaces. Check flue and gas line placements, ensuring compliance with safety standards. Maintain clear access around the boiler for maintenance. Distance from windows and doors must meet regulatory requirements to avoid exhaust recirculation. Proper preparation ensures optimal performance and safety.

Operating Instructions

Ensure the boiler is turned on and set the desired temperature using the control panel. Monitor the display for status updates and adjust settings as needed for optimal performance.

4.1 Starting Up the Boiler

To start the Glow Worm Flexicom 30CX, ensure all pre-checks are completed. Turn on the power supply and navigate to the control panel. Select the desired mode and set the temperature. The boiler will initiate the ignition sequence. Once operational, monitor the display for status updates. Ensure all safety devices are functioning correctly. Refer to the manual for detailed startup procedures and troubleshooting tips to ensure smooth operation.

4.2 Understanding the Control Panel

The Glow Worm Flexicom 30CX control panel features an intuitive LCD display for easy navigation. It includes buttons for adjusting temperature, selecting modes, and accessing settings. The panel allows users to monitor system status, set timers, and control both heating and hot water functions. Clear symbols and indicators ensure straightforward operation, making it easy to optimize boiler performance and energy efficiency. Regular use of the control panel helps maintain optimal heating levels and system health.

4.3 Adjusting Temperature Settings

Adjusting temperature settings on the Glow Worm Flexicom 30CX is straightforward using the control panel. Users can modify central heating and hot water temperatures via the digital interface. The boiler allows precise adjustments to optimize comfort and energy efficiency. Refer to the manual for step-by-step guidance on accessing and changing these settings. Ensure adjustments align with your heating needs to maintain performance and efficiency.

Maintenance and Servicing

Regular servicing ensures optimal performance and longevity of the Glow Worm Flexicom 30CX. Schedule annual checks by a Gas Safe installer and follow maintenance guidelines for efficiency and safety.

5.1 Regular Maintenance Tasks

Regular maintenance ensures optimal performance and longevity of the Glow Worm Flexicom 30CX. Users should check the flue for obstructions, clean the heat exchanger annually, and inspect gas pipes for leaks. Additionally, ensuring proper ventilation and checking system pressure regularly is essential. Annual servicing by a Gas Safe engineer is recommended to maintain warranty validity and efficiency. Always refer to the manual for detailed maintenance procedures.

5.2 Servicing Schedule Recommendations

Regular servicing is essential to maintain the Glow Worm Flexicom 30CX boiler’s efficiency and safety. It is recommended to have the boiler serviced annually by a Gas Safe registered engineer. During servicing, components like the heat exchanger, combustion chamber, and gas valves should be inspected and cleaned. Additionally, the flue system should be checked for any blockages or damage. Failure to service the boiler regularly may lead to reduced performance, increased energy bills, or potential safety hazards. Always refer to the manual for specific guidance on servicing intervals and procedures.

5.3 Troubleshooting Common Issues

Common issues with the Glow Worm Flexicom 30CX include error codes, ignition failure, and flue blockages. Users can resolve many problems by checking gas supply, ensuring proper ventilation, and cleaning the flue. Refer to the manual for specific error code meanings and step-by-step solutions. Regular maintenance, such as checking for blockages and ensuring proper installation, can prevent most issues. Always contact a Gas Safe engineer if problems persist.

Technical Specifications

The Glow Worm Flexicom 30CX boiler features a GC number of 47-047-34, operating as a condensing boiler with a flow temperature range of 30-80°C, ensuring high efficiency and gas consumption optimization.

6.1 Key Technical Details of the Flexicom 30CX

The Glow Worm Flexicom 30CX is a condensing boiler with a Gas Council Number of 47-047-34. It operates on natural gas and features a high-efficiency design, achieving energy savings through advanced heat recovery. The boiler is compact, making it suitable for various installation scenarios. It offers a reliable heating performance with a maximum flow rate and heat output tailored for modern homes, ensuring optimal energy efficiency and reduced emissions.

6.2 Gas Consumption and Efficiency Ratings

The Glow Worm Flexicom 30CX boiler is designed to optimize gas consumption while maintaining high efficiency. With a condensing technology, it achieves impressive energy ratings, reducing fuel usage and lowering emissions. Its efficient design ensures minimal gas waste, making it an eco-friendly choice. The boiler’s performance meets Gas Safe standards and UK building regulations, ensuring reliable and safe operation while minimizing environmental impact through reduced carbon emissions.

Compliance and Certifications

The Glow Worm Flexicom 30CX holds Gas Safe Certification and complies with UK Building Regulations, ensuring safety, efficiency, and environmental standards are met effectively.

7.1 Gas Safe Certification

The Glow Worm Flexicom 30CX boiler is fully Gas Safe certified, ensuring compliance with UK safety standards for gas appliances. This certification guarantees that the boiler meets rigorous safety and performance requirements, providing users with peace of mind. To maintain certification, installation and servicing must be performed by a Gas Safe registered engineer. Proper compliance ensures optimal efficiency, safety, and reliability of the boiler. Always verify the installer’s Gas Safe registration to avoid potential risks and warranty issues.

7.2 Compliance with UK Building Regulations

The Glow Worm Flexicom 30CX boiler is fully compliant with UK Building Regulations, ensuring it meets strict standards for safety, efficiency, and environmental performance. Designed to adhere to Part L of the Building Regulations, it contributes to energy conservation and reduced carbon emissions; Its Gas Safe certification further validates its compliance with UK legal requirements, making it a reliable choice for homeowners seeking to meet regulatory standards while optimizing heating performance.

Environmental Benefits

The Glow Worm Flexicom 30CX boiler features condensing technology, enhancing energy efficiency and reducing carbon emissions, making it an eco-friendly choice for heating systems.

8.1 Energy Efficiency and Savings

The Glow Worm Flexicom 30CX boiler is renowned for its high energy efficiency, utilizing condensing technology to maximize heat recovery. This design significantly reduces energy losses, ensuring lower fuel consumption and operational costs. With an ErP A-rating for efficiency, it helps users save on energy bills while maintaining consistent heating performance. The boiler’s advanced engineering minimizes waste and optimizes energy use, making it an eco-friendly and cost-effective choice for home heating needs.

8.2 Reduced Carbon Emissions

The Glow Worm Flexicom 30CX boiler significantly reduces carbon emissions through its high-efficiency condensing technology. By reusing heat that would otherwise be lost, it minimizes energy waste and lowers environmental impact. With an ErP A-rating, this boiler contributes to greener heating solutions, helping users reduce their carbon footprint while enjoying lower energy bills and a more sustainable heating system.

User Reviews and Feedback

Users praise the Glow Worm Flexicom 30CX for its efficiency and reliability, though some find the control panel complex. Overall feedback is generally positive, highlighting its performance and energy-saving capabilities.

9.1 Common Praise for the Flexicom 30CX

Users frequently commend the Flexicom 30CX for its high efficiency, quiet operation, and ease of installation. Its compact design and reliable performance make it a popular choice for modern heating systems. Many highlight its user-friendly control panel and consistent heat delivery. Additionally, the boiler’s cost-effectiveness and environmental benefits, such as reduced carbon emissions, are often praised by homeowners and installers alike.

9.2 Areas for Improvement Reported by Users

Users have reported some areas for improvement with the Glow Worm Flexicom 30CX. The control panel can be complex for novices, and the boiler may operate noisily at times. Some users find the cost of replacement parts high and wish for clearer troubleshooting guides in the manual. Additionally, the customer support response time could be faster. Addressing these issues would enhance user satisfaction.

Warranty and Support Information

The Glow Worm Flexicom 30CX boiler comes with a comprehensive warranty. For inquiries or assistance, contact Glow Worm customer support through their official channels.

10.1 Warranty Coverage Details

The Glow Worm Flexicom 30CX boiler typically comes with a standard warranty covering parts and labor for a specified period, often up to 2-5 years, depending on installation and registration. Extended warranties may be available through authorized installers or by registering the product online. Terms and conditions vary, but proper installation and annual servicing are usually required to maintain warranty validity. Always refer to the manual or contact Glow Worm support for precise details.

10.2 Contacting Glow Worm Customer Support

For assistance with the Glow Worm Flexicom 30CX, contact their customer support team via phone or email through their official website. Visit www.glow-worm.co.uk for detailed contact information. Ensure to reach out during business hours for prompt service. Glow Worm’s support team is available to address queries, provide troubleshooting guidance, and offer technical advice, ensuring optimal performance of your boiler.

Comparison with Other Glow Worm Models

The Flexicom 30CX stands out for its balanced efficiency and power, making it suitable for medium-sized homes, while other models like the 24CX and 35CX cater to smaller or larger spaces respectively.

11.1 Flexicom 24CX vs. 30CX

The Flexicom 24CX and 30CX boilers differ primarily in output capacity, with the 30CX offering higher performance for larger heating demands. Both models share similar energy-efficient condensing technology and compact designs. The 24CX is ideal for smaller homes, while the 30CX suits medium to large properties. Both boilers are Gas Safe certified and comply with UK building regulations, ensuring reliability and safety. The choice depends on heating requirements and available installation space.

11.2 Flexicom 35CX vs. 30CX

The Flexicom 35CX and 30CX are both high-efficiency condensing boilers, but they differ in output and suitability. The 35CX offers higher heat output, making it ideal for larger homes, while the 30CX is better suited for smaller to medium-sized properties. Both models share similar energy-saving features and compact designs, ensuring reliability and performance. The choice between them depends on specific heating needs and property size requirements.

Frequently Asked Questions

12.1 Common Queries About Installation

Where can I download the Glow Worm Flexicom 30CX manual? The manual is available for free on official sources like glow-worm.co.uk or authorized dealer websites.

12.2 Frequently Asked Maintenance Questions

What if my boiler shows an error code? Refer to the manual for troubleshooting or contact Glow Worm customer support at 2000225263-02 for assistance.

Users often inquire about flue requirements, electrical connections, and venting options. Questions also arise regarding boiler placement, pipe sizing, and system compatibility. Many ask about reducing pipe lengths for bends, as each 90-degree bend reduces length by 1 meter. Additionally, queries about resetting the boiler after installation or checking for gas leaks are common. Proper installation steps and adherence to manual guidelines are frequently emphasized.

Common maintenance queries include how often to service the boiler and how to check for leaks. Users also ask about cleaning the condensate trap and ensuring proper ventilation. Annual servicing by a Gas Safe engineer is recommended to maintain efficiency and safety. Additionally, checking system pressure and bleeding radiators are frequent topics to ensure optimal performance and avoid issues.

Accessing the Manual Online

The Glow Worm Flexicom 30CX manual is available online for free, accessible via official sources like Plumbase or the manufacturer’s website for easy viewing and download.

13.1 Official Sources for the Manual

The official Glow Worm Flexicom 30CX manual is available on the manufacturer’s website at www.glow-worm.co.uk. Additionally, authorized dealers and installers provide access to the manual. Platforms like Plumbase also host the manual for easy download. Ensure you only use verified sources to avoid unauthorized versions. For further assistance, contact Glow Worm’s customer service or visit their official support page.

13.2 How to Download the Manual

To download the Glow Worm Flexicom 30CX manual, visit the official Glow Worm website. Navigate to the “Manuals” section, select your boiler model, and click “Download.” Ensure compatibility with your device. For convenience, save the manual for future reference. If unavailable, check authorized dealers like Plumbase or contact Glow Worm support for assistance. Always verify the source for authenticity.

Contact Information for Further Assistance

Glow Worm, Nottingham Road, Belper, Derbyshire. DE56 1JT. Visit www.glow-worm.co.uk or call 2000225263 for support and inquiries about the Flexicom 30CX boiler.

14.1 Glow Worm Customer Service Details

For inquiries or assistance, contact Glow Worm’s customer service at their headquarters on Nottingham Road, Belper, Derbyshire (DE56 1JT). Visit their official website at www.glow-worm.co.uk or refer to the manual (Doc. No. 2000225263-02) for contact details. Their team is available to address questions, repairs, and technical support, ensuring prompt resolution for Flexicom 30CX users. Phone, email, and website options are provided for convenience.

14.2 Authorized Dealers and Installers

For genuine Glow Worm products and expert installation, contact authorized dealers listed on the official Glow Worm website. These certified professionals ensure compliance with safety standards and warranty terms. Using unauthorized installers may void your warranty and compromise boiler performance. Always verify installer credentials to guarantee quality service and adherence to manufacturer guidelines. Visit www;glow-worm.co.uk for a list of approved dealers and installers near you.

The Glow Worm Flexicom 30CX offers reliable performance, energy efficiency, and durability, making it a practical choice for home heating needs while ensuring optimal energy savings.

15.1 Summary of Key Points

The Glow Worm Flexicom 30CX boiler is a highly efficient, condensing appliance designed for reliability and energy savings. It offers advanced features, durability, and compatibility with various heating systems. Key benefits include reduced carbon emissions, lower energy bills, and user-friendly controls. Regular maintenance and adherence to the manual ensure optimal performance. Its compact design and high-efficiency ratings make it a popular choice for modern homes, aligning with environmental and economic goals.

15.2 Final Tips for Optimal Boiler Performance

Regular servicing ensures efficiency and longevity of your Glow Worm Flexicom 30CX. Always follow the manual’s guidelines for maintenance and adjustments. Keep the area around the boiler clear to improve airflow. Monitor temperature settings to avoid unnecessary energy use. Address any issues promptly to prevent larger problems. Ensure all installations and repairs are done by certified professionals for safety and performance.

The information provided is for general guidance only. Glow Worm or its affiliates disclaim liability for any misuse or misinterpretation of the manual’s content. Users should consult professionals for precise installations or repairs to avoid any legal or safety issues.

16.1 Liability and Responsibility

Glow Worm is not liable for damages arising from misuse or improper installation of the Flexicom 30CX boiler. Users must adhere to the manual’s guidelines. The company disclaims responsibility for third-party modifications or negligence. Proper installation by a qualified technician is essential. Users are responsible for ensuring compliance with safety standards and regulations. Any deviations from the manual may void the warranty or cause operational issues.

gcse chemistry moles questions and answers pdf

GCSE Chemistry Moles Questions and Answers⁚ A Comprehensive Guide

This comprehensive guide provides a detailed explanation of moles and their importance in GCSE Chemistry․ It covers key concepts, types of mole calculations, practice questions and answers, tips for solving problems, and resources for further learning․ This guide will help students understand and master mole calculations, which are essential for success in GCSE Chemistry․

Introduction

Welcome to the world of moles! In GCSE Chemistry, understanding moles is crucial for tackling a wide range of calculations․ This guide is your ultimate companion to mastering mole calculations․ We’ll delve into the fundamental concept of the mole, explore its significance in chemistry, and equip you with the necessary tools to confidently tackle mole-related problems․ Whether you’re preparing for exams or simply looking to deepen your understanding of this essential concept, this guide will provide you with a solid foundation in mole calculations․

This guide is designed to be user-friendly and comprehensive․ It covers everything from basic concepts to advanced calculations, providing clear explanations, worked examples, and practice questions․ We’ll also highlight common pitfalls and offer tips for solving mole problems effectively․ By the end of this guide, you’ll be able to confidently calculate moles, convert between mass, volume, and moles, and apply your knowledge to real-world chemical scenarios․

What is a Mole?

In the realm of chemistry, a mole is a fundamental unit of measurement, much like a dozen is for eggs․ It represents a specific quantity of a substance, but instead of referring to a group of items, a mole refers to a fixed number of particles․ This number is known as Avogadro’s constant, which is approximately 6․022 x 1023․ So, one mole of any substance contains 6․022 x 1023 particles, be it atoms, molecules, ions, or even electrons․

The mole concept provides a convenient way to express the amount of a substance, particularly in chemical reactions․ It allows us to relate the mass of a substance to the number of particles it contains․ For instance, one mole of carbon atoms has a mass of 12 grams, while one mole of water molecules has a mass of 18 grams․ Understanding the mole concept is essential for performing accurate chemical calculations and interpreting experimental results․

The Importance of Moles in Chemistry

The mole concept serves as a cornerstone in chemistry, providing a crucial link between the microscopic world of atoms and molecules and the macroscopic world of substances we encounter in our everyday lives․ It enables us to quantify the amount of a substance in a meaningful way, making it possible to perform accurate chemical calculations and predict the outcomes of chemical reactions․

Moles play a pivotal role in stoichiometry, the branch of chemistry dealing with the quantitative relationships between reactants and products in chemical reactions․ By using the mole concept, we can determine the exact amounts of reactants needed to produce a desired amount of product, or conversely, calculate the amount of product that can be formed from a given amount of reactant․ This ability to predict and control chemical reactions is essential for various applications, including industrial processes, pharmaceutical development, and environmental monitoring․

Moreover, the mole concept is fundamental to understanding the behavior of solutions and gases․ It allows us to calculate the concentration of solutions, the volume of gases at specific conditions, and the number of particles in a given volume․ This knowledge is crucial for fields like analytical chemistry, where precise measurements are essential for identifying and quantifying substances․

Key Concepts in Mole Calculations

Mastering mole calculations hinges on understanding several key concepts that underpin the entire system․ One crucial concept is the Avogadro constant, which represents the number of particles (atoms, molecules, or ions) in one mole of a substance․ This constant, approximately 6․022 x 1023, serves as a bridge between the microscopic world of atoms and the macroscopic world of grams and liters․

Another essential concept is the molar mass, which represents the mass of one mole of a substance․ It is expressed in grams per mole (g/mol) and can be calculated by adding the atomic masses of all the atoms in the molecule․ For example, the molar mass of water (H2O) is 18․015 g/mol, calculated by adding the atomic masses of two hydrogen atoms (1․008 g/mol each) and one oxygen atom (15․999 g/mol)․ Understanding molar mass is key to converting between mass and moles․

The mole concept also allows us to relate the volume of a gas to the number of moles present․ The ideal gas law, PV = nRT, connects pressure (P), volume (V), number of moles (n), gas constant (R), and temperature (T)․ This equation enables us to calculate the volume of a gas at a given temperature and pressure, or conversely, determine the number of moles present in a specific volume of gas․

Types of Mole Calculations

Mole calculations come in various forms, each requiring a specific approach to solve them․ These different types are essential to understand as they allow you to navigate various chemical scenarios and problems․ Here are some common types of mole calculations you’ll encounter in GCSE Chemistry․

One common type involves converting between mass and moles․ This is often done using the molar mass of the substance, which is the mass of one mole of that substance․ For example, if you know the mass of a sample of sodium chloride (NaCl), you can use the molar mass of NaCl (58․44 g/mol) to calculate the number of moles present․ Conversely, if you know the number of moles of a substance, you can calculate its mass by multiplying the number of moles by the molar mass․

Another type of mole calculation involves converting between volume and moles․ This is often done using the ideal gas law, which relates the volume, pressure, temperature, and number of moles of a gas․ For example, if you know the volume of a sample of nitrogen gas (N2) at a given temperature and pressure, you can use the ideal gas law to calculate the number of moles of N2 present․

Mass to Moles

Converting mass to moles is a fundamental concept in chemistry․ It allows you to determine the amount of substance present based on its weight․ This conversion is essential for various calculations, including determining the number of molecules or atoms in a sample and calculating the yield of a chemical reaction․

To convert mass to moles, you use the following formula⁚

Number of moles = Mass / Molar mass

Where⁚

  • Number of moles is the quantity you want to find․
  • Mass is the given weight of the substance․
  • Molar mass is the mass of one mole of the substance, which can be found on the periodic table․

For example, if you have 10 grams of sodium chloride (NaCl), and the molar mass of NaCl is 58․44 g/mol, the number of moles of NaCl present would be⁚

Number of moles = 10 g / 58․44 g/mol = 0․171 moles

Therefore, 10 grams of NaCl contains 0․171 moles of NaCl․

Moles to Mass

Converting moles to mass is the reverse process of converting mass to moles․ It involves calculating the mass of a substance given its number of moles․ This conversion is crucial for various calculations, including determining the mass of reactants or products in a chemical reaction, and for preparing solutions with specific concentrations․

To convert moles to mass, you use the following formula⁚

Mass = Number of moles x Molar mass

Where⁚

  • Mass is the quantity you want to find․
  • Number of moles is the given number of moles of the substance․
  • Molar mass is the mass of one mole of the substance, which can be found on the periodic table․

For example, if you have 0․5 moles of sodium hydroxide (NaOH), and the molar mass of NaOH is 40․00 g/mol, the mass of NaOH present would be⁚

Mass = 0․5 moles x 40․00 g/mol = 20․00 grams

Therefore, 0․5 moles of NaOH has a mass of 20․00 grams․

Volume to Moles

Converting volume to moles is a crucial skill in chemistry, particularly when dealing with gases․ It allows you to determine the amount of substance present in a given volume, which is vital for stoichiometric calculations and understanding gas behavior․

The conversion between volume and moles is achieved using the ideal gas law equation⁚

PV = nRT

Where⁚

  • P is the pressure of the gas (in atmospheres, atm)
  • V is the volume of the gas (in liters, L)
  • n is the number of moles of the gas
  • R is the ideal gas constant (0․0821 atm L/mol K)
  • T is the temperature of the gas (in Kelvin, K)

To find the number of moles (n), you can rearrange the equation as follows⁚

n = PV/RT

For example, if you have a gas at a pressure of 1 atm, a volume of 2․5 L, and a temperature of 298 K, the number of moles can be calculated as follows⁚

n = (1 atm x 2․5 L)/(0․0821 atm L/mol K x 298 K) = 0․102 moles

This calculation shows that there are 0․102 moles of gas present in the given volume․

Moles to Volume

Converting moles to volume is an essential skill in chemistry, especially when working with gases․ It allows you to determine the volume occupied by a given amount of substance, which is crucial for understanding gas behavior and performing stoichiometric calculations․

The conversion between moles and volume is achieved using the ideal gas law equation⁚

PV = nRT

Where⁚

  • P is the pressure of the gas (in atmospheres, atm)
  • V is the volume of the gas (in liters, L)
  • n is the number of moles of the gas
  • R is the ideal gas constant (0․0821 atm L/mol K)
  • T is the temperature of the gas (in Kelvin, K)

To find the volume (V), you can rearrange the equation as follows⁚

V = nRT/P

For example, if you have 0․5 moles of a gas at a pressure of 1․5 atm and a temperature of 300 K, the volume can be calculated as follows⁚

V = (0․5 mol x 0․0821 atm L/mol K x 300 K)/1․5 atm = 8․21 L

This calculation shows that 0․5 moles of gas will occupy a volume of 8․21 L under the given conditions․

Practice Questions and Answers

To solidify your understanding of mole calculations, it’s essential to practice solving a variety of problems․ Here are some examples, categorized by difficulty level, to help you test your knowledge and build your confidence⁚

Basic Mole Calculations

Calculate the mass of 2․5 moles of sodium chloride (NaCl)․ (Molar mass of NaCl = 58․44 g/mol)

How many moles are present in 10 grams of calcium carbonate (CaCO3)? (Molar mass of CaCO3 = 100․09 g/mol)

Advanced Mole Calculations

A reaction between 5․0 grams of magnesium (Mg) and excess hydrochloric acid (HCl) produces magnesium chloride (MgCl2) and hydrogen gas (H2)․ Calculate the mass of magnesium chloride produced․

A solution of 250 mL of 0․1 M sodium hydroxide (NaOH) is reacted with excess hydrochloric acid (HCl)․ Calculate the volume of hydrogen gas produced at standard temperature and pressure (STP)․

By working through these practice questions, you’ll gain valuable experience in applying the mole concept to real-world scenarios․ Remember to use the periodic table to find the molar masses of elements and compounds, and make sure to show your working clearly to ensure accuracy․

Basic Mole Calculations

These questions focus on the fundamental relationship between moles, mass, and molar mass․ They are designed to introduce you to the basic concepts and calculations involved in mole calculations․

Calculate the mass of 2․5 moles of sodium chloride (NaCl)․ (Molar mass of NaCl = 58․44 g/mol)

To solve this problem, use the formula⁚ Mass = Moles x Molar Mass

Mass = 2․5 moles x 58․44 g/mol = 146․1 g

How many moles are present in 10 grams of calcium carbonate (CaCO3)? (Molar mass of CaCO3 = 100․09 g/mol)

Use the formula⁚ Moles = Mass / Molar Mass

Moles = 10 g / 100․09 g/mol = 0․1 moles

These calculations demonstrate the straightforward relationship between moles, mass, and molar mass․ As you progress to more complex problems, you will build upon these foundational concepts․

Advanced Mole Calculations

These questions involve more complex scenarios that require a deeper understanding of mole concepts and their application within chemical reactions․ They test your ability to apply stoichiometry, limiting reactants, and percentage yield calculations․

A reaction between 20 grams of magnesium (Mg) and excess hydrochloric acid (HCl) produces magnesium chloride (MgCl2) and hydrogen gas (H2)․ Calculate the mass of magnesium chloride produced․ (Molar mass of Mg = 24․31 g/mol, Molar mass of MgCl2 = 95․21 g/mol)

First, write the balanced chemical equation for the reaction⁚ Mg + 2HCl -> MgCl2 + H2

Then, calculate the moles of magnesium using the formula⁚ Moles = Mass / Molar Mass

Moles of Mg = 20 g / 24;31 g/mol = 0․822 moles

Using the mole ratio from the balanced equation, determine the moles of MgCl2 produced․ Finally, calculate the mass of MgCl2 using the formula⁚ Mass = Moles x Molar Mass․

A reaction between 50 grams of sodium (Na) and 30 grams of chlorine gas (Cl2) produces sodium chloride (NaCl)․ What is the limiting reactant, and what is the theoretical yield of NaCl? (Molar mass of Na = 22․99 g/mol, Molar mass of Cl2 = 70․90 g/mol, Molar mass of NaCl = 58․44 g/mol)

Start by determining the moles of each reactant․ Then, use the mole ratio from the balanced equation to identify the limiting reactant․ Calculate the theoretical yield of NaCl based on the limiting reactant․

These advanced calculations involve a deeper understanding of chemical reactions and stoichiometry․ By practicing these problems, you will develop a strong foundation in mole calculations, essential for tackling more complex chemistry problems․

Tips for Solving Mole Problems

Mastering mole calculations can be a challenge, but with the right approach, you can confidently tackle any problem․ Here are some crucial tips to keep in mind⁚

Understand the Basics⁚ Before tackling complex problems, ensure a solid understanding of fundamental mole concepts, such as Avogadro’s number, molar mass, and the relationship between moles, mass, and volume․ Review these concepts thoroughly and practice basic calculations before moving on to more challenging problems․

Write Balanced Chemical Equations⁚ Always begin by writing a balanced chemical equation for the reaction involved․ This will provide the correct mole ratios between reactants and products, essential for accurate calculations․

Identify the Limiting Reactant⁚ In reactions involving multiple reactants, determine the limiting reactant, which is the reactant that gets completely consumed first․ This reactant determines the maximum amount of product that can be formed․

Use the Mole Ratio⁚ The mole ratio from the balanced equation is crucial for converting between moles of reactants and products․ Use this ratio to determine the number of moles of a particular substance involved in the reaction․

Check Your Units⁚ Always pay attention to units throughout your calculations․ Ensure that you are using consistent units for mass, volume, and molar mass․ This will help prevent errors and ensure accurate answers․

By following these tips, you can develop a systematic approach to solving mole problems, which will increase your confidence and accuracy in GCSE Chemistry․

Resources for Further Learning

To deepen your understanding of moles and enhance your problem-solving skills, explore these valuable resources⁚

Online Resources⁚ Numerous websites offer comprehensive GCSE Chemistry resources, including tutorials, practice questions, and interactive simulations․ Websites like Save My Exams and PhysicsAndMathsTutor․com provide detailed revision notes and past paper questions, allowing you to test your knowledge and identify areas for improvement․

Textbooks⁚ Consult your GCSE Chemistry textbook for in-depth explanations of mole concepts, worked examples, and practice problems․ Many textbooks include online resources, such as interactive exercises and videos, further enhancing your learning experience․

YouTube Channels⁚ Several YouTube channels dedicated to GCSE Chemistry offer engaging video tutorials and explanations of mole concepts․ Channels like Hazel’s Chemistry and Footprints-Science provide clear and concise explanations, making complex topics easier to understand․

Study Groups⁚ Joining a study group allows you to collaborate with peers, discuss challenging concepts, and practice problem-solving together․ This collaborative learning environment can be highly beneficial for understanding complex topics and developing your problem-solving skills․

Tutoring⁚ If you require additional support or personalized guidance, consider seeking tutoring from a qualified Chemistry tutor․ A tutor can provide tailored explanations, address specific areas of difficulty, and offer valuable exam preparation tips․

By utilizing these resources, you can continue your learning journey and master the concept of moles in GCSE Chemistry․

billesley rock club gig guide

Billesley Rock Club is a live music venue in Kings Heath, Birmingham, showcasing tribute and original rock music, mainly classic rock and traditional metal. The venue is located upstairs at The Billesley Pub, Brook Lane, Birmingham, B13 0AB. It is a popular spot for fans of rock music, with a wide range of gigs taking place throughout the year.

Introduction

Welcome to the Billesley Rock Club Gig Guide, your comprehensive source for all things rock in Birmingham’s vibrant Kings Heath neighborhood. This guide is your one-stop shop for discovering the latest and greatest live music events at Billesley Rock Club, a beloved venue known for its energetic atmosphere and dedication to showcasing a diverse range of rock genres. From classic rock tributes that transport you back to the golden age of rock to original bands pushing the boundaries of modern rock, Billesley Rock Club offers a unique and unforgettable experience for music lovers of all stripes.

Whether you’re a seasoned rock aficionado or a curious newcomer to the genre, this guide will help you navigate the exciting world of live music at Billesley Rock Club. We’ll provide you with all the essential information you need to plan your next rockin’ night out, including upcoming events, venue details, ticket information, and insights into the club’s rich history and vibrant community. Get ready to rock out with us and experience the electrifying energy of Billesley Rock Club!

Venue Information

Billesley Rock Club is nestled upstairs at The Billesley Pub, a charming and well-established pub in the heart of Kings Heath. The venue boasts a spacious and intimate setting, perfect for enjoying live music with friends and fellow rock enthusiasts. Its stage is designed to provide an immersive experience, allowing you to feel the energy of the performers and connect with the music on a deeper level. The club’s sound system is top-notch, ensuring that every note and beat is delivered with crystal clarity, enhancing your listening pleasure.

Billesley Rock Club offers a welcoming and inclusive atmosphere, making it a favorite destination for both seasoned rock veterans and newcomers to the scene. The club’s friendly staff is always on hand to ensure that you have a memorable and enjoyable experience. Whether you’re looking to catch a classic rock tribute, discover a new band, or simply enjoy a night out with friends, Billesley Rock Club provides the perfect setting for a truly rocking good time.

Upcoming Events

Billesley Rock Club has a vibrant calendar of events, showcasing a diverse range of rock acts, from classic rock tributes to original unsigned bands. You can find information about upcoming gigs on their website and social media pages.

Some of the upcoming events at Billesley Rock Club include⁚

  • Cillirion ⎻ Bringing a smörgåsbord of Fish-Era Marillion classics, along with a full rendition of the iconic album Fugazi.
  • Fred Zeppelin (Led Zeppelin tribute) ⸺ A must-see for fans of Led Zeppelin, offering a high-energy and authentic tribute to one of rock’s greatest bands.
  • The Spirit of Rush ⎻ A tribute to the legendary progressive rock band Rush, guaranteed to transport you back to the golden age of rock.
  • Absolva ⎻ A renowned heavy metal band known for their powerful performances and impressive technical skills.

Keep an eye on the Billesley Rock Club gig guide to stay up-to-date on all the latest events and secure your tickets before they sell out.

About Billesley Rock Club

Billesley Rock Club is a haven for rock enthusiasts in Birmingham, offering a platform for both established and up-and-coming rock acts. This lively venue, situated upstairs at The Billesley Pub, boasts a dedicated team passionate about delivering an unforgettable experience for music lovers.

The club’s commitment to providing high-quality entertainment is evident in the diverse range of musical genres it caters to. From classic rock and metal tributes to original rock bands, Billesley Rock Club offers something for every rock fan. The venue prides itself on showcasing the best rock talent in the country, ensuring a consistently exciting and energetic atmosphere.

Beyond the music, Billesley Rock Club fosters a sense of community among rock lovers, creating a welcoming space where fans can connect and share their passion for the genre. The club’s dedication to providing a platform for local talent and its commitment to creating a vibrant music scene in Birmingham make it an integral part of the city’s cultural landscape.

Location and Contact

Billesley Rock Club is conveniently located in the heart of Kings Heath, Birmingham, making it easily accessible for music lovers across the city. Nestled upstairs at The Billesley Pub, the venue is a familiar landmark for locals and a welcoming destination for visitors. The club’s address is Brook Lane, Kings Heath, Birmingham, B13 0AB, ensuring a straightforward journey for those seeking a night of rock and roll.

For those seeking further information or wishing to connect with the club, a variety of contact options are available. The Billesley Rock Club can be reached via their website, www.billesleyrockclub.com, which serves as a hub for gig updates, event information, and venue details. The club also maintains an active presence on social media platforms like Facebook, providing a platform for fans to stay up-to-date on the latest happenings and engage with the club’s community.

Whether you’re planning a night out or seeking information about upcoming gigs, Billesley Rock Club’s accessible location and diverse communication channels ensure a smooth and enjoyable experience for all.

Ticket Information

Securing your spot at a Billesley Rock Club gig is a straightforward process, with a variety of options available to suit different preferences. Most gigs at the club operate on a cash-on-the-door basis, allowing for spontaneous attendance and a flexible approach to event planning. This system offers convenience for those who prefer to decide last minute, ensuring a hassle-free entry to the venue.

For larger events or those featuring popular acts, advance ticket purchase might be recommended. The Billesley Rock Club often utilizes online platforms like Skiddle, a popular primary ticket outlet, to facilitate ticket sales for specific gigs. These online platforms provide a secure and convenient way to purchase tickets in advance, ensuring a guaranteed spot at the event and eliminating the need to wait in line at the door.

Whether you opt for the cash-on-the-door approach or secure your tickets online, Billesley Rock Club strives to make the ticket purchasing process as easy and accessible as possible. This ensures a smooth experience for all music enthusiasts, allowing them to focus on enjoying the vibrant live music scene at the club.

History of Billesley Rock Club

Billesley Rock Club, a vibrant hub for rock music enthusiasts in Birmingham, boasts a relatively recent history, establishing itself as a prominent venue for live music in the city. The club’s story began with a vision to create a dedicated space for rock music, a space where fans could gather to experience the energy of live performances. The decision to open the club was driven by a passion for rock music and a desire to foster a vibrant community for fans.

The club’s journey began in a new location, the Billesley Pub, which provided an ideal setting for the club’s vision. The upstairs area of the pub was transformed into a dedicated space for live music, complete with a stage and a welcoming atmosphere that quickly drew in local music lovers; Since its inception, Billesley Rock Club has become a popular destination for rock music fans, hosting a diverse range of tribute acts, original rock bands, and local musicians.

The club’s dedication to showcasing a variety of rock music styles has contributed to its growing reputation as a hub for live music in Birmingham. With each passing gig, Billesley Rock Club continues to solidify its place as a vital part of the local music scene, providing a platform for both established and emerging artists to connect with passionate fans.

Music Genres

Billesley Rock Club embraces a diverse spectrum of rock music genres, catering to a wide range of tastes and preferences. Classic rock, a cornerstone of the venue’s musical identity, takes center stage with tributes to legendary bands like Led Zeppelin, Rolling Stones, and many others. The club’s stage comes alive with the timeless sounds of classic rock anthems, captivating audiences with their familiar riffs and powerful vocals.

Metal, in its various forms, finds a dedicated space at Billesley Rock Club. From the heavy sounds of traditional metal to the more modern and experimental subgenres, the club provides a platform for metal bands to showcase their raw energy and technical prowess. The venue’s atmosphere is ideal for appreciating the raw intensity and technical brilliance of metal music.

Beyond classic rock and metal, Billesley Rock Club ventures into other rock subgenres, including hard rock, alternative rock, and even punk rock, ensuring a diverse and exciting musical landscape. The club’s commitment to showcasing a broad range of rock music styles makes it a popular destination for music lovers seeking a vibrant and eclectic live music experience.

Reviews and Feedback

Billesley Rock Club has garnered a reputation for its vibrant atmosphere, passionate crowds, and top-notch live music performances. Reviews and feedback from concertgoers consistently highlight the venue’s energetic ambiance, making it an ideal destination for those seeking a night of exhilarating rock music.

The club’s commitment to showcasing a diverse range of rock acts, from classic rock tributes to original metal bands, has earned praise from music enthusiasts. Reviews often commend the venue’s ability to cater to a wide array of tastes, ensuring that there’s something for everyone to enjoy.

The intimate setting of the club allows for an immersive and engaging live music experience. Audiences are encouraged to interact with the bands, creating a sense of community and shared passion for rock music. The positive feedback from concertgoers consistently praises the club’s ability to foster an atmosphere of camaraderie and excitement.

Social Media

Billesley Rock Club maintains a strong presence on social media, serving as a platform to connect with fans, promote upcoming events, and share news and updates about the venue. The club’s Facebook page is a hub for music lovers, where they can find information about upcoming gigs, view photos from past events, and engage in discussions with fellow rock enthusiasts.

The Facebook page showcases the venue’s vibrant atmosphere and the diverse range of musical acts it hosts. Fans can stay informed about the latest lineups, ticket information, and special events. The club’s social media presence also allows for direct interaction with patrons, providing a platform for feedback, inquiries, and event suggestions.

Billesley Rock Club utilizes social media to foster a sense of community among its patrons. The club actively encourages fans to share their experiences, post photos, and engage in discussions about their favorite bands and performances. This online platform creates a space for rock music enthusiasts to connect, share their passions, and stay connected with the vibrant music scene at Billesley Rock Club.

nursing care plan template pdf

A nursing care plan template PDF is a digital document designed to help nurses create and organize individualized care plans for their patients. These templates typically include sections for assessment, nursing diagnosis, planning, interventions, evaluation, and expected outcomes. They provide a structured format for documenting important information such as medical history, goals, treatment plans, and follow-up care, ensuring that client care is effective and organized.

What is a Nursing Care Plan Template?

A nursing care plan template is a pre-designed document that serves as a framework for creating individualized care plans for patients. It outlines the essential components of a comprehensive care plan, providing a structured approach for nurses to assess, diagnose, plan, implement, and evaluate patient care. These templates are often tailored to specific patient needs, diagnoses, or care settings.

The template itself is not a complete care plan but rather a guide that helps nurses organize their thoughts and ensure all necessary information is included. It assists in standardizing care plans, promoting consistency and efficiency in patient care delivery.

Nursing care plan templates are widely used in various healthcare settings, including hospitals, clinics, long-term care facilities, and home health agencies. They are particularly valuable for nurses who are new to the profession or working with complex patients.

Types of Nursing Care Plan Templates

Nursing care plan templates come in various formats, each tailored to specific needs and preferences. Some common types include⁚

  • Blank Templates⁚ These offer a basic structure with headings for assessment, diagnosis, planning, interventions, and evaluation. Nurses have complete flexibility to fill in the details according to the patient’s individual needs.
  • Structured Templates⁚ These provide a more detailed framework with pre-defined sections and subheadings, guiding nurses through the care planning process. They may include specific questions or prompts to ensure comprehensive assessment and planning.
  • Boxed Templates⁚ These templates have predefined boxes or sections for each component of the care plan, making it easier to organize information visually. They are particularly helpful for visual learners and those who prefer a structured approach.
  • Condition-Specific Templates⁚ These templates are designed for patients with specific diagnoses or conditions, such as diabetes, heart failure, or pneumonia. They include relevant assessments, interventions, and outcomes tailored to the condition.
  • Specialty-Specific Templates⁚ These templates cater to particular nursing specialties, such as critical care, pediatrics, or mental health. They incorporate specialized assessments, interventions, and outcomes specific to the field.

The choice of template depends on the individual nurse’s preferences, the patient’s needs, and the care setting’s requirements.

Benefits of Using a Nursing Care Plan Template

Utilizing a nursing care plan template offers numerous advantages for both nurses and patients, contributing to improved patient care and outcomes. Here are some key benefits⁚

  • Organization and Structure⁚ Templates provide a clear and organized framework for developing and documenting care plans. This ensures that all essential components are included, promoting consistency and reducing the risk of overlooking critical information.
  • Time Efficiency⁚ Templates streamline the care planning process, saving nurses valuable time. By providing a pre-defined structure and prompts, they minimize the need for extensive note-taking and reduce redundancy.
  • Improved Communication⁚ Templates facilitate clear and concise communication among healthcare professionals. They provide a standardized format for documenting patient information, goals, interventions, and progress, enhancing collaboration and continuity of care.
  • Patient-Centered Care⁚ Templates encourage a patient-centered approach to care. By prompting nurses to assess patient needs, goals, and preferences, they ensure that care plans are tailored to individual requirements.
  • Quality Assurance⁚ Templates help maintain quality standards in care planning. They provide a structured approach, reducing the likelihood of errors and ensuring that care plans are comprehensive and evidence-based.
  • Legal Protection⁚ Well-documented care plans offer legal protection for nurses. They provide evidence of the care provided, demonstrating adherence to best practices and supporting decision-making in case of legal disputes.

Overall, using a nursing care plan template fosters efficient, effective, and patient-centered care, enhancing the quality of nursing practice.

Key Components of a Nursing Care Plan Template

A comprehensive nursing care plan template typically incorporates several key components, each playing a vital role in guiding patient care. These components provide a structured framework for assessing patient needs, identifying problems, setting goals, planning interventions, and evaluating progress. Here are the essential elements typically found in a nursing care plan template⁚

  • Patient Demographics⁚ This section includes basic patient information such as name, age, date of birth, medical record number, and other relevant identifiers.
  • Assessment⁚ This component involves a thorough assessment of the patient’s physical, psychological, and social needs. It includes gathering information about the patient’s health history, current condition, medications, allergies, and any relevant social factors that may influence their care.
  • Nursing Diagnosis⁚ Based on the assessment data, nurses identify actual or potential nursing diagnoses that describe the patient’s health problems. These diagnoses guide the development of care plan interventions.
  • Goals⁚ Specific, measurable, attainable, relevant, and time-bound (SMART) goals are established for each nursing diagnosis. These goals outline desired outcomes for the patient’s health condition.
  • Interventions⁚ This section details the nursing actions that will be implemented to achieve the established goals. Interventions can include medication administration, wound care, patient education, and other supportive measures.
  • Evaluation⁚ Regular evaluation of the patient’s progress is crucial. This component assesses the effectiveness of interventions, monitors changes in the patient’s condition, and determines whether goals are being met. Adjustments to the care plan may be necessary based on the evaluation findings.

These key components ensure a comprehensive and individualized care plan that addresses the unique needs of each patient.

Nursing Care Plan Template Examples

To better understand the structure and content of a nursing care plan template, exploring real-world examples can be highly beneficial. These examples demonstrate how different templates are organized and provide insights into the specific information included in each section. Numerous online resources offer downloadable nursing care plan templates for various patient conditions and healthcare settings. Here are some common examples of nursing care plan templates⁚

  • Acute Pain Management⁚ This template focuses on managing acute pain, including assessment of pain levels, identification of pain triggers, and implementation of non-pharmacological and pharmacological interventions. It may include sections for pain scales, medication administration, and patient education on pain management techniques.
  • Impaired Mobility⁚ This template addresses patients with mobility limitations due to injury, illness, or surgery. It outlines interventions to improve mobility, prevent complications such as pressure ulcers, and promote independence. The template may include sections for range of motion exercises, ambulation assistance, and fall prevention strategies.
  • Risk for Infection⁚ This template focuses on patients at risk for infection, such as those with weakened immune systems or undergoing invasive procedures. It includes interventions to reduce the risk of infection, such as hand hygiene, wound care, and appropriate isolation precautions.
  • Post-Surgical Recovery⁚ This template is designed for patients recovering from surgery. It outlines interventions to manage pain, promote wound healing, prevent complications, and facilitate a smooth transition to home. It may include sections for pain management, dressing changes, and post-surgical exercises.

By reviewing these examples, nurses can gain a better understanding of how to create effective and tailored care plans for their patients.

Where to Find Nursing Care Plan Templates

Finding high-quality nursing care plan templates is essential for nurses and nursing students seeking to create comprehensive and organized care plans. Fortunately, numerous resources offer free and paid templates for various patient conditions and care settings. Here are some reliable sources to explore⁚

  • Template.net⁚ This website offers a wide range of free and premium nursing care plan templates, including options for patient-centered care, acute pain management, mental health, and aged care. You can customize these templates to meet specific patient needs.
  • Scribd⁚ Scribd hosts a collection of nursing care plan templates in PDF format, providing users with downloadable options for various care plans. These templates often include sections for assessment, nursing diagnosis, planning, interventions, evaluation, and expected outcomes.
  • PdfFiller⁚ PdfFiller offers a library of free editable care plan templates in MS Word DOC format. These templates provide a structured format for documenting important information such as medical history, goals, treatment plans, and follow-up care. They can be easily customized and saved in PDF format.
  • NormalNurseLife⁚ This website provides a comprehensive guide to nursing care plans, including tips on how to write them effectively. It also offers a free nursing care plan template in a 5-column format.

Additionally, many universities, colleges, and professional nursing organizations offer free downloadable nursing care plan templates to their students and members.

How to Use a Nursing Care Plan Template

Using a nursing care plan template effectively requires a systematic approach and a clear understanding of the patient’s needs. Here are some steps to guide you through the process⁚

  1. Choose the Right Template⁚ Select a template that aligns with the patient’s condition and care setting. Consider factors such as the patient’s age, diagnosis, and the specific goals of care.
  2. Gather Patient Information⁚ Conduct a thorough assessment, including a review of the patient’s medical history, vital signs, medications, and social history. Use this information to identify the patient’s needs and develop appropriate nursing diagnoses.
  3. Complete the Template⁚ Fill in the relevant sections of the template, including the patient’s demographics, nursing diagnoses, goals, interventions, and evaluation criteria. Be specific and measurable in your descriptions.
  4. Collaborate with the Patient⁚ Involve the patient in the planning process whenever possible. Explain the plan and encourage their input to ensure their preferences and values are considered.
  5. Implement the Plan⁚ Put the care plan into action by carrying out the prescribed interventions. Monitor the patient’s progress and make adjustments as needed.
  6. Evaluate and Revise⁚ Regularly evaluate the effectiveness of the care plan by monitoring the patient’s response to interventions. Revise the plan as needed to ensure it remains appropriate and achieves desired outcomes.

Remember to use clear and concise language when completing the template, and ensure all information is accurate and up-to-date.

Tips for Creating a Nursing Care Plan

Crafting a comprehensive and effective nursing care plan requires attention to detail and a focus on the patient’s individual needs. Here are some tips to help you create a successful care plan⁚

  1. Identify the Patient’s Needs⁚ Begin by conducting a thorough assessment to identify the patient’s physical, emotional, and social needs. This may involve reviewing their medical history, conducting a physical exam, and interviewing the patient and their family.
  2. Establish Clear Goals⁚ Define specific, measurable, achievable, relevant, and time-bound (SMART) goals for the patient. These goals should address the identified needs and provide a framework for the care plan.
  3. Develop Targeted Interventions⁚ Choose interventions that are evidence-based and aligned with the patient’s goals. Be sure to consider the patient’s preferences and involve them in the decision-making process whenever possible.
  4. Prioritize Interventions⁚ Organize interventions based on their urgency and importance. Focus on addressing the most critical needs first and then work towards achieving secondary goals.
  5. Document Thoroughly⁚ Keep detailed records of all assessments, interventions, and patient responses. This documentation is essential for tracking progress, ensuring continuity of care, and providing evidence of care delivery.
  6. Collaborate with the Team⁚ Communicate effectively with other members of the healthcare team, including physicians, nurses, therapists, and social workers. This collaboration ensures a holistic approach to patient care.

By following these tips, you can create a comprehensive and effective nursing care plan that meets the individual needs of your patients and contributes to their overall well-being.

Legal Considerations for Nursing Care Plans

Nursing care plans are not merely organizational tools but also legal documents that can be used as evidence in legal proceedings. It is crucial for nurses to understand the legal implications of their care plans and ensure they are compliant with relevant regulations and standards of practice.

One key legal consideration is documentation. Care plans must be clear, concise, and accurate, reflecting the patient’s needs, goals, and interventions. Incomplete or inaccurate documentation can lead to legal liability if it contributes to adverse patient outcomes. It is essential to use standardized terminology and avoid subjective language.

Another legal consideration is informed consent. Nurses must ensure that patients understand their care plan and have consented to the proposed interventions. This includes providing information about the risks, benefits, and alternatives to treatment. Documentation of informed consent is crucial, as it can protect nurses from legal challenges related to patient autonomy.

Furthermore, nurses must be aware of legal requirements regarding confidentiality and privacy. Patient information contained in care plans must be protected from unauthorized access and disclosure. Failure to comply with privacy laws can result in significant legal penalties.

By adhering to these legal considerations, nurses can help ensure that their care plans are not only effective but also legally defensible. Regular review and updates of care plans are essential to maintain compliance and ensure that they remain relevant to the evolving needs of the patient.

Nursing care plan templates are valuable tools for nurses, providing a structured framework to develop individualized plans of care for their patients. They streamline the planning process, ensuring that client care is effective and organized. By using these templates, nurses can easily document important information, such as medical history, goals, treatment plans, and follow-up care, fostering better communication and collaboration among healthcare professionals.

While templates offer a helpful guide, it is crucial to remember that they are not a substitute for professional judgment. Nurses must always adapt the template to the unique needs of each patient, ensuring the care plan is comprehensive, personalized, and responsive to changing circumstances. The use of templates is just one aspect of providing quality care, and nurses must continue to develop their clinical skills and knowledge to provide the best possible outcomes for their patients.

In conclusion, nursing care plan templates are an essential resource for nurses, aiding in the development of effective and legally sound care plans. By utilizing these templates and understanding their legal implications, nurses can contribute to improved patient outcomes and enhance the quality of care they provide.

novice 27 dressage test pdf

Novice 27 Dressage Test⁚ A Comprehensive Guide

The Novice 27 Dressage Test is a popular choice for riders looking to advance their skills in dressage. This test is designed to assess a rider’s ability to execute a series of movements with precision and accuracy, demonstrating good communication and control over their horse. This comprehensive guide will equip you with the knowledge and tools to confidently prepare for and excel in this test.

Understanding the Novice 27 Test

The Novice 27 Dressage Test is a standard test within the British Dressage (BD) system, specifically aimed at riders who are progressing from the Preliminary level. The test is designed to evaluate a rider’s ability to perform a series of movements with accuracy and precision, demonstrating good communication and control over their horse. It features a combination of basic dressage movements, including transitions, circles, half-circles, and walk steps, all executed within a defined arena. The Novice 27 test is a stepping stone towards more challenging tests, like the Novice 28 and Novice 30, and it requires a higher level of proficiency in dressage fundamentals.

The Novice 27 test sheet is available online from various sources, including Trot-Online, which offers both printed and laminated versions. The sheet provides a detailed diagram of the arena layout, outlining the exact movements and their order. These sheets are essential for riders to study and practice the test sequence before entering a competition. They allow riders to visualize the movements, plan their approach, and develop a strategy for achieving a successful performance.

The Test’s Layout and Movements

The Novice 27 Dressage Test is conducted in a standard 20m x 60m dressage arena. The test begins with the horse entering at point A and proceeding down the center line. At point C, the rider executes a left turn, followed by a 20-meter circle at point E. A half-circle to the right is performed at point E, followed by another half-circle to the left at point X, returning to the track at point B. Between points F and A, the horse must perform 2-4 walk steps. A 20-meter circle is then executed at point A before transitioning to canter as the horse crosses the center line. The rider must give and retake the reins between points E and H, demonstrating good control and responsiveness from the horse. The test concludes with a final halt at point A.

The Novice 27 test is designed to evaluate the horse’s obedience, rhythm, and overall quality of movement. It assesses the rider’s ability to execute the transitions smoothly and accurately, maintain a consistent tempo and rhythm, and demonstrate good communication and control over their horse. The test also includes a number of specific movements that are particularly challenging, such as the half-circles and the walk steps, which require precise execution and a good understanding of the horse’s balance and responsiveness.

Key Considerations for Success

Success in the Novice 27 Dressage Test hinges on a combination of factors, including a well-trained horse, a skilled and confident rider, and a thorough understanding of the test requirements. The horse should be able to perform all of the movements accurately and with good rhythm and tempo. The rider must have a strong understanding of dressage principles and be able to communicate effectively with their horse. It’s essential to practice the test movements regularly and to build a strong bond with the horse, fostering a responsive and cooperative partnership.

Careful attention to details is paramount. A clear and concise ride, demonstrating smooth transitions, precise circles, and consistent rhythm, will significantly impact the score. The horse’s conformation and natural movement will also play a role in the overall performance. Maintaining a relaxed and confident demeanor throughout the test is crucial, as the horse will mirror the rider’s energy and attitude. A calm and focused approach will enhance the horse’s performance and maximize the potential for a successful ride.

While the test focuses on individual movements, it’s important to remember that each movement contributes to the overall impression. The horse should be presented in a balanced and collected frame, demonstrating good engagement and self-carriage. The rider’s position should be correct and balanced, allowing for effective communication and control. Success in the Novice 27 Dressage Test requires a holistic approach, encompassing both technical proficiency and a harmonious partnership between horse and rider.

Preparing for the Novice 27 Test

Preparing for the Novice 27 Dressage Test requires a systematic and well-structured approach. The first step involves acquiring a copy of the test sheet, available online from sources like Trot-Online or through British Dressage. This sheet outlines the specific movements, their sequence, and the required distances and diameters. It’s crucial to thoroughly study the test sheet, understanding each movement and its associated requirements.

Next, focus on training the horse to perform the movements accurately and with precision. Break down each movement into smaller components and practice them individually before combining them into the full test. Regularly practice the test, focusing on maintaining a consistent rhythm, accurate transitions, and precise circles. Practice at the actual test venue is ideal, allowing the horse to familiarize itself with the arena layout and potential distractions.

As the test date approaches, focus on refining the horse’s training and enhancing your riding skills. Pay close attention to the horse’s physical and mental state, ensuring adequate rest, proper nutrition, and a balanced training program. Maintain a positive and supportive attitude, fostering a partnership that promotes confidence and trust. The key to success lies in consistent practice, attention to detail, and a strong understanding of the test requirements.

Essential Equipment and Resources

Equipping yourself with the right tools and resources is crucial for success in the Novice 27 Dressage Test. A laminated test sheet, available online from Trot-Online or British Dressage, is essential for familiarizing yourself with the test layout and movements. Consider purchasing a waterproof and weatherproof A4 laminated test sheet with clear diagrams for easy reference during training and at the competition.

Invest in a dressage whip for subtle aids and a set of dressage spurs for more precise cues. A well-fitting dressage saddle and bridle, specifically designed for dressage, are essential for comfort and control. Invest in quality boots and gloves for optimal grip and protection. A dressage test scorebook, available online or at equestrian stores, is helpful for tracking scores, analyzing results, and identifying areas for improvement.

Access to online resources like British Dressage, Trot-Online, and Score.ie provides valuable information, test sheets, and scoring systems. These platforms offer comprehensive resources to enhance your understanding of dressage principles, test requirements, and scoring criteria. Embrace these essential equipment and resources to optimize your preparation and performance in the Novice 27 Dressage Test.

Training Techniques for Success

Mastering the Novice 27 Dressage Test requires a structured approach to training. Start by thoroughly analyzing the test sheet, understanding the sequence of movements, and visualizing the arena layout. Focus on developing a strong foundation in the basic dressage principles, including transitions, straightness, rhythm, and impulsion.

Break down the test into individual movements, practicing each one separately before combining them into sequences. Use dressage training aids, such as cones or poles, to mark the centerline, circles, and other designated points in the arena. Gradually increase the difficulty and complexity of the exercises, incorporating the correct aids and transitions.

Regularly practice the test in a competition-like setting, simulating the pressure and environment of the actual test. Focus on maintaining a consistent rhythm, clear transitions, and a relaxed and responsive horse. Seek professional guidance from a qualified dressage trainer, who can provide personalized instruction, feedback, and support throughout your training journey.

Tips for Scoring High Marks

Earning high marks in the Novice 27 Dressage Test requires a combination of technical proficiency, artistry, and attention to detail. Pay meticulous attention to the accuracy and precision of your movements, ensuring that your horse executes each transition, circle, and halt with precise timing and positioning.

Maintain a consistent rhythm throughout the test, demonstrating a clear and controlled tempo in each gait. Ensure that your horse is relaxed and supple, exhibiting a harmonious and balanced frame. Present your horse with a confident and positive attitude, showcasing your ability to communicate effectively and maintain control.

Remember that the judges are looking for a harmonious partnership between rider and horse. Exhibit a relaxed and confident presence in the saddle, demonstrating a clear understanding of the test and a strong connection with your horse. Aim for a smooth and flowing performance, showcasing the horse’s natural athleticism and responsiveness to your aids.

Analyzing Test Results and Improving Performance

After completing the Novice 27 test, carefully analyze your results to identify areas for improvement. Review the judge’s comments and scores, paying close attention to any deductions or suggestions. This feedback provides valuable insights into your strengths and weaknesses. If possible, watch a video recording of your test to gain a visual perspective of your performance.

Focus on the specific areas where you received lower scores or received critical comments. This may include aspects like transitions, circles, halt, or overall rhythm and impulsion. Develop a targeted training plan to address these areas, focusing on improving your horse’s obedience and responsiveness to your aids.

Consider seeking guidance from a qualified dressage trainer or coach who can provide personalized feedback and help you develop a customized training plan. Remember that consistency and persistence are key to improving your performance. Regular practice and consistent training will gradually refine your horse’s skills and build confidence in both horse and rider.

Common Mistakes to Avoid

While the Novice 27 test is designed to be accessible, riders often make common mistakes that can hinder their performance and impact their scores. One common mistake is rushing transitions. Ensure smooth transitions between gaits, avoiding abrupt changes in tempo or rhythm. Another common error is neglecting the importance of straightness. Strive to maintain straight lines, particularly on the center line and during transitions, ensuring your horse is balanced and aligned.

Riders often struggle with maintaining a consistent tempo and rhythm, especially during walk and canter work. Pay attention to the beat and regularity of each gait, ensuring a consistent tempo throughout the test. Avoid hesitation or loss of impulsion during transitions, particularly when moving from walk to canter. Finally, make sure you are prepared for the test environment. Familiarize yourself with the arena layout and practice the movements in the test.

By avoiding these common mistakes and focusing on precise execution and control, you can significantly improve your performance in the Novice 27 test and achieve a higher score.

Where to Find the Novice 27 Test Sheet

Obtaining the official Novice 27 test sheet is crucial for successful preparation. Several online resources offer access to this valuable document. One popular option is Trot-Online, a website dedicated to providing equestrian resources. They offer both A5 and laminated A4 test sheets with clear diagrams, ensuring a comprehensive understanding of the test layout. Their website also provides a wide range of British Dressage and British Eventing tests, catering to various disciplines and levels.

Additionally, you can explore the British Dressage website directly. They offer a comprehensive library of tests, including the Novice 27, allowing you to download and print the official test sheet. Furthermore, the website provides video demonstrations of the test movements, enhancing your understanding and visualization of the required execution. Remember, familiarizing yourself with the test sheet is essential for effective training and a successful performance in the Novice 27 dressage test.

car accident rate manual vs automatic

Manual vs. Automatic Transmission⁚ Does Gearbox Type Affect Accident Rates?

The debate on whether manual or automatic transmissions influence accident rates is a complex one‚ with no clear-cut answer. Some argue that manual transmissions promote greater driver engagement and awareness‚ potentially leading to fewer accidents. Others suggest that automatic transmissions offer smoother driving and reduced driver fatigue‚ potentially contributing to safer driving. However‚ it’s crucial to consider that accident rates are impacted by a multitude of factors beyond transmission type.

Introduction

The choice between a manual and an automatic transmission often comes down to personal preference and driving style. However‚ some drivers wonder if the type of transmission can influence accident rates. While the connection between gearbox type and accident statistics isn’t definitively established‚ there are arguments for and against both sides of the debate. This article will explore the historical context of manual and automatic transmissions‚ analyze arguments supporting each type‚ examine existing research on accident rates‚ and consider other factors that contribute to road safety. Ultimately‚ we aim to shed light on whether the choice of a manual or automatic transmission has a significant impact on the likelihood of a car accident.

The History of Manual and Automatic Transmissions

The history of manual and automatic transmissions is intertwined with the evolution of the automobile itself. Manual transmissions‚ the earliest type‚ were introduced alongside the first gasoline-powered cars in the late 19th century. They required drivers to manually shift gears‚ engage the clutch‚ and manage engine speed. The invention of the automatic transmission in the early 20th century marked a significant shift in driving experience. Initially‚ automatic transmissions were bulky and inefficient‚ but technological advancements throughout the 20th century led to more reliable and fuel-efficient models. The availability of automatic transmissions increased dramatically‚ especially in the latter half of the century‚ as they offered a more convenient and less physically demanding driving experience.

Today‚ automatic transmissions are the dominant choice in many markets‚ while manual transmissions remain popular in certain regions and among enthusiasts; The popularity of automatic transmissions has been driven by factors such as increased convenience‚ improved fuel efficiency‚ and enhanced driving comfort. While manual transmissions are still appreciated for their control and engagement‚ their relative complexity and the declining number of models offering them have led to a shift in market preference toward automatic transmissions.

The Argument for Manual Transmissions

Proponents of manual transmissions often cite their potential to enhance driver engagement and awareness‚ which could contribute to safer driving practices. The act of shifting gears‚ engaging the clutch‚ and coordinating engine speed requires a higher level of focus and attentiveness than simply pressing a gas pedal and steering. This greater mental engagement‚ they argue‚ translates to a more deliberate and cautious approach to driving‚ potentially reducing the likelihood of accidents. Furthermore‚ manual transmissions offer greater control over the vehicle’s power delivery‚ allowing drivers to tailor their acceleration and braking to specific driving situations; This control can be particularly beneficial in challenging conditions such as slippery roads or steep inclines‚ where a driver’s ability to manage engine braking and torque can be crucial for maintaining stability and avoiding accidents.

However‚ it’s important to acknowledge that the argument for manual transmissions as inherently safer is not universally accepted. While proponents emphasize the potential benefits of increased driver engagement‚ critics point out that the increased complexity of manual transmissions can also lead to driver errors‚ especially among inexperienced drivers. Furthermore‚ they argue that modern automatic transmissions have advanced significantly‚ offering features such as adaptive cruise control and lane departure warning that can enhance safety even further. Ultimately‚ the impact of transmission type on accident rates is a nuanced issue that requires careful consideration of individual driver experience‚ road conditions‚ and other factors.

The Argument for Automatic Transmissions

Advocates for automatic transmissions often highlight their potential to reduce driver fatigue and improve overall driving comfort. The absence of manual shifting allows drivers to focus more on their surroundings and less on the intricacies of gear selection. This can be particularly beneficial during long drives or in congested traffic‚ where constant gear changes can contribute to driver stress and distraction. Moreover‚ modern automatic transmissions are designed to optimize gear changes for fuel efficiency and smooth acceleration‚ reducing the likelihood of sudden jolts or jerky movements that could potentially contribute to accidents. The integration of advanced safety features such as adaptive cruise control and lane departure warning systems can further enhance safety by providing drivers with real-time alerts and assistance‚ reducing the risk of human error. These features can be particularly helpful in preventing accidents caused by inattentiveness or fatigue.

However‚ it’s crucial to acknowledge that the argument for automatic transmissions as inherently safer is not without its critics. While proponents highlight the potential benefits of reduced driver fatigue and enhanced safety features‚ detractors argue that automatic transmissions can sometimes lead to overconfidence and complacency among drivers‚ potentially contributing to accidents. They suggest that the ease of driving an automatic transmission may lead to a diminished sense of control and awareness‚ potentially reducing reaction times in emergencies. Ultimately‚ the impact of transmission type on accident rates is a complex issue that requires careful consideration of individual driver behavior‚ road conditions‚ and other factors.

Research on Accident Rates

While the debate surrounding manual vs. automatic transmissions and their impact on accident rates continues‚ research findings on the topic remain inconclusive. Some studies have suggested that manual transmission drivers may exhibit a slightly lower accident rate‚ attributing this to the increased engagement and focus required for manual shifting. This theory suggests that the physical act of operating the clutch and gearshift promotes greater driver attentiveness and potentially reduces distractions. However‚ these studies have often been met with skepticism and criticism‚ as they fail to account for various confounding factors that could influence accident rates‚ such as driver experience‚ road conditions‚ and vehicle type.

Furthermore‚ research on younger drivers with attention deficit hyperactivity disorder (ADHD) has shown that manual transmission can improve attentiveness while driving and reduce driver errors‚ suggesting that stick shifts may be safer for those most prone to distraction while driving. However‚ it’s important to note that this research focuses on a specific demographic and may not be generalizable to the broader population. Ultimately‚ the available research data provides limited evidence to definitively conclude that one transmission type is inherently safer than the other. More comprehensive studies with rigorous controls are needed to establish a clear link between transmission type and accident rates.

Factors Beyond Transmission Type

When considering the safety implications of manual vs. automatic transmissions‚ it’s crucial to recognize that transmission type alone is unlikely to be the sole determinant of accident rates. Numerous other factors contribute to a driver’s safety on the road‚ and these factors can often overshadow any potential influence of the transmission system. One key factor is driver experience and skill. Experienced drivers‚ regardless of their preferred transmission type‚ tend to have a better understanding of vehicle handling and road conditions‚ leading to a reduced risk of accidents. Conversely‚ inexperienced drivers‚ regardless of their transmission choice‚ may be more susceptible to errors and misjudgments that can lead to accidents.

Additionally‚ road conditions and environmental factors play a significant role in driving safety. Adverse weather conditions‚ such as rain‚ snow‚ or fog‚ can significantly impact visibility and traction‚ increasing the risk of accidents. Similarly‚ road surface conditions‚ such as potholes‚ debris‚ or construction zones‚ can pose challenges for drivers‚ potentially leading to accidents. Furthermore‚ traffic density and congestion can contribute to increased stress and driver fatigue‚ which can impair judgment and reaction time‚ ultimately increasing accident risk. Therefore‚ while transmission type may have a minor influence on driving safety‚ it’s crucial to consider the broader context and the numerous factors beyond transmission type that contribute to accident rates.

Driver Experience and Skill

The role of driver experience and skill in accident rates cannot be overstated‚ and it often overshadows any potential impact of transmission type. Experienced drivers‚ regardless of whether they prefer manual or automatic transmissions‚ tend to have a better understanding of vehicle handling‚ road conditions‚ and traffic flow. This allows them to anticipate potential hazards‚ react more quickly to changing situations‚ and maintain better control of their vehicles. As a result‚ experienced drivers generally exhibit lower accident rates compared to their less experienced counterparts.

In contrast‚ inexperienced drivers‚ regardless of their transmission choice‚ may be more prone to errors and misjudgments. They may struggle to maintain adequate vehicle control‚ misjudge distances and speeds‚ or fail to recognize potential hazards. This can lead to an increased likelihood of accidents‚ particularly during critical moments like merging‚ overtaking‚ or braking. Therefore‚ while transmission type may play a minor role in driving safety‚ driver experience and skill often have a more significant impact. Experienced drivers‚ regardless of their transmission preference‚ tend to exhibit safer driving habits and lower accident rates. Conversely‚ inexperienced drivers‚ regardless of their transmission choice‚ may be more vulnerable to accidents due to their lack of experience and skill.

Road Conditions and Environmental Factors

The influence of road conditions and environmental factors on accident rates often surpasses the impact of transmission type. Poor road conditions‚ such as potholes‚ uneven surfaces‚ and slippery roads due to rain or snow‚ can significantly increase the risk of accidents. These factors can make it more challenging to maintain vehicle control‚ increasing the likelihood of skidding‚ swerving‚ or losing traction. Furthermore‚ adverse weather conditions‚ such as heavy rain‚ fog‚ or snow‚ can impair visibility‚ making it difficult to perceive hazards and react appropriately. Such conditions can lead to reduced reaction times‚ increased stopping distances‚ and a greater risk of collisions.

Additionally‚ environmental factors like traffic congestion‚ construction zones‚ and limited lighting can contribute to accidents. Heavy traffic can lead to increased stress‚ driver fatigue‚ and a higher likelihood of sudden stops or lane changes. Construction zones often involve lane closures‚ reduced speed limits‚ and unexpected obstacles‚ which can increase the risk of collisions. Similarly‚ poor lighting can hinder visibility‚ making it difficult to see other vehicles‚ pedestrians‚ and obstacles‚ increasing the likelihood of accidents. While transmission type may play a minor role in driving safety‚ road conditions and environmental factors often have a more significant impact. Accidents are more likely to occur in challenging conditions‚ regardless of the type of transmission used.

Other Safety Features

While transmission type can be a factor in driver engagement‚ it’s important to acknowledge that other safety features play a far more significant role in accident prevention. Modern vehicles are equipped with an array of advanced safety systems designed to enhance driver awareness‚ improve braking performance‚ and mitigate the consequences of accidents. These features include anti-lock braking systems (ABS)‚ electronic stability control (ESC)‚ lane departure warning systems‚ blind spot monitoring‚ adaptive cruise control‚ and automatic emergency braking. ABS prevents wheel lock-up during hard braking‚ allowing for better steering control and shorter stopping distances. ESC helps maintain vehicle stability by automatically applying brakes and adjusting engine power during slippery or challenging conditions. Lane departure warning systems alert drivers if they stray from their lane‚ while blind spot monitoring systems detect vehicles in blind spots‚ reducing the risk of lane changes. Adaptive cruise control maintains a safe following distance from the vehicle ahead‚ while automatic emergency braking can automatically apply the brakes to prevent or mitigate collisions.

These safety features‚ regardless of transmission type‚ significantly contribute to accident prevention and mitigation. They provide drivers with crucial assistance‚ enhancing their awareness and reaction times‚ and minimizing the impact of potential accidents. While transmission type may influence driver engagement‚ it is these modern safety systems that truly enhance vehicle safety and contribute to reduced accident rates.

The Future of Manual and Automatic Transmissions

The future of manual and automatic transmissions is intertwined with the broader evolution of the automotive industry‚ particularly the rise of electric vehicles and autonomous driving technologies. While manual transmissions have historically been associated with a more engaging driving experience‚ their popularity has been declining‚ especially in developed markets where automatic transmissions offer greater convenience and fuel efficiency. With the advent of electric vehicles‚ the need for traditional gearboxes is diminishing. Electric motors provide instant torque‚ eliminating the need for gear changes. This‚ coupled with the increasing popularity of autonomous driving systems‚ suggests that manual transmissions may become increasingly rare in the future.

However‚ the future of automatic transmissions is also likely to undergo significant changes. As autonomous driving technologies advance‚ the role of the driver is expected to diminish‚ potentially leading to the development of new transmission systems specifically tailored for autonomous vehicles. These systems may prioritize efficiency and smooth operation over driver engagement. Ultimately‚ the future of manual and automatic transmissions will be shaped by technological advancements‚ consumer preferences‚ and the evolving landscape of the automotive industry. While manual transmissions may become a niche option‚ the future of automatic transmissions remains uncertain‚ with the potential for significant innovation in the context of autonomous driving.

manual hoover washing machine symbols

Manual Hoover Washing Machine Symbols⁚ A Comprehensive Guide

Navigating the symbols on your Hoover washing machine can feel like deciphering a foreign language. This guide will break down the common symbols you’ll encounter, providing a clear understanding of their meaning and how to use them effectively. From wash cycles to temperature settings and spin cycles, we’ll cover everything you need to know to master your Hoover washing machine and ensure your clothes come out clean and cared for.

Introduction

Modern washing machines are marvels of technology, offering a wide range of cycles and settings to cater to different laundry needs. However, the array of symbols that adorn these machines can be confusing, even for seasoned laundry enthusiasts. Understanding these symbols is crucial for making informed choices about wash settings, ensuring that your clothes are cleaned effectively without damage. This comprehensive guide focuses specifically on the manual symbols found on Hoover washing machines, providing a clear and concise explanation of their meaning and function.

Whether you’re a new homeowner or a seasoned laundry pro, this guide will equip you with the knowledge to confidently decipher the symbols on your Hoover washing machine. We’ll explore the basics of symbol interpretation, delve into common symbols related to wash cycles, temperature, spin cycles, and drying options, and provide insights into Hoover-specific symbols and troubleshooting tips. By the end of this guide, you’ll be a master of your Hoover washing machine, ready to tackle any laundry challenge with confidence.

Understanding the Basics

Before diving into the specific symbols found on Hoover washing machines, it’s essential to grasp the fundamental principles of laundry symbol interpretation. These symbols, often referred to as care labels, are standardized internationally to provide clear instructions for washing, drying, and ironing garments. They are typically found on the inside seam of clothing, providing a quick reference for the appropriate care methods.

The most common symbols are represented by pictograms, using shapes and lines to convey specific instructions. For instance, a basin filled with water signifies machine washing, while a circle with a cross through it indicates that the garment should not be bleached. The number of dots within a basin symbol indicates the maximum washing temperature, with one dot representing 30°C, two dots for 40°C, and three dots for 60°C. A hand immersed in a basin signifies hand washing, while a square with a cross through it means the garment should not be tumble dried.

Understanding these basic symbols is crucial for ensuring that your clothes are cleaned effectively and remain in good condition. By familiarizing yourself with these fundamental symbols, you’ll be well-equipped to interpret the specific symbols on your Hoover washing machine and care for your garments properly.

Common Washing Machine Symbols

While the specific symbols on your Hoover washing machine may vary slightly, a set of common symbols are used across many washing machine models. These symbols are designed to guide you through the washing process, ensuring you select the appropriate settings for your laundry. Understanding these symbols will empower you to confidently operate your machine and achieve optimal cleaning results.

One of the most frequently encountered symbols is the wash cycle symbol, typically depicted as a basin filled with water. This symbol often includes additional markings to indicate different wash cycles, such as delicate, hand wash, or a quick wash cycle. Temperature symbols, often represented by dots within the basin, indicate the maximum washing temperature allowed for the garment. A single dot usually signifies 30°C, two dots for 40°C, and three dots for 60°C. Spin cycle symbols, often depicted as a spiral within a circle, indicate the spin speed of the washing machine, with higher numbers representing a faster spin.

Drying symbols, typically represented by a square, offer instructions for drying the garment. A square with a circle inside signifies tumble drying, while a square with a line through it indicates that tumble drying is not recommended. Other symbols, such as a hand with an arrow pointing downwards, indicate that the garment should be line dried. Understanding these common symbols will help you interpret the instructions on your washing machine and ensure your clothes are treated appropriately.

Wash Cycle Symbols

Wash cycle symbols are essential for selecting the appropriate washing program for your garments. These symbols typically depict a basin filled with water, representing the washing process. They often include additional markings or variations to indicate different wash cycles, ensuring your clothes are cleaned effectively without damage.

One common variation is a basin with a single wave, representing a delicate wash cycle. This setting is ideal for delicate fabrics such as silk, lace, or lingerie. Another common symbol is a basin with two waves, indicating a hand wash cycle. This setting is recommended for garments that are too delicate for machine washing and should be hand washed. A basin with multiple arrows going in the same direction, often beneath an outline of your washing machine drum, represents a quick or super quick wash cycle. This option is perfect for lightly soiled clothes that require a shorter washing time.

Understanding these wash cycle symbols will help you select the appropriate washing program for your garments. These symbols are designed to guide you through the washing process, ensuring you choose the right setting for your laundry. Using the correct wash cycle will help preserve the life and quality of your clothes.

Temperature Symbols

Temperature symbols are crucial for determining the appropriate water temperature for washing your clothes. These symbols typically depict a basin with dots inside, representing the water temperature. The number of dots indicates the specific temperature setting, allowing you to select the appropriate heat level for different fabrics.

A basin with one dot usually represents a cold wash setting, typically around 30°C (86°F). This setting is ideal for delicate fabrics like silk, lace, or wool, as well as for brightly colored clothing to prevent fading. A basin with two dots typically indicates a warm wash setting, around 40°C (104°F). This setting is suitable for most everyday garments, such as cotton and linen. A basin with three dots usually indicates a hot wash setting, around 60°C (140°F). This setting is best for heavily soiled items or white fabrics.

Understanding these temperature symbols ensures you select the correct water temperature for your laundry, preventing damage to your clothes and ensuring effective cleaning. The symbols provide a clear guide to the optimal temperature for each wash cycle, allowing you to care for your clothes effectively.

Spin Cycle Symbols

Spin cycle symbols indicate the speed at which the washing machine will spin your clothes after washing and rinsing. These symbols are typically represented by a circle with a number inside, representing the revolutions per minute (RPM) of the spin cycle. The higher the number, the faster the spin cycle, and the drier your clothes will be after the wash.

A common spin cycle symbol is a circle with the number “1400” inside, representing a maximum spin speed of 1400 RPM. This setting is generally suitable for most fabrics, as it removes a significant amount of water, making clothes easier to dry. Another common symbol is a circle with the number “1000” inside, representing a lower spin speed of 1000 RPM. This setting is often preferred for delicate fabrics, as it reduces the amount of stress on the clothes during the spin cycle.

Some washing machines may also feature a “No Spin” or “Delicate Spin” symbol, indicated by a circle with a diagonal line through it. This setting is typically used for very delicate garments that cannot withstand the force of a regular spin cycle. Understanding these spin cycle symbols allows you to select the appropriate spin speed for your laundry, ensuring your clothes are treated with care and come out ready for drying.

Drying Symbols

Drying symbols provide guidance on how to safely dry your clothes after washing. They are typically depicted as a square with various icons inside, each representing a different drying method. A common drying symbol is a square with a circle inside, indicating that the garment can be tumble dried. This symbol may be accompanied by dots, representing the temperature setting for the dryer. One dot indicates low heat, two dots indicate medium heat, and three dots indicate high heat.

Another common drying symbol is a square with a line through it, indicating that the garment should not be tumble dried. This may mean the garment is delicate and could be damaged by the heat and movement of a dryer. If the symbol is a square with a circle inside and a line through it, it means the garment can be tumble dried on a low heat setting.

A square with a wavy line inside represents that the garment can be air dried. This is a gentle drying method suitable for delicate fabrics. Understanding these drying symbols allows you to choose the safest and most effective drying method for your clothes, ensuring they maintain their shape, color, and texture.

Other Symbols

In addition to wash cycle, temperature, spin, and drying symbols, your Hoover washing machine may feature other symbols to indicate specific functions or settings. One common symbol is a bucket with a cross through it, signifying that the garment should not be washed. This symbol is typically found on items that are meant to be dry cleaned or hand washed.

You might also see a symbol depicting an iron with dots, indicating that the garment can be ironed at a specific temperature. One dot signifies a low heat setting, two dots indicate medium heat, and three dots represent a high heat setting. A symbol with an iron and a cross through it indicates that the garment should not be ironed. This is usually found on delicate fabrics that could be damaged by heat.

Another symbol commonly found on washing machines is a basin with a hand inside, indicating that the garment should be hand washed. This symbol usually appears on delicate items, such as lingerie or silk, that could be damaged by the agitation of a machine wash. Understanding these “other” symbols will help you to care for your clothes properly and avoid any potential damage.

Decoding the Detergent Drawer

The detergent drawer of your Hoover washing machine may seem like a mystery, but it’s actually quite straightforward. It’s divided into compartments, each with its own symbol and specific purpose. The most common compartments are labeled with Roman numerals⁚ I, II, and sometimes III. Compartment I is typically for pre-wash detergent, which is used to loosen dirt and stains before the main wash cycle. It’s often smaller than the other compartments and may not be used for every wash. Compartment II is for the main wash detergent, which is used for the primary cleaning of your clothes. This compartment is usually the largest and may have a separate section for fabric softener, bleach, or stain remover, indicated by symbols within the compartment.

Compartment III, if present, is typically for fabric softener or liquid starch. It may be marked with a flower symbol or a similar icon. The detergent drawer symbols are usually clearly labeled and explained in your Hoover washing machine’s instruction manual. By understanding these symbols and their corresponding functions, you can ensure that you’re using the correct detergents and additives for each wash, resulting in clean and fresh clothes.

Hoover Washing Machine Specific Symbols

Hoover washing machines often incorporate unique symbols and features that set them apart. While many symbols are universal, there are a few that are specific to Hoover models, making it crucial to understand their meaning for optimal use. One such symbol is the “KG Mode” indicator, which lights up when the washing machine’s intelligent sensor is weighing the laundry load. This allows the machine to adjust water levels and cycle settings for optimal cleaning based on the weight and type of clothes. Another Hoover-specific symbol is the “One Touch” icon, which signifies that the machine can be controlled remotely using a smartphone app. This feature enables you to start, stop, and monitor your laundry from anywhere, making it incredibly convenient for busy lifestyles.

Hoover’s “Night & Day” function, indicated by a moon and sun symbol, is another distinctive feature. This allows you to select a wash cycle that operates at a quieter noise level for late-night or early-morning laundry sessions, ensuring a peaceful environment for your home. The “Steam” symbol, often depicted as a cloud or a steaming garment, signifies a specialized cycle that uses steam to refresh clothes, remove wrinkles, and sanitize fabrics. By understanding these Hoover-specific symbols, you can unlock the full potential of your washing machine and enjoy its unique features for a more efficient and personalized laundry experience.

Troubleshooting Common Symbols

While most washing machine symbols are straightforward, some can cause confusion, especially when they appear unexpectedly. One common symbol that often sparks concern is the “Error Code” display. This usually indicates a malfunction or issue with the washing machine. The specific code will determine the problem, so referring to the user manual for your specific Hoover model is essential. Common error codes might signal issues with the door latch, water intake, or drainage. If you’re unsure about the meaning of the code or how to resolve the issue, contacting Hoover’s customer support or a qualified appliance technician is recommended.

Another symbol that can cause uncertainty is the “Child Lock” icon, which is often depicted as a key or padlock. This feature is designed to prevent children from accidentally starting or altering the washing machine’s settings. If you’re experiencing difficulty operating the machine and suspect the Child Lock is activated, refer to your user manual to learn how to deactivate this feature. Understanding these common symbols and their potential meanings empowers you to troubleshoot minor issues effectively and ensure your Hoover washing machine continues to function smoothly.

ideal logic heat 18 manual

Ideal Logic Heat 18 Boiler⁚ A Comprehensive Guide

This comprehensive guide provides a complete overview of the Ideal Logic Heat 18 boiler, covering everything from its key features and specifications to installation, operation, troubleshooting, and maintenance. Whether you’re a homeowner seeking information on your new boiler or a professional installer looking for detailed instructions, this guide will be your trusted companion.

Introduction

The Ideal Logic Heat 18 is a high-efficiency condensing boiler designed to provide reliable and cost-effective heating for your home. This comprehensive manual serves as your guide to understanding and operating this powerful appliance. It covers everything from basic installation and servicing to advanced troubleshooting and maintenance tips. With a large backlit display and clear pressure gauge, the Logic Heat 18 is exceptionally easy to use and understand. This manual will equip you with the knowledge you need to maximize the efficiency and longevity of your boiler, ensuring a comfortable and warm home year-round.

Key Features and Specifications

The Ideal Logic Heat 18 boasts a range of features designed for efficiency, ease of use, and reliability. Its condensing technology captures heat from the flue gases, significantly improving efficiency and reducing energy consumption. The boiler features a large backlit display, clearly displaying boiler status and fault codes. A pressure gauge provides easy monitoring of the system’s pressure. The Logic Heat 18 is compatible with a variety of controls, allowing for tailored heating solutions. With a maximum output of 18kW, this boiler is suitable for most homes, providing efficient heating and hot water. The boiler’s compact design allows for easy installation and integration into existing systems. Its robust construction ensures long-lasting performance and minimal maintenance requirements. The Logic Heat 18 is also a reliable performer in cold climates, ensuring consistent heating even in freezing temperatures.

Installation and Servicing Guide

Installing and servicing the Ideal Logic Heat 18 requires professional expertise and adherence to safety regulations. The installation process involves careful planning and execution, ensuring proper connections to the gas supply, flue system, and central heating system. It’s crucial to use compatible components and follow the manufacturer’s guidelines to ensure optimal performance and safety. Regular servicing is essential for maintaining the boiler’s efficiency and longevity. This includes checking and cleaning the heat exchanger, burner, and flue system, as well as inspecting the gas supply and pressure. Professional servicing ensures that the boiler operates safely and efficiently, minimizing the risk of breakdowns and extending its lifespan. For detailed installation and servicing instructions, refer to the Ideal Logic Heat 18 manual, available online or from authorized Ideal Heating distributors.

User Guide⁚ Operating Your Boiler

Operating the Ideal Logic Heat 18 boiler is straightforward, thanks to its user-friendly controls and clear display. The boiler features a control panel with a backlit display and pressure gauge, providing easy access to essential information. To initiate heating, simply adjust the thermostat to your desired temperature setting. The boiler will automatically adjust its output to maintain the set temperature. For hot water, use the dedicated hot water controls to select the desired temperature and activate the hot water system. The boiler’s safety features include a pressure relief valve, a temperature sensor, and a flue gas safety device, ensuring safe and reliable operation. For comprehensive instructions on operating your Ideal Logic Heat 18 boiler, consult the user manual. This guide provides detailed explanations of the controls, settings, and safety features, allowing you to maximize your boiler’s performance and efficiency.

Troubleshooting Common Issues

While the Ideal Logic Heat 18 boiler is designed for reliable operation, occasional issues can arise. This troubleshooting guide helps you identify and address common problems. If the boiler fails to ignite, check the gas supply and ensure the gas valve is open. A flashing display may indicate a fault code, which can be deciphered using the user manual. If the boiler produces insufficient heat, check the thermostat settings and ensure all radiators are open. A lack of hot water might be due to a blocked water filter or a faulty hot water control. For persistent problems, consult the user manual for detailed troubleshooting steps. If the issue persists, contact a qualified heating engineer for professional assistance. Regular maintenance, such as cleaning the heat exchanger and checking the water pressure, can prevent many common issues and ensure optimal boiler performance.

Understanding Boiler Codes and Displays

The Ideal Logic Heat 18 boiler features a user-friendly display that provides information about its operation and any potential issues. The display shows various codes and symbols, each with a specific meaning. For example, “0” indicates the boiler is on standby, while “F2” might signal a fault with the flame sensor. The user manual provides a comprehensive list of codes and their explanations, allowing you to interpret the information displayed. Understanding these codes is essential for troubleshooting common problems and ensuring optimal boiler performance. If you encounter a code you don’t understand, refer to the user manual or contact a qualified heating engineer for assistance. By familiarizing yourself with the boiler’s codes and displays, you can effectively monitor its operation and address any potential issues promptly.

Maintaining Your Ideal Logic Heat 18

Regular maintenance is crucial for ensuring your Ideal Logic Heat 18 boiler operates efficiently and reliably for years to come. The user manual provides detailed instructions on how to perform basic maintenance tasks, such as cleaning the heat exchanger and checking the water pressure. It’s recommended to have a qualified heating engineer service your boiler annually. This professional service will include a thorough inspection of all components, cleaning, and adjustments as needed. By adhering to these maintenance recommendations, you can prevent potential issues, extend the lifespan of your boiler, and ensure optimal heating performance. Remember, a well-maintained boiler is a safe and efficient boiler.

Spare Parts and Accessories

Ensuring you have access to the right spare parts and accessories for your Ideal Logic Heat 18 boiler is essential for quick and efficient repairs. The user manual provides a comprehensive list of available spare parts, including filters, pumps, and control components. It’s recommended to purchase genuine Ideal parts, as these are specifically designed to meet the high standards of your boiler. You can usually find spare parts through authorized Ideal dealers or online retailers specializing in boiler components. Additionally, consider purchasing accessories like a programmer or a room thermostat to enhance the functionality and control of your heating system. Having the right parts and accessories on hand ensures that you can address any issues promptly and maintain the optimal performance of your Ideal Logic Heat 18 boiler.

Safety Considerations

Safety is paramount when dealing with any gas appliance, including the Ideal Logic Heat 18 boiler. The user manual emphasizes the importance of following all safety instructions and regulations. It’s crucial to ensure proper ventilation in the boiler room to prevent the accumulation of combustion products. Regularly check for gas leaks, using a specialized leak detector, and immediately address any detected issues. Never attempt to modify or repair the boiler yourself unless you’re a qualified gas engineer. Furthermore, keep children and pets away from the boiler and its controls, and ensure that all electrical connections are properly grounded. By adhering to these safety guidelines, you can minimize the risk of accidents and ensure the safe and reliable operation of your Ideal Logic Heat 18 boiler.

Frequently Asked Questions

Here are some common questions about the Ideal Logic Heat 18 boiler⁚

What is the status 0 on Ideal Logic Heat 18?

When “0” is displayed on the boiler screen, it indicates that the boiler is in standby mode. This means that the boiler is not receiving a demand for hot water or central heating.

What is the Ideal Logic Heat 18 boiler?

The Ideal Logic Heat 18 is a gas-fired condensing boiler with a maximum output of 18kW. It’s designed to provide efficient heating and hot water for domestic properties.

What is F2 on Ideal Logic Heat 18?

The error code “F2” typically indicates a fault with the boiler’s ignition system. This could be due to a problem with the spark ignition module, the gas valve, or the gas supply itself. It’s best to consult the user manual or contact a qualified engineer for assistance.

The Ideal Logic Heat 18 is a reliable and efficient boiler offering a range of features for comfortable heating and hot water. This comprehensive guide has provided essential information for understanding its operation, maintenance, and troubleshooting. Remember to consult the user manual for specific instructions and refer to a qualified professional for any repairs or installations. By following the guidelines outlined in this guide, you can ensure your Logic Heat 18 boiler functions optimally and provides years of reliable service.

Resources and Downloads

To further enhance your understanding and utilization of the Ideal Logic Heat 18 boiler, we recommend accessing the following resources⁚

  • Ideal Boilers Website⁚ Visit the official Ideal Boilers website to access a wealth of information, including user manuals, installation guides, troubleshooting tips, and spare parts ordering.
  • Online Forums and Communities⁚ Engage with other Ideal Logic Heat 18 owners and professionals in online forums and communities to exchange experiences, seek advice, and share solutions.
  • YouTube Tutorials⁚ Explore YouTube for video tutorials and demonstrations showcasing the installation, operation, and maintenance of the Ideal Logic Heat 18 boiler.

By utilizing these resources, you can gain deeper insights into the functionality and capabilities of your Ideal Logic Heat 18 boiler, ensuring its optimal performance and longevity.

english language revision booklet pdf

English Language Revision Booklet PDF⁚ A Comprehensive Guide

This comprehensive guide provides you with all the information you need to ace your GCSE English Language exams. Packed with insights, tips, and practice questions, this booklet is your one-stop shop for success.

Introduction

Welcome to the ultimate guide for your GCSE English Language revision! This booklet is your comprehensive companion for navigating the intricacies of the exam, equipping you with the knowledge and skills to excel. Our aim is to empower you with a clear understanding of the exam structure, key techniques, and effective strategies for tackling both Paper 1 (Explorations in Creative Reading and Writing) and Paper 2 (Writers’ Viewpoints and Perspectives). From analyzing language features and crafting compelling narratives to understanding viewpoints and constructing persuasive arguments, this booklet will guide you through every aspect of the exam, building your confidence and maximizing your potential.

Exam Structure and Overview

The GCSE English Language exam is divided into two papers, each with a duration of 1 hour and 45 minutes. Both papers are equally weighted, contributing 50% each to your overall grade. Paper 1 focuses on Explorations in Creative Reading and Writing, exploring fictional texts and engaging in imaginative writing. Paper 2 delves into Writers’ Viewpoints and Perspectives, examining non-fiction texts and developing your ability to express viewpoints. The exam assesses your understanding of language features, your ability to analyze and interpret texts, and your capacity to communicate effectively in written form. The assessment criteria encompass a range of skills, including reading comprehension, analysis, evaluation, and creative writing. By familiarizing yourself with the exam structure and assessment criteria, you can tailor your revision effectively and maximize your chances of success.

Paper 1⁚ Explorations in Creative Reading and Writing

Paper 1 of the GCSE English Language exam focuses on exploring fictional texts and engaging in imaginative writing. This paper is designed to assess your understanding of literary techniques and your ability to respond creatively to textual stimuli. Section A, Reading, requires you to analyze and interpret a given fictional text, focusing on identifying and explaining language features, themes, and character development. Section B, Imaginative Writing, allows you to showcase your creative writing skills by responding to a specific prompt. This section assesses your ability to craft a coherent and engaging narrative, employing a range of language techniques to convey your ideas and emotions effectively. By developing your understanding of fictional texts and practicing your creative writing skills, you can confidently approach Paper 1 and achieve a high score.

Section A⁚ Reading

Section A of Paper 1 focuses on your ability to analyze and interpret a fictional text. You’ll be presented with an extract and asked to answer a series of questions that assess your understanding of the text’s key ideas, themes, and characters. Be prepared to identify and explain the writer’s use of language features, such as imagery, metaphors, and symbolism, to create specific effects. It’s crucial to understand the context of the extract, considering its place within the wider narrative and the author’s purpose in writing it. You should also be able to identify and explain the writer’s use of structure, such as sentence length and paragraphing, and how these contribute to the overall meaning of the text. Practice identifying literary techniques and their effects, and learn to effectively cite textual evidence to support your interpretations. By mastering these skills, you’ll be well-equipped to succeed in Section A of Paper 1.

Section B⁚ Imaginative Writing

Section B of Paper 1 challenges you to unleash your creativity by writing a story or piece of descriptive writing. You’ll be given a stimulus, which could be a single word, a phrase, an image, or a short piece of text. Your task is to use this stimulus to inspire a piece of imaginative writing that demonstrates your ability to create vivid imagery, engage the reader’s emotions, and craft a compelling narrative. Remember to plan your writing carefully, considering structure, plot, character development, and theme. Practice writing different types of stories, such as narratives, descriptive pieces, and even poems, to broaden your creative writing skills. Pay attention to your use of language, employing varied sentence structures and a rich vocabulary to create impact. Ultimately, this section allows you to showcase your unique voice and storytelling abilities.

Paper 2⁚ Writers’ Viewpoints and Perspectives

Paper 2 delves into the world of non-fiction writing, focusing on how writers express their viewpoints and perspectives on various topics. You will encounter two unseen non-fiction texts, each with a distinct style, purpose, and audience. Your challenge is to analyze these texts, understanding the writers’ intentions and how they use language to persuade, inform, or entertain their readers. The reading section requires you to identify key information, interpret the writers’ choices, and analyze the impact of their language on the reader. The writing section then tasks you with expressing your own viewpoint on a given topic, using the insights gained from the reading texts as inspiration. This section tests your ability to present a reasoned argument, supported by evidence and persuasive language. Practice analyzing non-fiction texts, identifying key themes, and crafting well-structured arguments to excel in this paper.

Section A⁚ Reading

Section A of Paper 2 focuses on your ability to comprehend and analyze non-fiction texts. You will be presented with two unseen texts, each with distinct writing styles, purposes, and target audiences. Your task is to carefully read and understand these texts, identifying key information, interpreting the writers’ choices, and analyzing the impact of their language on the reader. The questions in this section will test your ability to⁚

  • Identify and interpret explicit and implicit information from the texts.
  • Analyze the writers’ use of language, including word choices, sentence structures, and literary techniques.
  • Explain the writers’ intentions and purposes in writing the texts.
  • Evaluate the effectiveness of the writers’ techniques in achieving their aims.
  • Compare and contrast the two texts, highlighting similarities and differences in style, content, and purpose.
  • Demonstrate your understanding of the writers’ perspectives and how they are conveyed through their writing.

Practice reading and analyzing non-fiction texts, focusing on understanding the writer’s message, their use of language, and the impact of their writing on the reader.

Section B⁚ Viewpoint Writing

In Section B, you will be presented with a task that requires you to write a persuasive piece expressing a viewpoint. This section assesses your ability to articulate a clear and well-supported argument, using language effectively to engage your reader and convince them of your perspective. The question will provide you with a context, a specific viewpoint to explore, and a target audience. Your response should be a well-structured piece of writing that demonstrates your understanding of the issue at hand and your ability to present a compelling and reasoned argument. To succeed in this section, you should⁚

  • Develop a strong and clear thesis statement that establishes your viewpoint.
  • Provide evidence to support your argument, drawing from your own knowledge, experience, and the texts you have studied.
  • Use a variety of persuasive techniques, such as logical reasoning, emotional appeals, and rhetorical devices, to engage your reader.
  • Structure your writing logically, using clear paragraphs, topic sentences, and transitions to guide your reader through your argument.
  • Pay careful attention to your language, choosing words and phrases that effectively communicate your viewpoint and engage your reader.

Practice writing persuasive pieces on a variety of topics, focusing on developing strong arguments, using effective language, and structuring your writing for clarity and impact.

Key Revision Techniques

Effective revision for English Language is about more than just memorizing facts; it’s about developing a deep understanding of key concepts and practicing essential skills. Here are some proven techniques to help you prepare for your exams⁚

  • Active Recall⁚ Instead of passively rereading notes, test yourself by recalling information without looking at them. Use flashcards, mind maps, or create your own practice questions.
  • Spaced Repetition⁚ Review material at increasing intervals (e.g., after a day, a week, a month) to strengthen your memory. This technique helps you retain information for the long term.
  • Practice Writing⁚ Regularly write essays, analyze texts, and answer exam-style questions. This will help you refine your writing style, develop your critical thinking skills, and become familiar with the format of the exam.
  • Work with a Study Partner⁚ Discuss concepts, quiz each other, and provide feedback on writing. Having a study buddy can make revision more engaging and help you identify areas you need to focus on.
  • Seek Feedback⁚ Share your work with your teacher or a tutor and ask for their feedback. This will help you identify any weaknesses in your understanding or writing skills and make improvements.

By utilizing these techniques, you’ll not only improve your understanding of the subject but also develop valuable study habits that will benefit you in your future academic endeavors.

Exam Tips and Strategies

The English Language exam can be daunting, but with the right strategies, you can approach it with confidence. Here are some tips to help you maximize your performance⁚

  • Read the Questions Carefully⁚ Understand exactly what the question is asking before you start writing. Pay attention to key words and instructions.
  • Plan Your Answers⁚ Before you start writing, take a few minutes to plan your response. Outline your main points and the evidence you will use to support them.
  • Use the Time Wisely⁚ Allocate your time wisely to ensure you have enough time to answer all the questions thoroughly. Don’t spend too much time on any one question;
  • Write Clearly and Concisely⁚ Use clear, concise language and avoid jargon or slang. Make sure your writing is well-structured and easy to follow.
  • Proofread Your Work⁚ Carefully proofread your answers for any errors in grammar, punctuation, and spelling. This will ensure that your work is presented professionally.

Remember, the key to success on any exam is preparation and practice. By following these tips, you’ll be well on your way to achieving your best possible score in English Language.

Sample Questions and Answers

To help you get a feel for the types of questions you’ll encounter in the English Language exam, here are some sample questions and answers⁚

  • Question⁚ What are four things you learn about the narrator in the following extract?
  • Answer⁚ The narrator is a young girl who is observant and detail-oriented. She is also curious and eager to learn. She is employed as a maid and seems to be in awe of her employer. She is also aware of the social hierarchy and her place within it.
  • Question⁚ Analyze the language used in the following extract. What effect does the author’s word choice create?
  • Answer⁚ The author uses vivid imagery and sensory details to create a sense of atmosphere. The use of strong verbs and adjectives helps to engage the reader emotionally. The repetition of certain words and phrases emphasizes the narrator’s feelings of awe and wonder.

By studying sample questions and answers, you’ll gain a better understanding of the expectations for each question type and develop your ability to analyze and interpret texts effectively.

Useful Resources and Websites

Beyond this booklet, numerous online resources can supplement your revision journey. Websites like StudyWise offer comprehensive revision guides specifically tailored for GCSE English Language, providing detailed notes, practice questions, and essay writing tips. For a deeper dive into literary techniques, consider exploring websites like “Literary Devices,” which offer definitions and examples of various literary techniques, helping you to understand the nuances of language used in texts.

Furthermore, platforms like YouTube host countless channels dedicated to English Language revision, offering video tutorials, exam tips, and analysis of past papers. These resources can provide alternative perspectives and explanations, enhancing your comprehension and confidence. Don’t hesitate to explore and utilize these resources to maximize your revision efforts and achieve outstanding results in your English Language exams.

1 2