golden curry instruction

Golden Curry, a beloved Japanese staple, offers a comforting and flavorful experience, frequently prepared in large batches for convenient enjoyment throughout the week.

This versatile dish, known as Kare Raisu, seamlessly blends rich flavors with tender meats and vibrant vegetables, making it a family favorite.

What is Golden Curry?

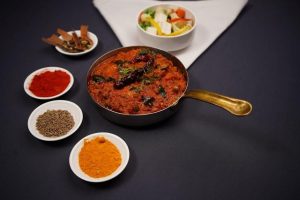
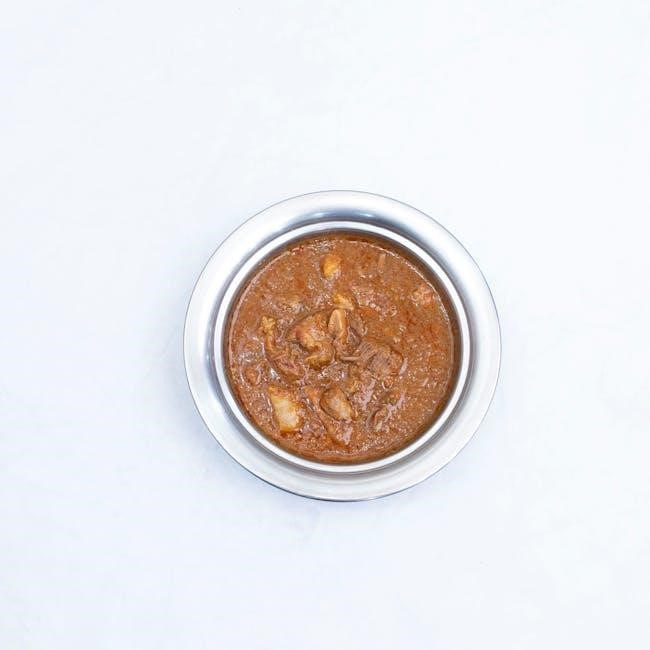
Golden Curry is a widely popular Japanese curry roux, instantly recognizable by its vibrant color and ease of use. It’s not a complete dish itself, but rather a concentrated block of flavor that forms the base of a hearty curry stew.

Typically sold in convenient packets (like the 184g packs often used), the roux contains a blend of curry powder, flour, oil, and other seasonings. It’s designed to be dissolved into water and simmered with meat and vegetables, quickly transforming into a delicious and comforting meal.

The beauty of Golden Curry lies in its simplicity and adaptability. It’s a foundational element in Kare Raisu (curry rice), a staple in Japanese cuisine, and provides a consistent, satisfying flavor profile.

History and Origins

While Golden Curry is synonymous with Japanese cuisine today, its roots trace back to British curry introduced during the Meiji era (late 19th century). The Japanese navy adopted curry to combat scurvy and boost morale, adapting the recipe over time.

Early versions were quite different from the modern, sweeter flavor profile. Over decades, Japanese cooks refined the dish, incorporating local ingredients and preferences. The development of convenient curry roux blocks, like Golden Curry, in the 20th century, democratized the dish, making it accessible to home cooks.

Today, Kare Raisu is a national dish, enjoyed by families across Japan, and Golden Curry remains a dominant force in its preparation, representing a fascinating fusion of culinary influences.

Ingredients for Golden Curry

Golden Curry relies on key components: roux blocks for the base, a protein like lamb or chicken, and a colorful array of vegetables.

Curry Roux Blocks

Curry roux blocks are the cornerstone of Golden Curry, providing the foundational flavor and thickness to the dish. These pre-made blocks, typically containing flour, oil, and curry powder, simplify the cooking process considerably.

They come in varying levels of spice, allowing for customization based on personal preference – from mild to extra hot. Jessica Nguyen’s recipe specifically calls for two packets (184g) of Japanese golden curry roux, demonstrating a common quantity for a substantial batch.

The roux melts into the simmering liquid, creating a smooth and luscious sauce that coats the meat and vegetables beautifully. Choosing a high-quality roux is crucial for achieving an authentic and satisfying Golden Curry experience.

Protein Choices (Beef, Pork, Chicken, Lamb)

Golden Curry is remarkably versatile when it comes to protein selection, accommodating a wide range of tastes and preferences. Popular choices include classic beef, tender pork, flavorful chicken, and robust lamb.

One Reddit user highlights lamb shoulder as an excellent option, recommending approximately 950g cut into 3cm chunks for a hearty curry; However, the beauty of this dish lies in its adaptability; any preferred cut of meat will work well.

The key is to brown the meat thoroughly before proceeding, as this step develops a rich, savory base for the curry. Consider the cooking time of each protein when deciding, ensuring it becomes wonderfully tender during the simmering process.

Vegetable Selection (Potatoes, Carrots, Onions, Pumpkin)

Golden Curry truly shines with a generous helping of vegetables, contributing both texture and nutritional value. Core ingredients typically include potatoes, carrots, and onions, forming the foundational flavor base.

However, don’t be afraid to experiment! A Reddit user suggests incorporating half a pumpkin – Kent or butternut squash varieties work beautifully – adding a subtle sweetness and creamy texture to the curry.

Vegetables should be chopped into similarly sized pieces, roughly 3cm, to ensure even cooking. The combination of root vegetables provides a satisfying heartiness, complementing the savory curry roux and tender meat perfectly.

Preparation: Getting Started

Before beginning, gather all ingredients and prepare for a delightful cooking experience. Proper preparation, including chopping and meat preparation, is key to success!

Chopping and Dicing Vegetables

Efficient vegetable preparation is crucial for even cooking and a pleasing texture in your Golden Curry. Begin with approximately four large carrots, chopping them into bite-sized pieces – roughly 1-inch chunks work well. Similarly, dice four to five potatoes into comparable sizes, ensuring they’ll cook through alongside the other ingredients.

Next, tackle one diced onion; this forms the aromatic base of the curry. For a touch of sweetness and color, consider adding half a pumpkin, chopped into similar-sized pieces as the carrots and potatoes. Consistent sizing is important for uniform cooking. Remember to wash all vegetables thoroughly before chopping to remove any dirt or residue.

Precise cuts aren’t necessary, but aim for manageable pieces that will soften during the simmering process, creating a harmonious blend of flavors and textures.

Preparing the Meat

Selecting and preparing your protein is a key step in crafting a delicious Golden Curry. Lamb shoulder, beef, pork, or chicken all work wonderfully, but lamb shoulder is a popular choice, often cut into 3cm (approximately 1.2 inch) chunks. Approximately 950g of meat is a good starting point for a substantial batch.

Regardless of your chosen protein, ensure it’s patted dry with paper towels before cooking. This promotes better browning, which significantly enhances the flavor of the curry. Trimming excess fat can also be beneficial, though some fat contributes to richness.

For tougher cuts like lamb shoulder, consider lightly seasoning the meat with salt and pepper before browning to further develop its savory profile. Proper meat preparation sets the foundation for a flavorful and tender curry.

Cooking Process: Step-by-Step

Begin by browning the meat, then sautéing onions, followed by adding vegetables and simmering. Finally, incorporate the curry roux and adjust liquid levels as needed.

Browning the Meat

Achieving a good sear on your chosen protein – be it lamb shoulder cut into 3cm chunks, beef, pork, or chicken – is crucial for developing a deep, rich flavor base for your Golden Curry.

Heat a generous amount of oil in a large, heavy-bottomed pot or Dutch oven over medium-high heat. Add the meat in batches, ensuring not to overcrowd the pot. Overcrowding will steam the meat instead of browning it.

Sear each side until nicely browned, approximately 3-5 minutes per side. This process creates Maillard reaction, enhancing the overall umami and complexity of the curry. Remove the browned meat and set aside, leaving the flavorful rendered fats in the pot.

Sautéing the Onions

Following the browning of the meat, utilize the rendered fats remaining in the pot to sauté one diced onion. This step builds another layer of flavor, softening the onion and releasing its natural sweetness.

Cook the onion over medium heat, stirring frequently, until it becomes translucent and slightly golden brown – approximately 5-7 minutes. Avoid burning the onion, as this will impart a bitter taste to the curry.

Properly sautéed onions form the aromatic foundation of the curry, complementing the savory notes from the browned meat. Ensure they are softened and fragrant before proceeding to the next step, creating a harmonious blend of flavors.

Adding Vegetables and Simmering

Once the onions are sautéed, introduce the chopped vegetables to the pot. Commonly used vegetables include diced potatoes, carrots, and pumpkin – approximately 4-5 potatoes, 4 large carrots, and half a pumpkin.

Stir well to coat the vegetables in the flavorful base of browned meat and sautéed onions. Add enough water to cover the vegetables, bringing the mixture to a boil.

Reduce the heat to low, cover the pot, and simmer for approximately 15-20 minutes, or until the vegetables are tender. This simmering process allows the flavors to meld and the vegetables to soften, creating a hearty and satisfying curry base.

Incorporating the Curry Roux

With the vegetables tender, it’s time to introduce the star of the show: the Japanese golden curry roux. Typically, two packets (around 184g total) are used for a substantial batch, but adjust based on desired thickness and flavor intensity.

Break the roux blocks into smaller pieces for easier dissolving. Reduce the heat to low and gradually add the roux pieces to the simmering curry, stirring constantly.

Continue stirring until the roux is completely dissolved and the curry sauce thickens to your liking. This usually takes about 5-10 minutes. Avoid high heat during this step to prevent sticking and ensure a smooth, consistent sauce.

Adjusting Water/Liquid Levels

Achieving the perfect curry consistency relies on careful water or liquid management. If the curry appears too thick after incorporating the roux, gradually add small amounts of water – about ¼ cup at a time – while stirring continuously.

Conversely, if the curry remains too thin, continue simmering uncovered for a longer duration, allowing excess liquid to evaporate. A gentle simmer is key; avoid boiling vigorously, which can alter the flavor.

Remember that the sauce will thicken further as it cools, so err on the side of slightly thinner during the cooking process. Patience and incremental adjustments are crucial for optimal results.
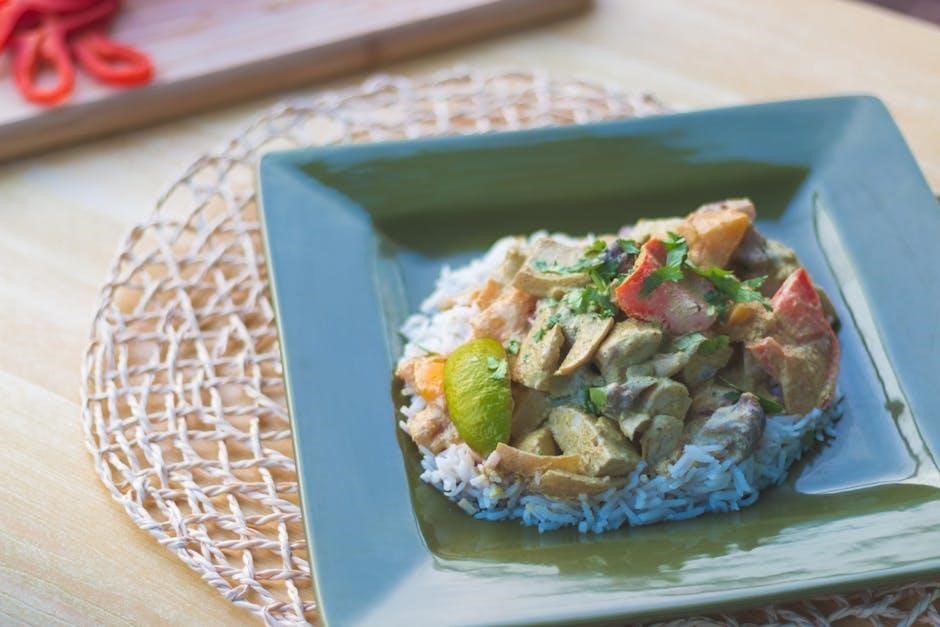
Serving Suggestions

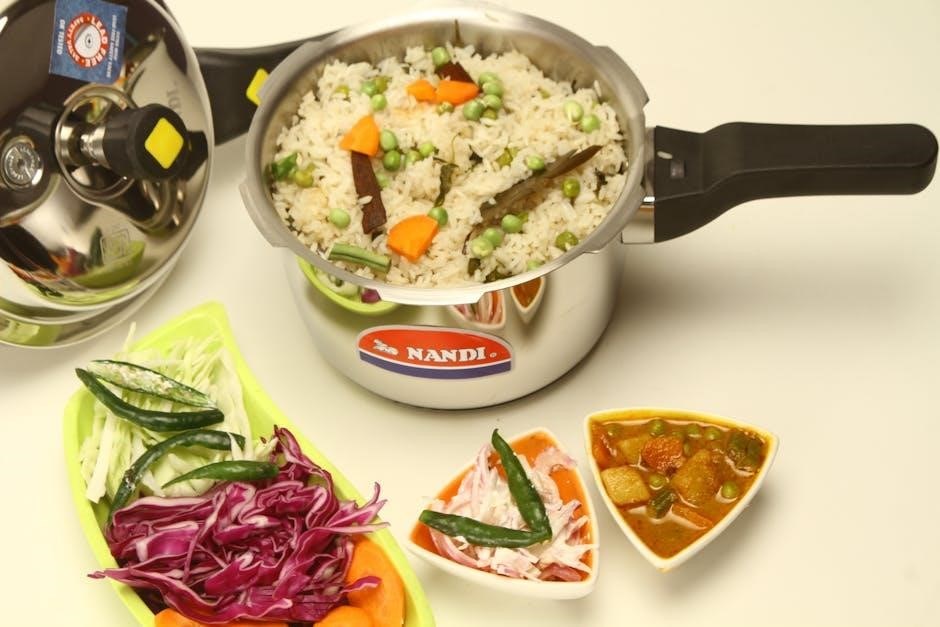
Golden Curry is traditionally served hot over a bed of fluffy white rice, creating a comforting and satisfying meal for any occasion.

Complement your curry with delightful side dishes to enhance the overall dining experience.

Traditional Serving with Rice

Golden Curry is almost universally enjoyed with steamed white rice in Japan, a practice deeply ingrained in its culinary tradition. The rice acts as the perfect neutral base, absorbing the rich and complex flavors of the curry sauce.

Typically, a generous portion of rice is placed in a bowl, and the hot curry is ladled over it. The ratio of curry to rice is often a matter of personal preference, but a good balance ensures every bite is flavorful.

Japanese short-grain rice is preferred for its slightly sticky texture, which helps it hold the curry sauce beautifully. Garnishes are minimal, allowing the curry’s flavors to shine, though fukujinzuke (pickled radish) is a common accompaniment.

This simple yet satisfying presentation is the cornerstone of the Kare Raisu experience.

Side Dishes to Complement Curry

Golden Curry, while a complete meal in itself, is often enhanced by thoughtfully chosen side dishes that provide textural contrast and refreshing flavors. Fukujinzuke, a vibrant mix of pickled vegetables, is a classic pairing, offering a sweet and tangy counterpoint to the curry’s richness.

Another popular choice is rakkyo, pickled scallions, which provide a sharp, slightly pungent bite. Simple side salads with a light vinaigrette dressing cleanse the palate between bites of curry and rice.

For a more substantial accompaniment, consider tonkatsu (deep-fried pork cutlet) served alongside, creating a delightful katsu curry combination. Japanese pickles, like takuan (pickled daikon radish), also offer a refreshing contrast.

These sides elevate the overall dining experience.

Variations and Customization

Golden Curry readily adapts to personal preferences! Adjust spice levels, incorporate fruits like apples or mangoes, or explore diverse protein choices for unique flavors.

Spice Level Adjustment

Golden Curry roux blocks come in varying levels of spiciness, typically mild, medium-hot, and hot. Selecting the appropriate block is the primary method for controlling the heat.

However, customization doesn’t end there! For a milder curry, begin with a mild roux and add a touch of sweetness, like a grated apple or a teaspoon of honey, to balance the flavors.

To increase the heat beyond the “hot” roux, consider incorporating a pinch of cayenne pepper, a dash of chili powder, or even a few drops of your favorite hot sauce. Taste frequently and adjust incrementally to achieve your desired spice level. Remember, you can always add more, but it’s difficult to remove heat once it’s been added!

Experimenting with different chili pastes or flakes can also introduce unique flavor profiles alongside the spice.

Adding Fruits (Apples, Mangoes)

Golden Curry benefits surprisingly well from the addition of fruits, creating a delightful sweet and savory balance. Apples, particularly, are a popular choice, lending a subtle sweetness and helping to tenderize the meat during simmering.

Grated or diced apples should be added during the vegetable simmering stage, allowing their flavors to meld with the curry. Mangoes, while less traditional, offer a tropical twist, best incorporated towards the end of the cooking process to retain their texture and vibrant flavor.

The natural sugars in these fruits counteract the curry’s spice, creating a more rounded and complex taste. Don’t be afraid to experiment with other fruits like peaches or pears for unique variations!

A small amount of fruit goes a long way, so start with a half cup and adjust to your preference.

Using Different Types of Meat

Golden Curry is incredibly adaptable to various protein choices, extending beyond the typical beef, pork, or chicken. Lamb shoulder, cut into 3cm chunks, provides a rich and flavorful base, particularly when browned thoroughly before simmering.

While beef and pork are common, chicken thighs offer a tender and juicy alternative. For a leaner option, consider using chicken breast, but be mindful of overcooking. Experimenting with different cuts impacts the final texture and taste.

Even seafood, like shrimp or firm white fish, can be incorporated, though added later in the cooking process to prevent overcooking. Remember to adjust cooking times based on the meat selected.

The key is to ensure the meat is properly browned to develop depth of flavor before adding the vegetables and curry roux.

Troubleshooting Common Issues

Golden Curry can sometimes be too thick or thin, or lack sufficient flavor; adjustments to liquid levels and seasoning are easily made for perfection.

Curry Too Thick

If your Golden Curry is excessively thick, don’t worry – it’s a common issue easily remedied! The primary culprit is often an insufficient amount of liquid during the simmering process.

Gradually add small amounts of water, about ¼ cup at a time, stirring continuously until the desired consistency is achieved. You can also incorporate a splash of soy sauce or even a touch of apple juice for added depth of flavor alongside the increased liquidity.

Avoid adding large quantities of water at once, as this can dilute the curry’s rich taste. Remember to simmer gently after each addition to allow the flavors to meld and the sauce to properly thin out. Patience is key to a perfectly textured curry!

Curry Too Thin

Encountering a thin Golden Curry? This usually indicates too much liquid was used during cooking, or insufficient roux blocks were incorporated. Don’t fret, it’s easily fixable!

The simplest solution is to create a slurry by mixing one tablespoon of cornstarch with two tablespoons of cold water. Gradually whisk this slurry into the simmering curry, stirring constantly. This will help to thicken the sauce. Alternatively, you can dissolve a small amount of additional curry roux block in a little hot water and stir that in.

Simmer for a few more minutes after each addition, allowing the sauce to reach your preferred consistency. Avoid adding more roux all at once, as it can quickly become overly thick.

Curry Not Flavorful Enough

Is your Golden Curry lacking that satisfying depth of flavor? Several adjustments can elevate the taste profile. First, ensure you’ve adequately browned the meat – this builds a crucial flavor base. Sautéing the onions thoroughly is also key; don’t rush this step!

Consider adding a dash of soy sauce, Worcestershire sauce, or even a small amount of grated apple or mango to introduce subtle sweetness and umami. A pinch of garam masala can also boost the complexity.

Finally, remember that the curry roux itself contributes significantly to the flavor. Using a higher quality or darker roux can provide a richer, more intense taste.

Golden Curry: Nutritional Information

Golden Curry’s nutritional content varies based on ingredients; however, it generally provides calories, vitamins, and minerals from the meat, vegetables, and roux.

Calorie Count

Estimating the calorie count in Golden Curry is complex, as it heavily depends on portion size and ingredient choices. A standard serving, typically with rice, can range from approximately 600 to 800 calories.

The meat selection significantly impacts this number; lamb shoulder, often used in larger batches, contributes more calories than chicken or pork. Similarly, the amount of roux used directly affects the overall calorie density.

Vegetables like potatoes and carrots add carbohydrates and fiber, while onions contribute fewer calories. Considering these variables, mindful portion control and leaner protein options are key for those watching their calorie intake. Adjusting the amount of roux can also help manage the calorie content.

Key Vitamins and Minerals

Golden Curry, beyond its delicious flavor, offers a surprising array of essential nutrients, largely thanks to its vegetable content. Carrots are a rich source of Vitamin A, crucial for vision and immune function; Potatoes contribute Vitamin C and potassium, supporting overall health and blood pressure regulation.

Onions provide Vitamin C and antioxidants, while the meat component offers iron and protein, vital for energy and muscle development. The curry roux itself may contain some added vitamins and minerals, depending on the brand.

However, it’s important to note that the nutritional value can vary based on the specific ingredients used and portion sizes. A balanced curry meal contributes to a well-rounded diet.

take and bake baguette instructions

Understanding Take and Bake Baguettes

Take and bake baguettes offer a delightful experience, boasting a chewy interior and a crisp, golden crust, mirroring artisan bakery quality with simple ingredients.

Achieving a perfect baguette requires practice, but these convenient options bring that bakery freshness closer to home, even for beginner bakers, with minimal time investment.

What are Take and Bake Baguettes?

Take and bake baguettes represent a convenient compromise between freshly baked bread from a bakery and the effort of making it entirely from scratch. These are pre-shaped, unbaked loaves, typically frozen or refrigerated, ready for the consumer to finish the baking process at home.

Essentially, you’re receiving a dough that has undergone the initial stages of preparation – mixing, kneading, and shaping – but requires a final bake to achieve that signature crispy crust and soft, airy interior. The simplicity lies in the core ingredients: flour, water, salt, and yeast, mirroring traditional baguette recipes.

However, the true artistry, usually residing in the baker’s technique, is partially transferred to you, the home baker, offering a rewarding experience and a taste remarkably close to an artisan loaf.

The Appeal of Convenience

The primary draw of take and bake baguettes is, undeniably, convenience. They eliminate the often-daunting process of working with yeast and achieving the correct dough consistency, saving significant time and effort in the kitchen. For those craving a fresh, bakery-style baguette without the complexities of traditional bread making, these are an ideal solution.

They cater to both beginner bakers and busy individuals who appreciate quality bread but lack the hours required for a full-scale baking project. While perfection may require practice, these loaves offer a consistently good result with minimal skill needed.

The ability to have a warm, crusty baguette on the table with a short baking time is a compelling advantage, bridging the gap between homemade and store-bought options.

Ingredients and What to Expect

Take and bake baguettes typically contain flour, water, salt, and yeast – a testament to simplicity. Expect a chewy interior and a delightfully crisp, golden crust!

Typical Ingredients List

Take and bake baguette ingredient lists are wonderfully concise, reflecting the traditional French baking philosophy. You’ll almost always find unbleached wheat flour as the primary component, providing the structure for the loaf. Water, of course, is essential for hydration and dough development.

Salt plays a crucial role, not only enhancing flavor but also controlling yeast activity. Active dry yeast, or sometimes instant yeast, is the leavening agent, responsible for the baguette’s airy texture. Some variations may include a small amount of malt flour to aid in browning and sweetness.

Occasionally, you might encounter dough conditioners to improve handling, but high-quality versions prioritize the core four ingredients: flour, water, salt, and yeast. These simple components, expertly combined, create a truly exceptional bread.

Quality of Ingredients & Expected Taste

The quality of ingredients significantly impacts the final baguette. Higher-protein flour yields a chewier texture and better structure, while filtered water contributes to a cleaner flavor. Expect a delightful contrast – a deeply golden, crisp crust giving way to a soft, airy interior riddled with irregular holes;

A well-made take and bake baguette should possess a subtle, wheaty aroma with a hint of yeast. The taste should be mildly tangy, with a satisfying saltiness that enhances the flour’s natural sweetness. Avoid products with overly processed ingredients or artificial flavors.

Ultimately, a good baguette delivers a rustic, authentic experience, transporting you to a French bakery with every bite.

Preparing for Baking

Before baking, ensure your oven is ready and you have essential tools like a baking sheet or stone for optimal crust development and even heating.

Oven Temperature and Rack Position

Optimal baking typically requires a higher oven temperature, generally between 400°F (200°C) and 450°F (232°C), to replicate the intense heat of a professional bakery oven. This heat is crucial for achieving that desirable, crispy crust.

Positioning the baguette on the center rack ensures even heat distribution, promoting consistent baking throughout. However, some bakers suggest placing it slightly lower to encourage a more robust bottom crust.

Avoid overcrowding the oven; allow sufficient space around the baguette for proper air circulation. Preheating the oven thoroughly is paramount – a fully heated oven is essential for the initial burst of steam and crust formation. Consistent temperature is key for a successful bake.

Necessary Baking Tools

Successfully baking take and bake baguettes requires minimal specialized equipment, making it accessible for home bakers. A sturdy baking sheet is fundamental, ideally one that doesn’t readily conduct heat to prevent burning the bottom crust.

A spray bottle is incredibly useful for creating steam within the oven, vital for achieving a crispy exterior. Parchment paper can prevent sticking and simplify cleanup.

While not essential, a sharp knife or lame is beneficial for scoring the baguette, controlling expansion during baking. A baking stone can further enhance crust development, but isn’t a necessity. Having these tools ensures a delightful, bakery-style result.

Baking Instructions: Step-by-Step

Baking take and bake baguettes involves preheating, preparing the dough (if needed), and carefully monitoring the time in the oven for a golden result.

Preheating the Oven

Preheating your oven is a crucial first step when baking take and bake baguettes, ensuring even cooking and a beautifully crisp crust. Most packages will specify a precise temperature, typically ranging between 375°F and 400°F (190°C ⎯ 200°C).

Allow ample time for the oven to reach the correct temperature – usually around 20-30 minutes. An oven thermometer is highly recommended to verify accuracy, as variations can significantly impact the final product. Proper preheating guarantees the baguette’s interior cooks thoroughly while the exterior develops that desirable golden-brown color and satisfying crunch. Don’t rush this stage; patience is key to a successful bake!

Preparing the Baguette (if needed)

Some take and bake baguettes require minimal preparation, while others benefit from a few simple steps before baking. Check the packaging instructions carefully! Often, lightly scoring the top of the baguette with a sharp knife allows steam to escape during baking, preventing bursting and promoting a more even crust.

Occasionally, a light spritz of water over the surface before baking can also enhance crust development. However, avoid over-wetting. If the package suggests it, you might need to gently reshape the baguette if it has slightly flattened during transport. Remember, the goal is to optimize the baguette for a perfect rise and texture.

Baking Time and Monitoring

Generally, take and bake baguettes require approximately 18-25 minutes of baking time at a temperature specified on the packaging – typically between 375°F and 400°F. However, ovens vary, so close monitoring is crucial. Begin checking for doneness around the 15-minute mark.

A perfectly baked baguette will exhibit a deep golden-brown crust and sound hollow when tapped on the bottom. Avoid opening the oven frequently, as this releases heat and can affect the rise. If the crust is browning too quickly, reduce the oven temperature slightly. Patience and observation are key to achieving that ideal, crispy exterior and chewy interior!

Achieving a Crispy Crust

Steam is vital for a superb crust! Spritzing the baguette with water during baking, or creating oven steam, helps develop that desirable, golden-brown crispness.

The Role of Steam

Steam plays a crucial, often underestimated, role in achieving that signature crispy crust on baguettes. During the initial stages of baking, introducing steam into the oven environment dramatically impacts the dough’s surface.

Essentially, steam delays the formation of the crust, allowing the baguette to fully expand before it sets. This extended expansion contributes to a lighter, airier interior with those characteristic irregular holes. Without sufficient steam, the crust forms too quickly, restricting the dough’s rise and resulting in a denser loaf.

The steam also gelatinizes the starches on the surface of the dough, which contributes to the beautiful golden-brown color and that satisfyingly crisp texture. Think of it as creating the perfect conditions for a truly exceptional baguette experience!

Spritzing with Water

If your oven doesn’t have a steam injection feature, don’t worry! You can effectively create steam by spritzing water inside the oven cavity during the first few minutes of baking your take and bake baguette.

Carefully open the oven door and use a spray bottle filled with water to lightly mist the oven walls – avoid directly spraying the baguette itself. Repeat this process a couple of times within the first 5-10 minutes.

The rapid evaporation of the water generates the necessary steam. Be cautious, as the oven is hot! This simple technique significantly enhances crust development, mimicking professional bakery results and ensuring a delightfully crispy exterior alongside a soft, chewy interior.

Troubleshooting Common Issues

Baguette baking can present challenges! Pale crusts may need longer baking, while overly hard results suggest reduced baking time or excessive heat.

Uneven baking often indicates inconsistent oven temperature, requiring adjustments for a perfectly golden, evenly textured loaf.

Baguette is Too Pale

A pale baguette often indicates insufficient baking time or a lower-than-recommended oven temperature. Don’t immediately assume a problem; extend the baking duration by 3-5 minutes, carefully monitoring to prevent burning.

Ensure your oven is accurately calibrated, as variations can significantly impact browning. If extending the time doesn’t yield desired color, slightly increase the oven temperature by 25°F (15°C) for the remaining baking period.

Remember, a deep golden-brown crust is the goal, signifying proper Maillard reaction development. Consider a quick spritz of water during the last few minutes to encourage crust formation, but avoid excessive moisture.

Finally, ensure the baguette isn’t shielded by other items in the oven, allowing for even heat circulation and optimal browning.

Baguette is Too Hard

A baguette that’s excessively hard usually results from overbaking, leading to excessive moisture loss. Reduce the baking time by a few minutes in subsequent attempts, closely observing the crust’s color and texture.

Consider lowering the oven temperature slightly – a reduction of 25°F (15°C) can make a noticeable difference. Remember, the ideal baguette boasts a crisp crust and a chewy interior, not a rock-hard exterior.

If the baguette feels hard even immediately after baking, it may indicate a lack of steam during the initial baking phase. Experiment with creating more steam in your oven.

Allowing the baguette to cool completely before slicing can also help retain some moisture, preventing it from becoming overly brittle.

Uneven Baking

Uneven baking in a take and bake baguette often stems from inconsistent oven temperature or improper rack positioning. Ensure your oven is accurately calibrated and preheated thoroughly before baking.

Rotating the baguette halfway through the baking time is crucial for even browning. This ensures all sides receive equal heat exposure, preventing one side from becoming overly dark while the other remains pale.

Avoid overcrowding the oven; allow sufficient space around the baguette for hot air to circulate freely. This promotes consistent heat distribution and prevents localized hot spots.

If using a baking stone, preheat it along with the oven to guarantee even heat transfer from the stone to the baguette’s base.

Serving and Storage

Take and bake baguettes are best enjoyed fresh, paired with cheeses, soups, or spreads. Store leftovers in a paper bag to maintain crustiness.

For longer storage, freezing is ideal; slice before freezing for easy access to a delightful, warm baguette anytime.

Best Ways to Serve

A freshly baked take and bake baguette elevates any meal! Its versatility shines when paired with classic French dips, creamy soups, or a vibrant cheese board; Consider slicing and serving alongside a robust pâté or a selection of artisanal cheeses for an authentic experience.

For a simple yet satisfying snack, drizzle with olive oil, sprinkle with herbs, and enjoy. The baguette’s crisp crust and chewy interior are perfect for sandwiches, bruschetta, or garlic bread. Don’t underestimate the power of a warm baguette with butter – a timeless delight! It’s a fantastic accompaniment to salads, pasta dishes, or even enjoyed on its own.

Experiment with different toppings and dips to discover your favorite combinations.

Proper Storage Techniques

To maintain the delightful crispness of your take and bake baguette, proper storage is key. Once cooled completely, store the baguette in a paper bag – plastic traps moisture, leading to a soggy crust. Avoid airtight containers for the same reason.

For short-term storage (1-2 days), a bread box is ideal. If you’re not planning to consume it within a day, consider slicing the baguette and freezing it. Wrap tightly in plastic wrap, then place in a freezer bag.

To refresh a slightly stale baguette, lightly spritz with water and reheat in a warm oven for a few minutes. This restores some of the original crispness. Remember, baguettes are best enjoyed fresh!

Advanced Techniques (Optional)

Scoring the baguette before baking allows for expansion, while a baking stone replicates a professional oven’s heat, enhancing crust development and texture.

Scoring the Baguette

Scoring a take and bake baguette, though often pre-scored, allows for controlled expansion during baking, preventing unsightly bursts and ensuring a more aesthetically pleasing loaf. Using a lame or a very sharp knife, make diagonal slashes across the surface, typically about ½ inch deep.

These cuts not only direct the oven spring – the rapid expansion of the dough – but also contribute to the final crust texture. The angle and depth of the scores influence how the baguette will open and bloom. Experimentation is key to mastering this technique, but even a simple scoring pattern can elevate the final product.

Remember, a properly scored baguette will exhibit beautiful “ears” – the raised, crispy edges formed along the slashes, a hallmark of a well-baked loaf.

Using a Baking Stone

Employing a baking stone significantly enhances the crust development of take and bake baguettes, mimicking the heat retention of a professional brick oven. Preheat the stone in the oven for at least 30-60 minutes at the recommended baking temperature to ensure it’s thoroughly heated.

Carefully transfer the prepared baguette onto the hot stone; this initial contact creates immediate heat, promoting a crispier crust. The stone’s ability to evenly distribute heat also minimizes the risk of uneven baking. Consider using a pizza peel dusted with cornmeal to facilitate easy transfer.

A baking stone is a worthwhile investment for anyone serious about achieving bakery-quality results at home, elevating the texture and overall experience.

mirro pressure cooker instruction manual

Mirro Pressure Cookers boast a rich history, offering both cooking and canning capabilities; finding the correct instruction manual is crucial for safe and effective operation.

Older manuals may contain outdated, potentially unsafe guidance, especially concerning processing times and recipes, rendering them less useful for modern models.

Resources like Yahoo Groups provide archived manuals, while Appliance Factory Parts offers current documentation for specific Mirro models, ensuring user safety.

What is a Mirro Pressure Cooker?

Mirro Pressure Cookers are versatile kitchen appliances designed for both rapid cooking and safe home canning.
They utilize sealed, pressurized environments to elevate boiling points, drastically reducing cooking times for various foods.

These cookers, detailed in their instruction manuals, come in diverse models, each with specific features and safety protocols.

Understanding your cooker’s capabilities, as outlined in the manual, is vital for optimal performance and preventing accidents.

History and Evolution of Mirro Cookers

Mirro has a long-standing reputation in pressure cooking and canning, evolving over decades to meet changing culinary needs.
Early instruction manuals focused on basic pressure cooking techniques, while later editions incorporated canning instructions.

Modern Mirro cookers feature updated safety mechanisms and designs, necessitating revised manuals.

The evolution reflects advancements in materials and a growing emphasis on user safety, detailed in current documentation.

Understanding Your Mirro Pressure Cooker Model

Identifying your specific Mirro model number, often found on the base, is vital for accessing the correct instruction manual and ensuring proper, safe operation.

Identifying Your Specific Model Number

Locating your Mirro pressure cooker’s model number is the first step towards accessing the correct instruction manual and parts lists. This number is typically stamped or affixed to the bottom or back of the cooker itself.

Knowing this number allows you to download the precise manual from Appliance Factory Parts or find relevant information within the Yahoo Groups archive, ensuring safe and effective use.

Key Components and Their Functions

Mirro pressure cookers feature essential components like the lid, sealing ring, pressure regulator (weight or valve), and safety features. The lid ensures a sealed environment, while the sealing ring maintains pressure.

Understanding the pressure regulator’s role in controlling internal pressure, and familiarizing yourself with safety mechanisms, is vital for safe operation, as detailed in your instruction manual.

Safety First: Important Precautions

Before use, thoroughly read the instruction manual. Never attempt to pressure fry with oil, and always follow guidelines to prevent burns and potential injuries.

Reading the Manual Before Use

Prior to operating your Mirro pressure cooker, carefully and completely read the provided instruction manual. Understanding all directions is paramount for safe operation and preventing accidents.

Incorrect usage can lead to serious burns or other injuries; the manual details essential safety precautions and proper techniques for both pressure cooking and canning.

Familiarize yourself with all components and their functions before first use.

Preventing Burns and Serious Injuries

Mirro pressure cooker instruction manuals emphasize avoiding contact with hot surfaces; always utilize handles or knobs. Never attempt to force the lid open while pressure remains inside the cooker.

Understand the pressure release methods – natural and quick – to prevent steam burns. Incorrect operation poses a significant risk of severe injury, so heed all warnings.

Proper use is vital for safety.

Operating Instructions: Pressure Cooking Mode

Mirro manuals detail adding food and liquid, securely sealing the cooker, and allowing pressure to build before setting appropriate cooking times and pressure levels.

Adding Food and Liquid

Mirro instruction manuals emphasize filling the cooker appropriately; generally, liquids should reach the minimum fill line, but never exceed the maximum fill mark, to prevent dangerous pressure buildup;

Solid foods expand during cooking, so adequate liquid ensures proper heat distribution and prevents scorching.

Always consult your specific model’s manual for precise liquid requirements based on the food being prepared, as these vary significantly.

Sealing the Cooker and Building Pressure

Mirro manuals detail a secure lid locking mechanism, crucial for pressure development; ensure the gasket is properly seated and the lid aligns correctly before locking it into place.

Heat the cooker on medium-high until steam visibly escapes, then reduce heat to maintain consistent pressure.

Refer to your manual for specific pressure levels and corresponding heat settings, as these vary by model and recipe.

Cooking Times and Pressure Levels

Mirro instruction manuals provide precise cooking times and pressure levels tailored to various foods; these are vital for safe and successful pressure cooking.

Times differ based on food quantity, altitude, and desired tenderness – always consult your manual’s charts.

Modern cookers often feature weighted gauges or digital displays indicating pressure, while older models rely on gauge readings.

Operating Instructions: Canning Mode

Mirro canning requires meticulous jar and lid preparation, alongside adherence to precise processing times detailed in your instruction manual for food safety.

Proper cooling and jar removal techniques, as outlined in the manual, are essential for successful preservation.

Preparing Jars and Lids

Mirro instruction manuals emphasize thoroughly washing jars in hot, soapy water, rinsing them well, and keeping them hot until filling; this prevents thermal shock.

New lids require simmering in hot water (do not boil) to soften the sealing compound, ensuring a proper vacuum seal during processing.

Inspect jars for chips or cracks, discarding any damaged ones, as they can compromise the canning process and food safety.

Processing Times for Different Foods

Mirro manuals detail specific processing times based on food type, jar size, and altitude; accurate timing is vital for safe canning.

Low-acid foods like vegetables and meats require higher temperatures and longer processing times than high-acid foods like fruits and pickles.

Always consult a current, reliable Mirro chart or updated USDA guidelines, as older times may be inaccurate and pose a food safety risk.

Cooling and Removing Jars

Mirro instruction manuals emphasize allowing the cooker to cool naturally before attempting to remove jars; forced cooling can cause seal failures or glass breakage.

Once cooled, carefully remove jars using a jar lifter, avoiding tilting which could disrupt the sealing process.

Inspect seals after 12-24 hours; jars that haven’t sealed must be refrigerated and consumed promptly or reprocessed with new lids.

Troubleshooting Common Issues

Mirro manuals address issues like failure to seal, pressure release problems, and food sticking; always consult your specific model’s guide for solutions.

Proper understanding of these issues ensures safe and efficient operation of your pressure cooker.

Cooker Won’t Seal

If your Mirro cooker fails to seal, ensure the gasket is correctly positioned and clean; inspect the rim for debris or damage.

Verify sufficient liquid is present, as inadequate liquid prevents proper pressure build-up.

Check the vent pipe and overpressure plug for obstructions; a faulty gasket often requires replacement, available through Appliance Factory Parts or online retailers.

Pressure Release Problems

Difficulty releasing pressure often stems from a blocked vent pipe; ensure it’s clear of food particles.

For quick release, carefully move the regulator to the vent position, avoiding direct contact with escaping steam.

If natural release is preferred, allow the cooker to cool undisturbed; persistent issues may indicate a faulty regulator needing replacement.

Food Burning or Sticking

Food burning frequently occurs with insufficient liquid; always adhere to minimum liquid requirements specified in recipes.

Ensure adequate stirring before sealing the cooker to prevent sticking, particularly with starchy foods.

Lowering the heat after pressure is reached can also help; a slightly longer cooking time is preferable to scorched results.

Cleaning and Maintenance

Proper washing after each use prevents residue buildup; avoid abrasive cleaners that could damage the cooker’s surface.

Store your Mirro cooker in a dry place, ensuring all components are completely dry to prevent corrosion.

Proper Washing Techniques

After each use, disassemble all removable parts – the lid, sealing ring, and steam vent – and wash them in warm, soapy water.

The cooker body can be washed similarly, but avoid abrasive cleaners or scouring pads, as these can damage the finish.

Ensure all parts are thoroughly rinsed and dried before reassembly and storage to prevent odors or corrosion.

Storage Recommendations

When storing your Mirro cooker, ensure all parts are completely dry to prevent mildew or rust.

Store the unit in a cool, dry place, away from direct sunlight and extreme temperatures.

Avoid stacking heavy items on top of the cooker, which could damage the lid or body; keep the manual accessible for future reference.

Understanding Pressure Release Methods

Mirro cookers utilize natural and quick release methods; understanding each is vital for safety and optimal cooking results, as detailed in the manual.

Natural Pressure Release

Natural Pressure Release (NPR) involves allowing the Mirro cooker to cool down and depressurize on its own, without intervention. This method is ideal for soups, stews, and foods with a high liquid content.

The manual emphasizes that NPR takes longer, often 10-30 minutes, but results in more tender food and prevents food from being forced up the steam vent.

Avoid rushing this process for optimal results.

Quick Pressure Release

Quick Pressure Release (QPR), as detailed in the Mirro manual, involves carefully releasing steam using the pressure regulator or vent. This is suitable for vegetables or foods where overcooking is a concern.

Exercise extreme caution to avoid burns from the escaping steam; always direct the steam away from your face and hands.

QPR is faster but can sometimes cause foaming.

Recipes for Mirro Pressure Cookers

Mirro manuals often include recipes like Beef Stew and Chicken and Rice, but always verify cooking times with updated guidelines for your specific model.

Beef Stew Recipe

Mirro manuals frequently feature classic Beef Stew recipes, adaptable to pressure cooking for faster results. Typically, these involve browning cubed beef, then pressure cooking with vegetables like carrots, potatoes, and onions in beef broth.

Always consult your specific Mirro model’s manual for precise cooking times, as they vary based on cooker type and altitude; generally, expect around 30-45 minutes under pressure.

Remember to follow safety guidelines for pressure release, either natural or quick, as detailed in your instruction manual.

Chicken and Rice Recipe

Mirro pressure cooker instruction manuals often include a simple Chicken and Rice recipe, perfect for a quick weeknight meal. This usually involves searing chicken pieces, then combining them with rice and broth within the cooker.

Cooking times depend on your Mirro model; refer to your manual for specific instructions, typically ranging from 20-25 minutes under pressure.

Ensure proper liquid ratios to prevent burning, and always prioritize safety precautions outlined in your manual during operation and pressure release.

Differences Between Older and Newer Models

Mirro pressure cooker instruction manuals reveal significant changes over time; older models have different usage directions and require recipe adjustments for modern cookers.

Consequently, outdated processing times and recipes found in older manuals are often inaccurate and potentially unsafe for newer Mirro units.

Changes in Usage Directions

Mirro pressure cooker instruction manuals demonstrate evolving safety standards and operational procedures. Older manuals often lacked detailed warnings about pressure frying with oil, a practice now strictly prohibited.

Modern manuals emphasize the importance of thoroughly reading all instructions before use, a critical step to prevent burns and serious injuries. Newer models may also feature updated sealing mechanisms and pressure regulation systems, necessitating revised operating procedures.

Recipe Adjustments for Modern Cookers

Mirro pressure cooker instruction manuals highlight that recipes from older manuals may be inaccurate for newer models. Processing times and cooking durations often require adjustment due to variations in heat distribution and pressure regulation.

Always consult current Mirro documentation or reliable sources for updated recipes, ensuring food safety and optimal results. Ignoring these adjustments could lead to undercooked or overprocessed food.

Finding Replacement Parts

Mirro pressure cooker instruction manuals often direct users to Appliance Factory Parts and various online retailers for genuine replacement components.

Maintaining your cooker’s functionality relies on sourcing correct parts, ensuring continued safe and efficient operation.

Appliance Factory Parts

Appliance Factory Parts serves as a dedicated resource for Mirro pressure cooker owners seeking authentic replacement components, including gaskets, seals, and valves.

They directly host Mirro owner’s manuals, like the 92122 model, offering convenient access to crucial instruction manual information alongside parts diagrams.

This platform streamlines the process of finding the correct parts, ensuring compatibility and maintaining the safety and functionality of your pressure cooker.

Online Retailers

Numerous online retailers carry Mirro pressure cooker parts and, occasionally, downloadable instruction manuals, though verifying manual accuracy is vital.

While not a primary source for official documentation, these platforms offer convenience for acquiring replacement components like seals and weights.

Always cross-reference part numbers and consult Appliance Factory Parts or manufacturer websites for the most reliable instruction manual access.

Resources and Further Information

Yahoo Groups Pressure Cooker Recipes Archive and official manufacturer websites provide valuable Mirro resources, including instruction manuals and support.

Yahoo Groups Pressure Cooker Recipes Archive

The Yahoo Groups Pressure Cooker Recipes Archive (link) is a valuable repository for older Mirro models’ instruction manuals.

Access often requires joining the group, but it offers a wealth of historical documentation, including the Mirro PressCookerManual2005.pdf, aiding in understanding vintage cooker operation and safety.

Manufacturer Websites

Appliance Factory Parts (link) hosts Mirro owners manuals as a courtesy, recognizing the difficulty in locating them elsewhere online.

These resources are specifically for older models, offering crucial guidance, but users should prioritize safety and carefully read all instructions before operating their pressure cooker/canner.

instructions to all persons of japanese ancestry

Instructions to All Persons of Japanese Ancestry⁚ A Historical Overview

The phrase “Instructions to All Persons of Japanese Ancestry” marked a dark period in American history. These instructions, issued during World War II, were a direct consequence of Executive Order 9066, which authorized the forced removal and internment of Japanese Americans. These chilling words signaled the beginning of a devastating chapter for Japanese Americans, forever etched in the annals of American history.

The Context of Executive Order 9066

Executive Order 9066, signed by President Franklin D. Roosevelt on February 19, 1942, emerged from the heightened fear and suspicion that gripped the United States following the Japanese attack on Pearl Harbor. The order authorized the military to designate certain areas as “military zones” and to exclude “any or all persons” from these areas. This broad authority paved the way for the mass displacement and incarceration of Japanese Americans, regardless of their citizenship status. The order was justified by the government as a necessary measure to protect national security, claiming that Japanese Americans posed a potential threat to the country. However, it was based on racial prejudice and fear rather than any credible evidence of espionage or sabotage.

The order itself did not explicitly mention Japanese Americans, but its application was overwhelmingly directed at them. This was due to the prevailing racist sentiment that equated Japanese Americans with the Japanese government and the widespread fear that they might be loyal to Japan. The government’s rationale was further fueled by the perception that Japanese Americans were “enemy aliens” despite the fact that many were American citizens. This perception, coupled with the war hysteria that gripped the nation, led to the implementation of a series of Civilian Exclusion Orders, which effectively forced Japanese Americans out of their homes and into internment camps.

The Infamous First Words⁚ “Instructions to All Persons of Japanese Ancestry”

The stark words “Instructions to All Persons of Japanese Ancestry” became a chilling symbol of the government’s discriminatory actions against Japanese Americans. These instructions, printed on posters and distributed throughout the West Coast, served as official pronouncements of the forced evacuation orders. They were the first tangible evidence of the government’s intent to forcibly remove Japanese Americans from their homes and communities. The starkness of the language, devoid of any pretense of compassion or fairness, reflected the prevailing atmosphere of fear and suspicion that fueled the internment policy.

The posters, often accompanied by Civilian Exclusion Orders, bore the official seal of the Western Defense Command and Fourth Army Wartime Civil Control Administration. They were posted in public places, including schools, businesses, and community centers, ensuring that Japanese Americans were fully aware of their impending fate. The posters were designed to be both informative and intimidating, leaving no room for doubt about the government’s authority and the urgency of the situation. They served as a stark reminder of the power dynamics at play, highlighting the vulnerability of Japanese Americans in the face of government decree.

The Content of the Instructions

The “Instructions to All Persons of Japanese Ancestry” detailed the steps Japanese Americans were required to take in preparation for their forced removal. These instructions were stark and impersonal, devoid of any empathy for the families and individuals they affected. They mandated the disposal of property, leaving behind homes, businesses, and cherished possessions. The instructions demanded that Japanese Americans prepare for an uncertain future, stripped of their rights and forced to abandon their lives. They were instructed to report to designated assembly centers, where they would be held before being transported to internment camps.

The instructions outlined the specific items Japanese Americans were allowed to bring with them, emphasizing a strict limit on personal belongings. This restriction further underscored the government’s intention to sever ties with their past lives. The instructions also mandated the surrender of valuable possessions, including automobiles, boats, and livestock. This requirement served to further destabilize their lives, leaving them at the mercy of the government’s authority. The instructions were a blueprint for dispossession, a calculated plan to strip Japanese Americans of their belongings and their sense of security.

The Impact of the Evacuation Orders

The evacuation orders, a direct consequence of the “Instructions to All Persons of Japanese Ancestry,” had a devastating impact on Japanese American communities. Families were forced to abruptly uproot their lives, leaving behind homes, businesses, and cherished possessions. The loss of property and livelihood was a profound blow, leaving many families in dire straits. The forced relocation also shattered the social fabric of Japanese American communities, disrupting long-standing relationships and breaking apart families. The sudden displacement caused deep psychological trauma, creating a sense of fear, uncertainty, and loss.

The evacuation orders fostered a climate of suspicion and distrust within American society. Japanese Americans, who had been loyal citizens, were now branded as enemies, their loyalty questioned solely based on their ancestry. The orders reinforced racist stereotypes and fueled anti-Japanese sentiment, contributing to a pervasive atmosphere of fear and prejudice. The evacuation orders, while seemingly aimed at protecting national security, ultimately served to exacerbate existing prejudices and undermine the fabric of American democracy. The impact of these orders resonated throughout Japanese American communities, leaving a lasting scar on their lives and their sense of belonging in America.

The Role of the Western Defense Command

The Western Defense Command, under the leadership of Lieutenant General John L. DeWitt, played a pivotal role in implementing the “Instructions to All Persons of Japanese Ancestry.” DeWitt, deeply influenced by racist fears and stereotypes, saw Japanese Americans as a potential threat to national security, despite a lack of evidence. The Western Defense Command, under DeWitt’s command, issued the Civilian Exclusion Orders, which mandated the forced evacuation of Japanese Americans from designated areas along the West Coast. These orders, often accompanied by the ominous phrase “Instructions to All Persons of Japanese Ancestry,” were the official mechanisms for carrying out the mass removal of Japanese Americans from their homes and communities.

The Western Defense Command established Civilian Control Stations, where Japanese Americans were forced to report before being transported to internment camps. The command was responsible for overseeing the logistics of the evacuation, including the transportation of individuals and their limited belongings. The Western Defense Command’s actions, driven by fear and prejudice, resulted in the unjust displacement and internment of tens of thousands of Japanese Americans, a tragic chapter in American history.

The Civilian Exclusion Orders

The Civilian Exclusion Orders, issued by the Western Defense Command under the authority of Executive Order 9066, were the legal instruments that enforced the forced removal of Japanese Americans from designated areas on the West Coast. These orders, often bearing the stark title “Instructions to All Persons of Japanese Ancestry,” were publicly posted in communities, leaving Japanese Americans with little time to prepare for their forced relocation. The orders defined specific geographic zones from which Japanese Americans were to be excluded, effectively transforming their homes and livelihoods into forbidden territory.

Each Civilian Exclusion Order contained instructions on the evacuation process, including the designated assembly points and the limited personal possessions allowed. The orders often specified a deadline for the evacuation, leaving families with little time to sell their property, businesses, or belongings. The Civilian Exclusion Orders, coupled with the pervasive fear and prejudice of the time, created a climate of anxiety and uncertainty for Japanese Americans, forcing them to abandon their homes and communities with little notice.

The Forced Relocation to Internment Camps

The Civilian Exclusion Orders, issued by the Western Defense Command, paved the way for the forced relocation of Japanese Americans to internment camps. These camps, located in remote and often harsh environments, were designed to hold Japanese Americans for the duration of the war. The conditions in these camps varied, but they were generally characterized by cramped living quarters, limited privacy, and a lack of basic amenities. Japanese Americans were forced to leave behind their homes, businesses, and possessions, enduring a significant disruption to their lives.

The internment camps were a stark contrast to the lives that Japanese Americans had built for themselves in the United States. They were subjected to constant surveillance, restrictions on their movements, and a loss of personal freedom. The internment camps were a traumatic experience for Japanese Americans, leaving lasting psychological scars on many individuals and families. The forced relocation to internment camps, a direct result of the “Instructions to All Persons of Japanese Ancestry,” represented a profound injustice, denying Japanese Americans their basic rights and freedoms during a time of national crisis.

The Legal Challenges to the Internment

The internment of Japanese Americans, though rooted in fear and prejudice, was not without legal challenges. Individuals and organizations challenged the constitutionality of Executive Order 9066 and the subsequent Civilian Exclusion Orders in court. These legal battles aimed to overturn the government’s authority to forcibly remove and detain individuals based solely on their ancestry. The Supreme Court, in the landmark case of Korematsu v. United States (1944), upheld the constitutionality of the internment program, ruling that the government’s actions were justified by military necessity.

This decision, however, was highly controversial and has been widely criticized in subsequent years. Many legal scholars and historians argue that the Supreme Court’s decision was based on racial prejudice and a flawed understanding of the threat posed by Japanese Americans. Despite the Supreme Court’s ruling, the legal challenges against the internment program continued, albeit with limited success. These challenges shed light on the legal and ethical complexities surrounding the internment program, raising questions about the balance between national security and individual rights in times of crisis.

The Legacy of the Internment

The internment of Japanese Americans during World War II left an indelible mark on American history and the lives of those affected. The legacy of this period of injustice continues to be felt today, prompting reflection on the enduring consequences of prejudice and discrimination. The internment experience, while deeply painful, also served as a catalyst for activism and advocacy. Japanese Americans, along with allies, fought for redress and recognition of the wrongs committed against them.

This struggle culminated in the passage of the Civil Liberties Act of 1988, which formally acknowledged the injustice of the internment and offered a formal apology from the United States government. The act also provided compensation to survivors of the internment. While the legacy of the internment remains a painful reminder of the dangers of prejudice and the fragility of civil liberties, it also serves as a powerful testament to the resilience and activism of those who fought for justice and remembrance. The internment serves as a critical reminder of the importance of protecting individual rights and challenging discriminatory practices in all forms;

The Importance of Remembering

The “Instructions to All Persons of Japanese Ancestry” and the subsequent internment of Japanese Americans during World War II are not mere historical events, but a stark reminder of the dangers of prejudice and the fragility of civil liberties. Remembering this period is not simply about dwelling on the past, but rather about learning from it to ensure that such injustices are never repeated. By remembering, we acknowledge the pain and suffering inflicted on innocent individuals and families, and we honor the resilience of those who endured such hardship.

Remembering also serves as a crucial tool for promoting understanding and empathy. By learning about the internment, we gain insights into the complexities of race, prejudice, and wartime hysteria. This understanding can help us to identify and challenge similar forms of discrimination in our own time. Remembering the internment is an act of vigilance, a commitment to safeguarding our democratic values and ensuring that history does not repeat itself. By keeping the memory of the internment alive, we can work to build a more just and equitable society for all.

trampoline net instructions

Trampoline Net Installation Instructions

Installing a trampoline net is a crucial step in ensuring the safety of your trampoline. This guide provides detailed instructions to help you install your trampoline net correctly and securely. It’s important to follow these instructions carefully to prevent any accidents or injuries during use.

Introduction

A trampoline net is an essential safety feature for any trampoline, providing a barrier to prevent jumpers from falling off the trampoline and getting injured. It also helps to keep debris and small objects from entering the jumping surface, ensuring a clean and safe bouncing experience. Installing a trampoline net correctly is crucial to ensure its effectiveness and the safety of those using the trampoline.

This guide provides step-by-step instructions on how to install a trampoline net, covering everything from preparing the trampoline to securing the net. It’s important to note that the specific installation process may vary slightly depending on the brand and model of your trampoline. However, the general principles outlined in this guide will apply to most trampoline nets. By carefully following these instructions, you can ensure a safe and enjoyable bouncing experience for everyone.

Before you begin the installation process, it’s essential to review the manufacturer’s instructions for your specific trampoline and net. These instructions will provide detailed information about your particular model, including any specific tools or techniques required for installation. Always prioritize safety and follow all recommended guidelines to ensure a successful and secure installation.

Safety Precautions

Installing a trampoline net is a task that requires caution and attention to detail to ensure the safety of everyone involved. Before you begin the installation process, it’s crucial to prioritize safety and take the necessary precautions to prevent any accidents or injuries.

Firstly, ensure that you have a clear and safe work area. Remove any obstacles or clutter from around the trampoline to avoid tripping or falling. It’s also a good idea to wear appropriate clothing, such as closed-toe shoes and long pants, to protect yourself from sharp edges or materials. Having a helper on hand can also be beneficial, especially for lifting and holding heavy components.

Secondly, it’s important to use the right tools for the job. Refer to the manufacturer’s instructions for your specific trampoline and net to determine the necessary tools. Ensure that your tools are in good working order and that you are familiar with their proper usage to avoid any mishaps. Always use caution when handling sharp tools or heavy objects.

Finally, always prioritize safety over speed. Take your time during the installation process, carefully following the instructions and double-checking your work. If you encounter any difficulties or have any doubts, consult the manufacturer’s instructions or seek assistance from a qualified professional. Remember, a safe and secure installation is paramount to ensuring the safety of everyone using the trampoline.

Tools Needed

The tools required for trampoline net installation can vary depending on the specific design and model of your trampoline. However, some common tools are typically needed for a successful and secure installation. Here’s a list of essential tools to gather before you begin the process⁚

Screwdriver⁚ A screwdriver is often needed to fasten screws or tighten bolts that secure the net to the trampoline frame. Make sure you have the right size screwdriver for the specific screws used in your net’s installation.
Wrench⁚ A wrench might be necessary to tighten or loosen nuts or bolts that connect different parts of the trampoline frame or the net attachment points. Select a wrench size that matches the nuts and bolts used in your trampoline’s construction.
Rubber Mallet⁚ A rubber mallet can be helpful for gently tapping components into place or for aligning parts without damaging them. Its soft impact helps prevent scratches or dents on the trampoline frame or net.
Measuring Tape⁚ A measuring tape is essential for ensuring accurate placement and alignment of the net around the trampoline frame. It helps you maintain consistent spacing and prevent unevenness.
Scissors or Utility Knife⁚ Scissors or a utility knife can be useful for trimming excess material or cutting ties or straps to the correct length during the installation process. Be cautious when using these tools and avoid cutting into any critical components of the trampoline or net.
Ladder⁚ Depending on the height of your trampoline, a ladder might be necessary to reach the upper sections of the frame or net during installation. Make sure you have a stable and safe ladder that allows you to reach the necessary heights without risking falls.
Work Gloves⁚ Wearing work gloves protects your hands from sharp edges, splinters, or rough surfaces during the installation process. They also provide a better grip on tools and components, enhancing safety and control.

Preparing the Trampoline

Before you embark on the installation of the trampoline net, it’s crucial to ensure your trampoline is properly prepared. This step helps create a smooth and successful installation process. Follow these guidelines to prepare your trampoline for the net installation⁚

Clear the Area⁚ Before starting the installation process, clear the area around the trampoline. Remove any obstacles, toys, or furniture that might hinder your movement or pose a safety hazard during the installation process.
Remove Existing Net⁚ If you’re replacing an old net, carefully remove it from the trampoline frame. This can typically be done by unfastening the clips, hooks, or straps that secure it to the frame. Be gentle to avoid damaging the trampoline or the old net.
Inspect the Frame⁚ Before installing the new net, take a moment to inspect the trampoline frame. Look for any signs of damage, rust, or wear and tear. If you find any issues, consider repairing them before proceeding with the net installation.
Remove Spring Pad⁚ If your trampoline has a spring pad, it might need to be removed for easier access to the frame during net installation. Some trampoline designs may require the spring pad to be removed while others may have the net installation points accessible with the spring pad in place. Always refer to the manufacturer’s instructions for your specific trampoline model.
Align the Frame⁚ Ensure the trampoline frame is level and stable before installing the net. If necessary, adjust the legs to ensure proper alignment and stability. A stable frame is crucial for a secure net installation.
Gather Tools⁚ Now is a good time to gather all the tools mentioned in the “Tools Needed” section. Make sure you have everything you need within easy reach for a smooth and efficient installation process.

Installing the Net

With the trampoline prepared and the necessary tools at hand, it’s time to embark on the installation of the trampoline net. This section provides step-by-step instructions for installing the net onto your trampoline. Take your time and carefully follow these guidelines to ensure a secure and effective installation.

Unpack the Net⁚ Carefully unpack the new trampoline net. Inspect it for any damage or missing parts. If you find any issues, contact the manufacturer immediately.

Locate the Entrance⁚ Most trampoline nets have a designated entrance area. Identify this entrance and make sure it’s positioned conveniently for access and exit.
Position the Net⁚ Carefully position the net around the trampoline frame, ensuring it’s centered and evenly distributed. Some nets may have specific alignment marks or instructions for positioning.
Attach the Net to the Frame⁚ The method of attaching the net to the trampoline frame will vary depending on the specific design of your trampoline. Some nets use clips, hooks, or straps to connect to the frame. Others may require you to thread ropes through loops on the net and frame. Consult the manufacturer’s instructions for the specific attachment method for your net.
Secure the Net⁚ Once the net is attached to the frame, ensure it’s securely fastened. Tighten any clips, hooks, or straps and check for any loose or sagging areas. A securely attached net is essential for safety.
Check for Tightness⁚ After securing the net, test its tightness by gently pulling on different sections. The net should be taut and provide a snug fit around the trampoline. If any areas are too loose, adjust them accordingly.
Final Inspection⁚ Before allowing anyone to use the trampoline, conduct a final inspection of the installed net. Make sure all clips, hooks, and straps are secure, and the net is free from any tears or damage.

Positioning the Net

Positioning the net correctly is crucial for a safe and effective trampoline enclosure. This step ensures the net fits snugly around the trampoline frame and provides adequate protection for jumpers.

Lay Out the Net⁚ Carefully lay out the net on the ground near the trampoline. Unfold it completely, making sure there are no creases or wrinkles.
Identify the Entrance⁚ Most trampoline nets have a designated entrance area. Locate this entrance and make sure it’s positioned conveniently for access and exit.
Center the Net⁚ Position the net so it’s centered over the trampoline frame. Make sure the net is evenly distributed around the trampoline.
Align the Net⁚ Ensure the top edge of the net is aligned with the top of the trampoline frame. This alignment is essential for a secure fit.
Check for Slack⁚ Once the net is positioned, check for any slack or loose areas. If you find any, adjust the net’s position accordingly. The net should be taut and fit snugly against the frame.
Double-Check⁚ Before proceeding to the next step, double-check the net’s positioning. Make sure it’s centered, aligned, and free from any slack. A properly positioned net is essential for optimal safety and performance.
Prepare for Attachment⁚ With the net correctly positioned, you’re ready to attach it to the trampoline frame. Follow the manufacturer’s instructions for the specific attachment method used for your net.

Attaching the Net to the Frame

Attaching the net to the trampoline frame is a critical step in the installation process. This step ensures the net is securely connected and provides a safe enclosure for jumpers.

Identify Attachment Points⁚ Most trampoline nets have designated attachment points, such as loops or clips, that correspond to attachment points on the trampoline frame. Locate these points on both the net and the frame.
Use Included Clips or Ropes⁚ The net typically comes with clips or ropes specifically designed for attachment. Refer to the manufacturer’s instructions for the correct type of attachment.
Attach Clips or Ropes⁚ If using clips, carefully attach them to the loops or designated attachment points on the net. Ensure the clips are securely fastened. If using ropes, thread them through the loops on the net and the frame, making sure they are taut.
Secure the Net⁚ Once the clips or ropes are attached, secure the net to the frame. This might involve tightening clips, tying knots, or using other methods specified in the manufacturer’s instructions.
Check for Secure Attachment⁚ After securing the net, thoroughly check each attachment point. Make sure the clips are securely fastened and the ropes are tightly tied. The net should be firmly attached to the frame without any looseness.
Repeat for All Attachment Points⁚ Repeat the process for all attachment points around the trampoline. This ensures the net is completely secured to the frame.
Additional Attachment Methods⁚ Some trampoline nets may have additional attachment methods, such as bungee cords or straps. Follow the manufacturer’s instructions for these specific methods.
Inspect and Adjust⁚ After attaching the net, thoroughly inspect the entire enclosure. Make any necessary adjustments to ensure a secure and properly fitted net.

Securing the Net

Securing the trampoline net is essential to prevent jumpers from falling out and getting injured. It ensures the net remains taut and provides a safe barrier around the trampoline.

Tighten Clips or Ropes⁚ Once the net is attached to the frame using clips or ropes, make sure these are tightened securely. This step ensures the net is snug against the frame and prevents any sagging or movement.
Use Additional Securing Methods⁚ Some trampoline nets require additional securing methods, such as bungee cords or straps. These are typically used to attach the bottom of the net to the frame or to secure specific sections of the net.
Check for Proper Tension⁚ After tightening clips or ropes, check the overall tension of the net. It should be taut and firm, without any slack or loose areas. If there’s any slack, tighten the clips or ropes further.
Secure the Entrance⁚ The entrance to the trampoline net usually has a zipper or a flap that needs to be secured. Ensure the zipper is securely closed or the flap is properly fastened to prevent accidental entry or exit.
Inspect for Tears or Damage⁚ After securing the net, inspect it thoroughly for any tears, holes, or damage. These can weaken the net and compromise its safety.
Replace Damaged Net⁚ If you find any tears or damage, replace the net immediately. A damaged net can pose a serious safety risk.
Test the Net⁚ After securing the net, test it by gently pulling on different sections. It should be firm and resistant to movement.
Secure the Base⁚ Some trampoline nets have a base that needs to be anchored to the ground. This helps to prevent the net from being blown away by wind or lifted by jumpers.

Troubleshooting

Even with careful installation, you might encounter some issues with your trampoline net. Here are some common problems and their solutions⁚

Net Sagging⁚ If your net is sagging, it’s likely due to loose clips, ropes, or bungee cords. Tighten these securely to restore the net’s tautness.
Net Not Aligning Properly⁚ If the net is not aligned with the frame, try repositioning it. Make sure the net is centered and straight before securing it.
Net Tearing⁚ If your net tears, you’ll need to replace it. Don’t attempt to repair a torn net, as it could compromise the safety of the trampoline.
Entrance Zipper Not Working⁚ If the zipper on the entrance flap is stuck or broken, you’ll need to repair or replace it. This is essential for ensuring safe entry and exit.
Net Catching on the Frame⁚ If the net catches on the frame, check for any obstructions or sharp edges. Remove or adjust these to prevent the net from catching.
Net Blowing in the Wind⁚ If the net is being blown by the wind, consider securing it with additional weights or anchoring the base of the net to the ground.
Net Not Securely Attached to the Base⁚ If the net is not securely attached to the base, make sure all the clips, ropes, or bungee cords are properly fastened.
Net Too Loose⁚ If the net is too loose, tighten the clips or ropes further. A loose net doesn’t provide adequate safety.
Net Too Tight⁚ If the net is too tight, it could cause strain on the frame or the net itself. Loosen the clips or ropes slightly to adjust the tension.

Maintenance

Regular maintenance is crucial to ensure your trampoline net remains safe and functional for years to come. Here’s a simple maintenance routine⁚

Inspect Regularly⁚ Inspect the net for any tears, holes, or loose stitching at least once a month. Pay close attention to the areas around the entrance flap and the base of the net.
Clean Regularly⁚ Wash the net with mild soap and water. Avoid using harsh chemicals or abrasive cleaners. Allow the net to air dry completely before re-attaching it to the frame.
Check Clips and Ropes⁚ Examine the clips and ropes for any signs of wear or damage. Replace any damaged components immediately.
Lubricate Zipper⁚ Lubricate the entrance zipper with a silicone-based lubricant to prevent it from sticking or getting damaged.
Store Properly⁚ During the off-season, store the net in a dry, well-ventilated area. Avoid exposing it to direct sunlight or extreme temperatures.
Follow Manufacturer Recommendations⁚ Consult the manufacturer’s instructions for specific maintenance guidelines for your trampoline net.
Replace as Needed⁚ If the net shows significant signs of wear and tear, replace it with a new one.
Inspect Frame Pads⁚ Ensure the frame pads are in good condition and securely attached to the trampoline frame.
Check Springs⁚ Make sure the springs are in good condition and not corroded or broken.
Secure the Trampoline⁚ Ensure the trampoline is anchored securely to the ground to prevent it from tipping over in windy conditions.
1Remove Obstructions⁚ Clear the area beneath the trampoline and enclosure of any obstructions that could cause injury.

quickvue strep test instructions

This document provides instructions for using the QuickVue Strep A test. The test is intended for the rapid‚ qualitative detection of Group A Streptococcal antigen from throat swabs or confirmation of presumptive Group A Streptococcal colonies recovered from culture. It is used as an aid in the diagnosis of Group A Streptococcal infection.

Introduction

The QuickVue Strep A test is a rapid‚ qualitative immunoassay designed to detect the presence of Group A Streptococcus antigen directly from patient throat swab specimens or from culture. It utilizes Quidel’s patented antibody-labeled particles and provides results within 5 minutes. This test is intended to aid healthcare professionals in the diagnosis of Group A Streptococcal infection‚ a common bacterial infection that causes strep throat.

The QuickVue Strep A test is a valuable tool for healthcare providers‚ allowing for rapid diagnosis and appropriate treatment. It can help to reduce unnecessary antibiotic use and improve patient outcomes. This document will guide you through the proper use and interpretation of the QuickVue Strep A test.

The QuickVue Strep A test is a lateral flow immunoassay that utilizes Quidel’s patented antibody-labeled particles. The test is easy to perform and provides results in 5 minutes or less. It is a valuable tool for healthcare providers‚ allowing for rapid diagnosis and appropriate treatment;

Intended Use

The QuickVue Strep A test is intended for the rapid‚ qualitative detection of Group A Streptococcal antigen from throat swabs or confirmation of presumptive Group A Streptococcal colonies recovered from culture. This test is designed to aid in the diagnosis of Group A Streptococcal infection‚ commonly known as strep throat. The test is specifically intended for use by healthcare professionals in clinical settings.

It is important to note that the QuickVue Strep A test is not intended to be used as a sole diagnostic tool. The results should be interpreted in conjunction with the patient’s clinical presentation‚ history‚ and other laboratory findings. The test is intended to provide a rapid and accurate assessment of the presence of Group A Streptococcal antigen‚ which can assist healthcare providers in making informed treatment decisions.

The QuickVue Strep A test is a valuable tool for healthcare providers‚ allowing for rapid diagnosis and appropriate treatment. It can help to reduce unnecessary antibiotic use and improve patient outcomes.

Test Procedure

The QuickVue Strep A test is a simple and straightforward procedure that can be performed in a matter of minutes. Here are the steps involved⁚

  1. Collect a throat swab sample⁚ Using a sterile swab‚ gently rub the back of the patient’s throat‚ including the tonsils‚ for at least 5 seconds. Avoid touching the tongue or teeth.
  2. Prepare the test cassette⁚ Remove the test cassette from its foil pouch. Place the test cassette on a clean‚ flat surface.
  3. Insert the swab⁚ Insert the swab into the test cassette’s swab chamber. Make sure the swab is fully inserted and in contact with the extraction solution.
  4. Remove the swab⁚ After 1 minute‚ remove the swab from the test cassette.
  5. Read the results⁚ Observe the test cassette for the presence of a colored line within the results window. A colored line indicates a positive result‚ while the absence of a colored line indicates a negative result. Results should be read between 10-15 minutes after placing the swab into the test cassette.

It is important to follow the instructions provided in the test kit carefully for accurate results.

Materials

The QuickVue Strep A test kit contains all the necessary materials for performing the test. These materials are designed to ensure accurate and reliable results. Here is a list of the materials included in the kit⁚

  • Test cassettes⁚ These cassettes contain the reagents needed to detect the presence of Group A streptococcal antigen.
  • Sterile swabs⁚ These swabs are specifically designed for collecting throat samples. They are made of rayon or Dacron and have plastic shafts.
  • Extraction solution⁚ This solution is used to extract the antigen from the throat swab sample.
  • Control swabs⁚ These swabs are used to ensure that the test is working properly. They are available in positive and negative control versions.
  • Instructions for use⁚ The instructions for use provide detailed information on how to perform the test‚ interpret the results‚ and troubleshoot any issues.

It is important to use all the materials provided in the kit for accurate test results.

Sample Collection

Collecting a throat swab sample is a crucial step in performing the QuickVue Strep A test. Proper collection ensures accurate results and helps detect Group A streptococcal antigen effectively. Here’s how to collect a throat swab sample⁚

  1. Prepare the patient⁚ Have the patient sit or lie down comfortably. Ensure proper lighting and a clean workspace for the procedure.
  2. Gather the materials⁚ Gather a sterile swab from the QuickVue Strep A test kit.
  3. Depress the tongue⁚ Ask the patient to open their mouth wide and gently depress their tongue with a tongue depressor. This provides a clear view of the back of the throat.
  4. Collect the swab⁚ Using the sterile swab‚ gently rub the back of the throat‚ including the tonsils and the posterior pharyngeal wall. Avoid touching the tongue or the inside of the cheeks.
  5. Label the swab⁚ Immediately label the swab with the patient’s name and date of collection.
  6. Dispose of the swab⁚ Dispose of the swab properly in a biohazard container.

Following these steps ensures the sample collection process is safe‚ hygienic‚ and produces accurate results.

Test Preparation

Preparing for the QuickVue Strep A test is essential for obtaining accurate results. Following these steps will ensure the test is conducted properly and that you are ready to analyze the results⁚

  1. Gather the materials⁚ Before beginning the test‚ assemble all necessary components from the QuickVue Strep A test kit. This includes the test cassette‚ extraction reagent‚ and a sterile swab.
  2. Read the instructions⁚ Carefully read the instructions provided in the test kit insert. This will ensure you understand the steps involved and any precautions to take.
  3. Prepare the test cassette⁚ Remove the test cassette from its foil pouch and place it on a clean‚ flat surface. Avoid touching the test window or the sample well.
  4. Prepare the extraction reagent⁚ If the extraction reagent is in a vial‚ carefully remove the cap and set it aside. If the reagent is in a dropper bottle‚ shake it gently before using.
  5. Prepare the swab⁚ If using a swab from a previously collected sample‚ ensure the swab is properly labeled and stored.

By completing these steps‚ you can ensure a smooth and successful test procedure. Remember to follow all instructions carefully to ensure accurate and reliable results.

Test Execution

The QuickVue Strep A test is designed for straightforward execution‚ ensuring accurate and reliable results. Follow these steps to perform the test correctly⁚

  1. Collect the throat swab⁚ Using a sterile swab‚ gently rub the back of the throat‚ including the tonsils‚ for at least 10 seconds. Avoid touching the tongue or the roof of the mouth.
  2. Add the swab to the extraction reagent⁚ Insert the swab into the extraction reagent tube. Ensure the swab is fully submerged in the reagent.
  3. Mix the swab and reagent⁚ Vigorously mix the swab and reagent for at least 1 minute to release the antigen from the swab.
  4. Add the reagent to the test cassette⁚ Using a dropper or pipette‚ add 3 drops of the extraction reagent to the sample well of the test cassette.
  5. Wait for the results⁚ Allow the test to run for 5 minutes. Do not move or handle the test cassette during this time.
  6. Read the results⁚ After 5 minutes‚ read the results according to the instructions provided in the test kit insert.

By carefully following these steps‚ you can ensure that the QuickVue Strep A test is performed correctly and that you obtain accurate results.

Results Interpretation

Interpreting the results of the QuickVue Strep A test is crucial for accurate diagnosis. The test cassette will display two lines‚ a control line and a test line‚ which indicate the presence or absence of Group A Streptococcal antigen. Here’s how to interpret the results⁚

  • Positive result⁚ If both the control line and the test line appear‚ the test is positive. This indicates that Group A Streptococcal antigen has been detected in the sample‚ suggesting a possible strep throat infection.
  • Negative result⁚ If only the control line appears‚ the test is negative. This indicates that Group A Streptococcal antigen was not detected in the sample. However‚ it’s important to note that a negative result does not necessarily rule out a strep throat infection‚ as other causes of sore throat may exist.
  • Invalid result⁚ If the control line does not appear‚ the test is invalid. This could be due to improper test execution or expired reagents. Repeat the test with a new kit.

It’s essential to consult a healthcare professional for further evaluation and treatment based on the test results. They can provide guidance on the best course of action‚ including antibiotic therapy if necessary.

Quality Control

Maintaining the accuracy and reliability of the QuickVue Strep A test requires consistent quality control measures. These measures help ensure that the test is functioning as intended and producing accurate results. Here’s a breakdown of essential quality control procedures⁚

  • Positive and Negative Control Swabs⁚ The QuickVue Strep A test kit includes positive and negative control swabs. These controls are used to validate the test’s ability to detect the target antigen and to rule out any potential issues with the test procedure.
  • Visual Inspection of Reagents⁚ Before performing the test‚ visually inspect the reagents for any signs of contamination‚ discoloration‚ or precipitation. These indicators could suggest a compromised reagent and potentially affect test accuracy.
  • Storage and Stability⁚ Ensure that the test kit is stored properly as per the manufacturer’s instructions. Store the kit at room temperature‚ out of direct sunlight.
  • Regular Proficiency Testing⁚ Participating in proficiency testing programs is a vital aspect of quality control. These programs provide external assessment of the test’s performance‚ ensuring that the laboratory is consistently producing accurate results.

By adhering to these quality control measures‚ you can maintain the integrity of the QuickVue Strep A test and ensure reliable results for accurate diagnosis.

Storage and Stability

Proper storage and handling are crucial for maintaining the integrity and accuracy of the QuickVue Strep A test. Here’s a detailed guide on storing and handling the test kit to ensure optimal performance⁚

  • Room Temperature Storage⁚ The QuickVue Strep A test kit is designed for storage at room temperature. Store the kit between 59°F and 86°F (15°C and 30°C).
  • Avoid Direct Sunlight⁚ Direct sunlight can degrade the test components. Store the kit in a cool‚ dry place‚ away from direct sunlight.
  • Shelf Life⁚ The QuickVue Strep A test kit has a shelf life of 18 months from the date of manufacture. Check the expiration date on the packaging before using the test.
  • Handling Precautions⁚ Handle the test components with care to prevent contamination. Avoid touching the test strip or other components with bare hands.
  • Discarding⁚ After the expiration date or after the test has been used‚ dispose of the kit properly according to local regulations.

By adhering to these storage and stability guidelines‚ you can ensure that the QuickVue Strep A test remains reliable and accurate for its intended use.

Precautions

While the QuickVue Strep A test is designed for safe and reliable use‚ certain precautions should be taken to ensure accurate results and minimize the risk of potential issues. Carefully follow these precautions⁚

  • For In-Vitro Diagnostic Use Only⁚ This test is intended for use in a laboratory setting by trained healthcare professionals. Do not use the test for self-diagnosis or home testing.
  • Avoid Cross-Contamination⁚ Always use sterile swabs and equipment to collect samples. Avoid touching the test strip or other components with bare hands to prevent contamination.
  • Proper Specimen Handling⁚ Collect throat swabs according to standard procedures. Handle specimens with care to avoid spills or contamination.
  • Interpretation of Results⁚ Read and interpret the test results carefully following the instructions provided in the package insert. Consult with a healthcare professional for proper diagnosis and treatment.
  • Disposal of Waste⁚ Dispose of used test components and specimens appropriately according to local regulations.

By adhering to these precautions‚ you can help ensure the safety and accuracy of the QuickVue Strep A test and obtain reliable results for patient care.

Troubleshooting

While the QuickVue Strep A test is designed for reliable results‚ certain factors can sometimes lead to unexpected or inconclusive outcomes. If you encounter any issues during testing‚ refer to the troubleshooting guide below⁚

  • Invalid Results⁚ If the test strip does not show a clear positive or negative result within the specified time frame‚ the test may be invalid. Repeat the test using a new test kit and fresh swab.
  • Incorrect Swab Type⁚ Ensure you are using the correct type of swab for the QuickVue In-Line Strep A Test. The kit provides specific swabs designed for the device. Using other swabs can lead to inaccurate results.
  • Improper Specimen Collection⁚ Insufficient or improperly collected throat swab specimens can affect test accuracy. Ensure you follow the proper procedure for collecting samples.
  • Expired Test Kit⁚ Check the expiration date on the test kit. Do not use expired kits as they may not provide accurate results.
  • Environmental Factors⁚ Extreme temperatures or humidity can affect the performance of the test. Ensure the test kit is stored within the recommended temperature range.

If you continue to experience problems with the test‚ contact the manufacturer or a qualified healthcare professional for assistance.

Additional Information

The QuickVue Strep A test offers a rapid and convenient method for detecting Group A Streptococcus in patients suspected of having strep throat. While the test is designed for user-friendliness‚ it’s important to remember that it’s not a substitute for proper medical diagnosis.

If you receive a positive result on the QuickVue Strep A test‚ it is essential to consult with a healthcare professional for diagnosis and treatment. A positive result may indicate a strep throat infection‚ but it does not rule out other possible causes of sore throat symptoms. The healthcare provider can assess your symptoms‚ conduct a thorough examination‚ and make appropriate treatment recommendations.

Remember that the QuickVue Strep A test is a valuable tool for rapid strep detection‚ but it’s crucial to use it in conjunction with a comprehensive medical evaluation for accurate diagnosis and management of strep throat.

Ordering Information

To order the QuickVue Strep A test‚ you can contact the manufacturer‚ Quidel Corporation‚ or their authorized distributors. For direct contact with Quidel‚ you can reach them by phone at 800-874-1517. Their website‚ www.quidel.com‚ also provides information about their products and ordering procedures.

When placing your order‚ you’ll need to specify the quantity of tests you require and any other necessary details‚ such as the specific kit configuration or any additional supplies. Be sure to provide accurate shipping information to ensure timely delivery of your order.

For more information about ordering the QuickVue Strep A test‚ contact Quidel directly or visit their website for detailed instructions and ordering options.

breadman ultimate instruction manual

Breadman Ultimate Instruction Manual⁚ A Comprehensive Guide

This manual is your comprehensive guide to using your Breadman Ultimate bread machine․ It covers everything from safety precautions to advanced features and troubleshooting tips․ With this guide, you’ll be able to bake delicious and fresh bread in no time․

Introduction

Welcome to the world of fresh, homemade bread! Your Breadman Ultimate bread machine is designed to make baking easy and enjoyable․ Whether you’re a seasoned baker or a complete novice, this machine will help you create delicious loaves of bread with minimal effort․

This manual provides a complete guide to understanding and using your Breadman Ultimate bread machine․ From unpacking and setting up your machine to exploring its various features and troubleshooting common issues, this manual has everything you need to get started and become a bread-baking expert․

With its intuitive controls and versatile features, the Breadman Ultimate allows you to customize your bread-making experience․ Experiment with different recipes, adjust settings, and discover the joy of crafting your own perfect loaf․

Get ready to embark on a delicious journey of bread baking with your Breadman Ultimate!

Safety Precautions

Your safety and the well-being of your loved ones are paramount․ Please read and understand the following safety precautions before using your Breadman Ultimate bread machine․ Failure to follow these instructions could result in injury or damage to the machine․

Always unplug the machine before cleaning or performing any maintenance․ Never immerse the machine or its power cord in water․ Do not use the machine if the power cord or plug is damaged․ Do not operate the machine near a heat source or flammable materials․ Keep the machine on a stable, heat-resistant surface․ Do not leave the machine unattended while it is operating․

Always supervise children when they are near the machine and never allow them to operate it․ Never use the machine for any purpose other than that for which it was intended․ Do not attempt to repair or modify the machine yourself․ If the machine malfunctions, contact the manufacturer for assistance;

By following these safety precautions, you can ensure a safe and enjoyable bread-making experience․

Understanding Your Breadman Ultimate

The Breadman Ultimate is a versatile and user-friendly bread machine designed to simplify the process of baking delicious bread at home․ It features a range of settings and cycles to accommodate different bread types and preferences, allowing you to experiment with various recipes and create your own signature loaves․

Understanding the features and components of your Breadman Ultimate is essential for successful operation․ This section will guide you through the different models, key components, and functionalities, enabling you to navigate the machine effectively and unlock its full potential․

From basic operation to advanced customization, you’ll learn how to utilize your Breadman Ultimate to create a variety of bread masterpieces, from classic white bread to hearty whole wheat loaves and even gluten-free options․

Model Variations

The Breadman Ultimate comes in various models, each offering unique features and functionalities․ Understanding the specific model you own is crucial for using your machine effectively․ Some common Breadman Ultimate models include the TR2200C, TR4000, and TR2500BC․

The TR2200C is a popular model known for its user-friendly interface and wide range of settings․ The TR4000 offers additional features, such as a larger capacity for baking larger loaves․ The TR2500BC, also known as the Breadman Ultimate Plus, features enhanced functionalities and a more robust design․

Refer to your specific model’s instruction manual for detailed information on its features and settings․

Key Features and Components

The Breadman Ultimate bread machine is equipped with a range of features designed to simplify and enhance your bread-making experience․ Understanding these key components will allow you to utilize your machine to its full potential․

The Breadman Ultimate typically features a digital control panel with buttons for selecting different baking cycles, crust settings, and other customization options․ A viewing window allows you to monitor the progress of your bread throughout the baking process․

The bread pan, usually made of non-stick material, is where the ingredients are mixed and baked․ A kneading paddle, typically removable, aids in thorough dough mixing․ A heating element, located at the base of the machine, provides the necessary heat for baking․ Additional components may include a timer, a dispenser for adding ingredients during the baking cycle, and a keep-warm function․

Getting Started

Before you can start baking delicious bread, you need to unpack, set up, and prepare your Breadman Ultimate․ This section will walk you through the essential steps to get your machine ready for its first loaf․

Unpacking your Breadman Ultimate involves carefully removing all components from the box and checking for any missing parts․ The instruction manual should provide a list of included items․ Once unpacked, place the bread machine on a stable, level surface, ensuring there is adequate ventilation around it․

The next step is to prepare your machine for its first loaf․ This may involve rinsing the bread pan and kneading paddle with warm, soapy water, followed by a thorough drying․ Familiarize yourself with the control panel and the different settings available․ Refer to the instruction manual for specific instructions on how to clean and prepare your bread machine․

Unpacking and Setup

The first step in your Breadman Ultimate journey is unpacking the machine and its components․ Carefully remove all items from the box, taking note of any protective packaging․ The instruction manual should provide a comprehensive list of included items, so cross-reference to ensure nothing is missing․

After unpacking, find a suitable location for your bread machine․ It should be placed on a stable, level surface, ensuring there is adequate ventilation around it․ This will prevent overheating and ensure proper operation․ Avoid placing the machine near heat sources or in direct sunlight․

The next step is to familiarize yourself with the various components․ This includes the bread pan, kneading paddle, lid, and control panel․ Understand how each part functions and where they are located within the machine․ This initial exploration will make using your Breadman Ultimate much smoother․

Preparing for Your First Loaf

Before embarking on your first bread-baking adventure, it’s crucial to prepare your Breadman Ultimate properly․ Start by cleaning the bread pan and kneading paddle thoroughly with warm, soapy water․ Rinse them well and dry them completely before assembling them back into the machine․ This initial cleaning ensures that your first loaf is free from any lingering odors or residues․

Next, refer to the instruction manual to understand the various settings and cycles available on your Breadman Ultimate․ Familiarize yourself with the basic breadmaking cycle and the options for customizing settings like crust color, loaf size, and even the type of bread you want to bake․ This preliminary exploration will help you confidently navigate the machine’s features․

Finally, select your first recipe․ The instruction manual usually includes a variety of basic bread recipes․ Choose one that appeals to you and ensure you have all the necessary ingredients on hand․ This preparation will allow you to smoothly transition from understanding your Breadman Ultimate to actually baking your first delicious loaf of bread․

Using Your Breadman Ultimate

Once you’ve prepared your Breadman Ultimate and gathered your ingredients, it’s time to put your machine to work․ The process is surprisingly simple and effortless, thanks to the machine’s automated cycles․ Start by adding your ingredients to the bread pan in the order specified by your chosen recipe․ Most recipes require you to add liquids first, followed by dry ingredients, yeast, and any additional toppings or nuts․

After loading the ingredients, select the appropriate cycle for your recipe․ Your Breadman Ultimate offers a range of pre-programmed cycles for different bread types, including basic white bread, wheat bread, and even dough cycles for preparing pizza dough or other baked goods․ Once you’ve selected the right cycle, simply close the lid and press “Start․” The machine will then automatically guide you through the entire breadmaking process, from mixing and kneading to rising and baking․

While the machine is working its magic, you can relax and enjoy the convenience of having fresh bread baked at home․ The Breadman Ultimate will alert you when the baking cycle is complete, allowing you to enjoy the delicious aroma of freshly baked bread․

Basic Breadmaking Cycle

The basic breadmaking cycle in your Breadman Ultimate is designed to create a simple, yet delicious loaf of white bread․ This cycle typically consists of four main phases⁚ mixing, kneading, rising, and baking․ During the mixing phase, the machine will blend all the ingredients together to form a dough․ The kneading phase follows, where the dough is worked and stretched to develop its gluten structure, which is essential for a light and airy bread․

Once the kneading is complete, the dough enters the rising phase․ Here, the yeast begins to ferment, producing carbon dioxide gas that causes the dough to rise․ The Breadman Ultimate’s heating element helps to create a warm environment that encourages optimal yeast activity․ Finally, the baking phase begins, where the machine’s heating element heats the dough to a specific temperature, allowing the bread to bake evenly and achieve a golden crust․ The cycle will then automatically shut off once the bread is fully baked․

The entire process can take anywhere from 2 to 3 hours, depending on the specific settings you choose and the recipe you’re using․ During the baking cycle, you may hear the machine’s internal fan circulating the heat, which is perfectly normal․

Customizing Settings

The Breadman Ultimate offers a range of customizable settings that allow you to tailor your breadmaking experience․ You can adjust factors such as crust color, loaf size, and even the type of bread you want to bake․ For example, you can choose from options like light, medium, or dark crust, depending on your preference․ You can also select a small, medium, or large loaf size, depending on how much bread you need․

The machine comes with a variety of pre-programmed cycles for different bread types, including white bread, wheat bread, French bread, and even sourdough․ These pre-programmed cycles are designed to optimize the baking process for each specific type of bread․ However, if you want to experiment with your own recipes, you can also customize the settings manually․

This allows you to adjust the baking time, kneading time, and rising time to suit your specific recipe and preferences․ The ability to customize settings gives you greater control over the breadmaking process, allowing you to create unique loaves that meet your specific taste and needs․

Dough Cycles

The Breadman Ultimate features dedicated dough cycles designed for preparing various doughs beyond just bread․ These cycles are perfect for making pizza dough, cookie dough, and even pasta dough, expanding the culinary possibilities of your bread machine․

The dough cycles are designed to handle the specific kneading and rising requirements of different types of dough․ They ensure that the dough is properly developed and ready for your next culinary creation․ For pizza dough, the cycle will create a soft and pliable dough that is ideal for stretching and shaping․

For cookie dough, the cycle will produce a dough that is smooth and consistent, perfect for rolling and cutting into cookies․ Similarly, the pasta dough cycle will create a dough that is firm and elastic, ready for shaping into pasta noodles․ With these dough cycles, you can explore a wider range of baking and cooking projects, making your Breadman Ultimate a true kitchen multi-tasker․

Troubleshooting

While the Breadman Ultimate is designed for ease of use, there might be times when you encounter minor issues․ This section provides solutions to common problems you might encounter․ If your bread is not rising properly, ensure you’re using fresh yeast and that the ingredients are at the right temperature․

If the dough is too sticky, add a bit more flour․ If it’s too dry, add a tablespoon of water at a time․ If the bread is dense, check the yeast for freshness and ensure the kneading cycle completed properly․ If the bread is burnt, adjust the crust setting or reduce the baking time slightly․

If the bread machine is not working, ensure it’s plugged in and the power switch is on․ If the display is blank, check the power cord and the outlet․ If the bread machine is making unusual noises, check the kneading blades for obstructions․ For more complex issues, consult the detailed troubleshooting section in the user manual or contact Breadman customer support․

Cleaning and Maintenance

Regular cleaning is essential to keep your Breadman Ultimate in optimal condition․ After each use, unplug the machine and allow it to cool completely․ Remove the bread pan and kneading blade․ Wash the bread pan, kneading blade, and lid with warm, soapy water․ Do not immerse the main unit in water․

Wipe the exterior of the machine with a damp cloth․ Ensure all parts are thoroughly dried before reassembling․ Store the bread machine in a clean, dry location․ Avoid storing it in direct sunlight or extreme temperatures․

For deeper cleaning, you can use a mild baking soda solution to remove any stubborn stains․ Avoid abrasive cleaners or scouring pads as these can damage the surface of the machine․ With proper care and maintenance, your Breadman Ultimate will provide you with delicious homemade bread for years to come․

instructions for westinghouse outdoor timer

Westinghouse Outdoor Timer Instructions

This guide provides comprehensive instructions on using your Westinghouse Outdoor Timer, covering features, programming, safety, and troubleshooting. This user-friendly timer offers a range of settings, from simple on/off to dusk-to-dawn operation, allowing you to customize lighting and appliance schedules for any occasion.

Introduction

Welcome to the world of convenient and customizable outdoor lighting with your Westinghouse Outdoor Timer. This comprehensive guide will walk you through the features, settings, and operation of your new timer, empowering you to manage your outdoor lighting with ease and precision. Whether you’re seeking to illuminate your garden pathways, enhance holiday decorations, or simply create a welcoming ambiance for your home’s exterior, this timer offers the flexibility and reliability you need.

Our guide covers everything from basic time setting to advanced programming modes, ensuring you can fully utilize the capabilities of your Westinghouse Outdoor Timer. We’ll also delve into safety precautions and troubleshooting tips to ensure a smooth and enjoyable experience. Get ready to unlock the potential of your Westinghouse Outdoor Timer and enjoy the convenience and control it brings to your outdoor spaces.

Features and Benefits

Your Westinghouse Outdoor Timer is designed to simplify your outdoor lighting and appliance control, offering a range of features that provide convenience and versatility. Here are some key highlights⁚

  • Single Grounded Outlet⁚ The timer provides a secure and reliable connection for your outdoor lights or appliances.
  • Photocell⁚ This built-in sensor automatically activates your lights at dusk and turns them off at dawn, providing energy savings and added safety.
  • Eleven Settings⁚ Choose from a variety of scheduling options, including constant on/off, dusk-to-dawn, and timed intervals, allowing you to customize lighting patterns to suit your needs.
  • Mechanical Setting⁚ The timer’s simple mechanical design makes programming a breeze, enabling you to create custom lighting schedules for any occasion.
  • Indoor/Outdoor Use⁚ The timer is UL listed for both indoor and outdoor use, ensuring safety and reliability in any environment.

With its combination of convenience, reliability, and adaptability, your Westinghouse Outdoor Timer empowers you to enjoy the benefits of customized outdoor lighting and appliance control.

Setting the Time

Ensuring your Westinghouse Outdoor Timer is set to the correct time is crucial for accurate scheduling. Follow these steps to set the time⁚

  1. Locate the Time Button⁚ Identify the button labeled “TIME” on the timer’s control panel.
  2. Press and Hold⁚ Press and hold the “TIME” button. The current time will be displayed on the timer’s LCD screen.
  3. Adjust the Hours⁚ Using the “+” and “-” buttons, adjust the hours to match the current time.
  4. Adjust the Minutes⁚ Once the hours are correct, use the “+” and “-” buttons to adjust the minutes.
  5. Confirm the Time⁚ Once the time is set correctly, release the “TIME” button. The timer will now display the accurate time.

It is important to set the time accurately for your timer to function correctly; Remember to check the time periodically, especially during daylight saving time transitions, to ensure accurate scheduling.

Programming Modes

The Westinghouse Outdoor Timer offers versatile programming modes to accommodate your specific needs. Here are some of the available modes⁚

  1. Constant On/Off: This mode allows you to switch the connected device on or off manually, without any programmed schedule.
  2. Dusk to Dawn⁚ This mode automatically turns the connected device on at dusk and off at dawn, providing convenient lighting or appliance operation during darkness.
  3. Timed On⁚ This mode allows you to set a specific duration for the device to remain on, providing flexibility for tasks like watering or lighting. You can choose from 2 to 10 hours of operation.

To access the programming modes, locate the “MODE” button on the timer’s control panel. Press the button to cycle through the available modes. Once you’ve selected the desired mode, you can proceed to program the specific settings for that mode. Consult the user manual for detailed instructions on programming each mode.

Using the Photocell

The Westinghouse Outdoor Timer incorporates a photocell, a light-sensitive component that automatically controls the device’s operation based on ambient light levels. This feature allows you to create a seamless and convenient lighting experience, especially for outdoor applications.

The photocell is typically located on the timer’s housing. When exposed to sufficient light, it sends a signal to the timer, triggering the device to turn off. As light levels decrease, the photocell signals the timer to turn the device on.

For optimal performance, ensure that the photocell is properly positioned and unobstructed. Avoid placing it in areas where it might be shaded or receive direct sunlight. Ensure the area surrounding the photocell is kept clean and free of debris.

By utilizing the photocell, your Westinghouse Outdoor Timer can provide reliable and efficient lighting control, automatically adjusting to changing light conditions for optimal performance.

Troubleshooting

While Westinghouse Outdoor Timers are designed for reliable operation, occasional issues may arise. Here are some common troubleshooting tips to address potential problems⁚

Check the Power Source⁚ Ensure the timer is plugged into a working electrical outlet. Verify that the circuit breaker for the outlet is not tripped.

Verify Timer Settings⁚ Review the timer’s programming settings to ensure they are correct and match your desired operation.

Inspect the Photocell⁚ If using the photocell feature, check for obstructions or dirt that might be interfering with its operation.

Test the Outlet⁚ Plug a different device into the timer’s outlet to confirm it is functioning correctly.

Reset the Timer⁚ If the timer is not responding, try pressing the reset button to clear any temporary glitches.

If these steps don’t resolve the issue, refer to the Westinghouse Outdoor Timer’s user manual for more detailed troubleshooting instructions.

Safety Precautions

Safety is paramount when using electrical devices. Here are essential safety precautions to follow when using your Westinghouse Outdoor Timer⁚

Proper Installation⁚ Ensure the timer is installed correctly, following the instructions provided in the user manual.

Avoid Overloading⁚ Do not exceed the timer’s maximum load rating, as this can cause overheating or damage.

Keep Dry⁚ Protect the timer from rain and moisture. Avoid using it in wet conditions.

Unplug Before Cleaning⁚ Disconnect the timer from the power source before cleaning or servicing it.

Avoid Contact with Water⁚ Do not immerse the timer in water or allow water to enter its electrical components.

Use with Grounded Outlets⁚ Always use the timer with properly grounded outlets to minimize the risk of electrical shock.

Do Not Modify⁚ Avoid tampering with the timer’s internal components or attempting unauthorized modifications.

Where to Find Additional Information

For a more detailed understanding of your Westinghouse Outdoor Timer’s features and operation, you can access a variety of resources⁚

Westinghouse Website⁚ Visit the official Westinghouse website and search for your specific timer model. Their website often includes detailed user manuals, FAQs, and troubleshooting guides.

Online Manuals⁚ Many online platforms, such as ManualsLib, offer downloadable user manuals for various Westinghouse products. Simply search for your timer’s model number to find the corresponding manual.

Retailer Websites⁚ If you purchased your timer from a specific retailer like Amazon or Home Depot, their websites may also host product information, including user manuals and troubleshooting tips.

Customer Support⁚ Westinghouse provides customer support channels, such as phone lines or email addresses, where you can reach out for assistance with your timer.

Online Forums⁚ Online forums dedicated to home improvement or electrical products can be valuable resources. Search for discussions related to your Westinghouse Outdoor Timer to find advice from other users.

The Westinghouse Outdoor Timer offers a convenient and reliable solution for automating your outdoor lighting and appliances. By understanding its features, programming options, and safety guidelines, you can easily optimize its use for your specific needs. Whether you’re creating a festive holiday display, ensuring security lighting, or simply automating your garden sprinkler system, this timer provides the flexibility and control you need.

Remember to review the user manual for your specific model, which can be found on the Westinghouse website, retailer websites, or online manual platforms. If you encounter any difficulties, utilize the available customer support channels for assistance. By following these instructions and seeking additional information when needed, you can confidently use your Westinghouse Outdoor Timer to enhance the functionality and convenience of your outdoor spaces.

schumacher 1.5 amp battery charger/maintainer instructions

Schumacher 1․5 Amp Battery Charger/Maintainer Instructions

This manual will explain how to use the battery charger safely and effectively․ Please read and follow these instructions and precautions carefully․ The Schumacher XM1-5 Maintainer has 6V and 12V connectors that are quick and easy to put in place so the driver can get back on the road in no time․ This handy accessory wont operate if the connection is reversed, helping to ensure safe operation every time․ The 1․5a battery charger is suitable for maintaining car, motorcycle, power sport and boat batteries․

Introduction

The Schumacher XM1-5 1․5 Amp Battery Charger/Maintainer is a fully automatic, microprocessor-controlled charger designed to maintain and charge 6V and 12V batteries․ This charger is perfect for a variety of applications, including cars, motorcycles, power sports, and boats․ It features a multi-stage charging process that delivers just the right amount of charge to your battery, ensuring optimal performance and longevity․ The Schumacher XM1-5 is also equipped with a built-in spark protection feature to prevent damage to your battery or charger․ This manual provides comprehensive instructions and safety guidelines for the safe and efficient use of the Schumacher XM1-5 Battery Charger/Maintainer․ We recommend that you carefully read and understand this manual before using the charger․

Features and Benefits

The Schumacher XM1-5 Battery Charger/Maintainer boasts a range of features designed for convenience and efficiency․ Its fully automatic operation eliminates the need for manual adjustments, making it user-friendly for everyone․ The microprocessor-controlled multi-stage charging process ensures optimal charging for your battery, extending its lifespan․ The charger’s quick-connect terminals facilitate effortless connection and disconnection, saving you time and effort․ The Schumacher XM1-5 also incorporates reverse polarity protection, safeguarding both your battery and charger from potential damage․ This charger’s compact size and lightweight design make it portable and convenient to store․ Moreover, its durable construction ensures long-lasting performance, making it a reliable investment for your vehicle’s battery maintenance needs;

Safety Precautions

Before using the Schumacher 1․5 Amp Battery Charger/Maintainer, carefully review and adhere to these safety precautions to ensure your safety and the proper functioning of the device⁚

  • Always disconnect the charger from the power source before connecting or disconnecting the battery clamps․
  • Never attempt to charge a frozen battery․ Allow it to thaw completely before charging․
  • Avoid charging the battery in a poorly ventilated area․ Ensure adequate ventilation to prevent the build-up of flammable gases․
  • Never connect the charger to a battery that is damaged or leaking․
  • Do not use the charger for any purpose other than battery charging․
  • Keep the charger away from children and pets to prevent accidental contact or misuse․
  • If you notice any unusual noises, smells, or excessive heat from the charger, immediately disconnect it from the power source and contact Schumacher Electric Corporation for assistance․

Connecting the Charger

Connecting the Schumacher 1․5 Amp Battery Charger/Maintainer to your battery is a straightforward process․ Follow these steps to ensure a secure and safe connection⁚

  1. Ensure the charger is disconnected from the power source․
  2. Locate the positive (+) and negative (-) terminals on your battery․ The positive terminal is typically marked with a “plus” sign (+) or a red color, while the negative terminal is marked with a “minus” sign (-) or a black color․
  3. Connect the red clamp of the charger to the positive (+) terminal of the battery․
  4. Connect the black clamp of the charger to the negative (-) terminal of the battery․
  5. Plug the charger into a standard 120-volt AC outlet․
  6. The charger will automatically begin the charging process․ You may notice a slight bubbling or gassing from the battery, which is normal during charging․

Charging Modes

The Schumacher 1․5 Amp Battery Charger/Maintainer utilizes a microprocessor-controlled, multi-stage charging process to ensure optimal battery health and performance․ The charging modes are designed to deliver the appropriate amount of current based on the battery’s condition and charging needs․ Here’s a breakdown of the typical charging modes employed by Schumacher battery chargers⁚

  1. Initial Charge⁚ This stage delivers a high current to quickly boost the battery voltage․ The charger automatically adjusts the current level as the battery voltage rises․
  2. Bulk Charge⁚ In this phase, the charger delivers a consistent current to bring the battery to a near-full charge․ The current level gradually decreases as the battery nears full capacity․
  3. Absorption Charge⁚ This stage provides a low current to maintain a full charge and prevent overcharging․ The charger carefully monitors the battery’s voltage and adjusts the current accordingly․
  4. Float Charge⁚ Once the battery is fully charged, the charger switches to float charge mode․ This mode applies a trickle current to maintain the battery’s full charge over an extended period․

Maintenance Mode

The Schumacher 1․5 Amp Battery Charger/Maintainer features a dedicated maintenance mode that’s essential for keeping your battery in top condition over the long term․ This mode is particularly valuable for batteries that are not in regular use, such as those in seasonal vehicles or power sports equipment․

Here’s how maintenance mode works⁚

  1. Constant Trickle Charge⁚ The charger delivers a low, consistent current to the battery, ensuring it stays fully charged without overcharging․ This prevents sulfation, a common issue with batteries that sit idle for prolonged periods․
  2. Periodic Refresh⁚ The charger may periodically cycle through a brief charge and discharge cycle to refresh the battery and maintain its optimal performance․ This helps to prevent the battery from losing its capacity over time․
  3. Safety Features⁚ The maintenance mode includes safety features such as reverse polarity protection, which prevents damage to the charger and battery if the connections are reversed․

Troubleshooting

While the Schumacher 1․5 Amp Battery Charger/Maintainer is designed for reliable operation, there may be instances where you encounter issues․ Here’s a guide to common troubleshooting steps⁚

  1. No Power⁚ If the charger is not powering on, check the power cord for damage and ensure it’s securely plugged into a working outlet․ Also, verify that the circuit breaker hasn’t tripped․ If the issue persists, contact Schumacher customer support․
  2. Charger Not Detecting Battery⁚ If the charger doesn’t recognize the connected battery, double-check the battery terminals for corrosion or loose connections․ Clean the terminals and ensure they’re securely attached․ If the issue continues, the battery may be faulty and require replacement․
  3. Charger Overheating⁚ If the charger becomes unusually hot, it could be due to a faulty connection or a problem with the battery․ Disconnect the charger immediately and allow it to cool down․ Inspect the connections and address any issues․ If the overheating persists, contact Schumacher customer support․
  4. Battery Not Charging⁚ If the battery isn’t charging, check the battery’s charge level․ A deeply discharged battery may require a longer charging time․ If the battery is fully charged and still not charging, it might be faulty and require replacement․

Cleaning and Storage

To ensure optimal performance and longevity of your Schumacher 1․5 Amp Battery Charger/Maintainer, proper cleaning and storage are crucial․ Here’s a step-by-step guide⁚

  1. Unplug the Charger⁚ Before cleaning, always unplug the charger from the power outlet to prevent electric shock․
  2. Clean the Exterior⁚ Use a soft, damp cloth to wipe down the exterior of the charger, removing any dust, dirt, or debris․ Avoid using harsh chemicals or abrasive cleaners as they can damage the charger’s surface․
  3. Clean the Connectors⁚ Gently clean the battery connectors using a small wire brush or a cotton swab dipped in rubbing alcohol․ Ensure the connectors are free from corrosion or debris for optimal contact with the battery terminals․
  4. Store in a Dry Place⁚ Store the charger in a cool, dry place, away from direct sunlight and moisture․ Avoid storing it in areas where it might be exposed to extreme temperatures or humidity․

Warranty Information

Schumacher Electric Corporation stands behind the quality of its products and offers a comprehensive warranty for the 1․5 Amp Battery Charger/Maintainer․ This warranty covers defects in materials and workmanship for a period of two years from the date of purchase․

To initiate a warranty claim, you will need to provide proof of purchase, such as a receipt or sales invoice․ Contact Schumacher Electric Corporation’s customer service department to obtain instructions on how to return the defective charger for repair or replacement․
This warranty does not cover damage caused by misuse, abuse, neglect, or unauthorized modifications․ It also does not cover normal wear and tear, or damage resulting from accidents or acts of nature․

For complete details and exclusions regarding the warranty, please refer to the warranty information included in the original product packaging or visit Schumacher Electric Corporation’s website․

Technical Specifications

The Schumacher 1․5 Amp Battery Charger/Maintainer is designed for charging and maintaining 6V and 12V lead-acid batteries commonly found in cars, motorcycles, power sports vehicles, and boats․ It features a microprocessor-controlled, multi-stage charging process that delivers the optimal charge for different battery types and conditions․

Here are the key technical specifications⁚

  • Input Voltage⁚ 120V AC, 60Hz
  • Output Voltage⁚ 6V/12V DC
  • Output Current⁚ 1․5 Amp
  • Charging Modes⁚ Fully Automatic, Multi-Stage
  • Battery Types⁚ Lead-acid (Wet, AGM, Gel)
  • Connectors⁚ Quick-Connect Clamps
  • Dimensions⁚ (L x W x H) 5․5 x 3․5 x 2․5 inches
  • Weight⁚ 1․5 lbs

These specifications provide a clear understanding of the charger’s capabilities and ensure compatibility with your battery․

Frequently Asked Questions

Here are some common questions about the Schumacher 1․5 Amp Battery Charger/Maintainer:

  • Can I use this charger for a lithium-ion battery? No, this charger is specifically designed for lead-acid batteries․ Lithium-ion batteries require specialized chargers with different charging protocols․
  • How long does it take to charge a fully discharged battery? The charging time depends on the battery’s capacity and level of discharge․ Generally, it can take several hours to fully charge a deeply discharged battery․
  • Is it safe to leave the charger connected to the battery for extended periods? Yes, this charger features a maintenance mode that prevents overcharging and maintains the battery at optimal levels․ It is safe to leave it connected for long durations․
  • What if the battery is not accepting a charge? There could be several reasons, such as a faulty battery, a connection issue, or a malfunctioning charger․ Check the connections, test the battery, and ensure the charger is functioning correctly․
  • Where can I find replacement parts or accessories? Contact Schumacher Electric directly for information on replacement parts, accessories, or technical support․

If you have any other questions, consult the user manual or contact Schumacher Electric for assistance․

Where to Buy

The Schumacher 1․5 Amp Battery Charger/Maintainer is widely available at various retailers both online and in physical stores․ Here are some popular options⁚

  • Amazon․com⁚ You can find the Schumacher XM1-5 1․5 Amp Fully Automatic Power Charger and Maintainer on Amazon with convenient delivery options․ Search for “Schumacher XM1-5” on the website․
  • Walmart⁚ Walmart also carries the Schumacher 1․5 Amp Battery Charger/Maintainer․ You can check their website or visit your local store to see if it’s in stock․
  • Lowes․com⁚ Lowes․com offers the Schumacher Electric 1․5-Amp 12-Volt Car Battery Charger under their Car Battery Chargers department․
  • Schumacher Electric Website⁚ Visit the Schumacher Electric website for a complete list of authorized retailers and online stores that carry their products, including the 1․5 Amp Battery Charger/Maintainer․ You might find special offers or promotions on their website․

Remember to compare prices and shipping costs before making your purchase․ You may also find local automotive stores or online marketplaces that offer this charger․

The Schumacher 1․5 Amp Battery Charger/Maintainer offers a convenient and reliable solution for maintaining the charge of your car, motorcycle, power sport, or boat batteries․ Its fully automatic operation and easy-to-use design make it a great choice for both seasoned mechanics and beginners․

With its multi-stage charging process, the charger ensures that your battery receives the appropriate amount of charge, preventing overcharging and extending its lifespan․ The 1․5 amp output provides a steady and safe charging current, ensuring optimal battery health․

Remember to always follow the safety precautions outlined in this manual to ensure safe and effective operation․ For any questions or concerns, contact Schumacher Electric for assistance․ By properly using and maintaining the Schumacher 1․5 Amp Battery Charger/Maintainer, you can keep your batteries in top condition and enjoy reliable performance for years to come․

amana washer instructions

Amana Washer Instructions⁚ A Comprehensive Guide

This comprehensive guide provides detailed instructions on using and maintaining your Amana washer․ Whether you’re a first-time owner or seasoned user, this guide covers everything from basic operations to troubleshooting common issues․ We’ll walk you through loading your washer, selecting the right wash cycle, and using detergent and fabric softener․ We’ll also explain how to clean and maintain your washer for optimal performance․ Learn about Amana washer parts and accessories, how to find user manuals, and how to contact Amana customer support․

Introduction

Welcome to the world of Amana washers, known for their reliability, efficiency, and user-friendly features․ This guide is your comprehensive resource for understanding and mastering your Amana washing machine․ Whether you’re a seasoned user or a first-time owner, this guide will provide you with the knowledge and confidence to operate your Amana washer with ease․

We’ll delve into the intricacies of your Amana washer model, highlighting its unique features and capabilities․ We’ll emphasize the importance of safety precautions to ensure a smooth and secure washing experience․ We’ll then guide you through basic washing machine operations, from loading your washer to selecting the right wash cycle․

This guide will also equip you with the knowledge to troubleshoot common issues, ensuring your Amana washer remains in peak condition․ We’ll explore proper cleaning and maintenance techniques to keep your washer running smoothly for years to come․

By the end of this guide, you’ll have a thorough understanding of your Amana washer, its capabilities, and the best practices for its care․ Ready to dive in? Let’s get started!

Understanding Your Amana Washer Model

Before you start washing, it’s essential to familiarize yourself with your Amana washer model․ This will help you understand its unique features and capabilities․ Amana offers a range of washer models, each with its own set of specifications and design elements․

To begin, locate your washer’s model number․ This information is typically found on a sticker attached to the washer’s exterior․ Once you have the model number, you can access the user manual online or through Amana’s website․ The manual provides detailed information about your specific model, including its wash cycles, control panel settings, and any special features․

Take some time to review the user manual carefully․ Pay attention to the different wash cycles available, such as delicate, normal, and heavy-duty․ Understanding the various cycle options will allow you to select the appropriate setting for your laundry needs․

Familiarize yourself with the control panel, noting the buttons and dials; Learn how to adjust the water level, temperature, and spin speed․ This knowledge will allow you to customize your wash settings for optimal cleaning and care of your clothes․

By taking the time to understand your Amana washer model, you’ll be equipped to operate it effectively and efficiently․

Safety Precautions

Safety should always be a top priority when operating any appliance, and your Amana washer is no exception․ Here are some essential safety precautions to keep in mind⁚

  • Never operate the washer with the lid open․ This can cause a malfunction and potentially lead to injury․
  • Avoid overloading the washer․ Overloading can cause damage to the washer and potentially lead to an imbalance that could result in a safety hazard․
  • Do not wash flammable substances․ These substances can ignite and cause a fire․
  • Keep children away from the washer․ The washer can be a source of danger for young children, so it’s crucial to keep them away from the appliance․
  • Do not use an extension cord with the washer․ Using an extension cord can overload the electrical circuit and increase the risk of fire․
  • Unplug the washer before cleaning or performing any maintenance tasks․ This will prevent electrical shock․
  • Avoid putting heavy objects on top of the washer․ This could lead to damage to the washer and potentially cause it to tip over․
  • Do not tamper with the washer’s electrical wiring or internal components․ This should be done by a qualified technician․

By following these safety precautions, you can help ensure a safe and enjoyable laundry experience․

Basic Washing Machine Operations

Once you’ve familiarized yourself with the safety precautions, you’re ready to start using your Amana washer․ Here’s a step-by-step guide to basic washing machine operations⁚

  1. Load your washer․ Refer to the “Loading Your Washer” section of this guide for detailed instructions on how to distribute your laundry items evenly in the drum․
  2. Add detergent and fabric softener․ Use the appropriate amount of detergent based on your load size and the type of fabric you’re washing․ Add fabric softener to the dispenser if desired․
  3. Select the wash cycle․ Choose the appropriate wash cycle based on the type of fabric you’re washing, the level of soiling, and your desired water temperature․
  4. Close the lid․ Ensure the lid is securely closed before starting the cycle․
  5. Press start․ Once the lid is closed, press the start button to begin the wash cycle․
  6. Monitor the cycle․ You can typically monitor the progress of the cycle on the washer’s control panel․
  7. Unplug the washer․ Once the wash cycle is complete, unplug the washer to prevent potential electrical hazards․
  8. Remove your laundry․ Carefully remove your laundry from the washer, ensuring that all items are dry and ready to be transferred to the dryer․

These basic steps will guide you through the operation of your Amana washer․ Remember to consult your user manual for specific instructions and details on the different cycles available on your model․

Loading Your Washer

Properly loading your Amana washer is crucial for ensuring a clean and efficient wash․ Here’s a guide to help you load your clothes effectively⁚

  1. Sort your laundry․ Separate your laundry by color, fabric type, and level of soiling․ For instance, white clothes should be washed separately from colored clothes to prevent color bleeding․
  2. Check pockets․ Empty all pockets of items like tissues, pens, or keys that could damage your washer or your clothes․
  3. Fasten closures․ Close zippers, button shirts, and tie drawstrings to prevent snags and tangles․
  4. Distribute the load evenly․ Avoid overloading the washer․ Load clothes loosely and evenly around the drum to ensure proper water circulation and cleaning․
  5. Consider delicate items․ For delicate items like lingerie or silk, use a mesh laundry bag to protect them during the wash cycle․
  6. Don’t wash bulky items․ Avoid washing excessively large items like rugs, blankets, or curtains in your washer unless it’s specifically designed for such loads․
  7. Avoid overfilling․ Overfilling the washer can lead to inefficient cleaning, excessive wear and tear, and potential damage to your washer․

By following these tips, you’ll ensure that your laundry is properly loaded and ready for a clean wash cycle․ Remember to refer to your Amana washer’s user manual for specific loading instructions and capacity recommendations․

Selecting the Right Wash Cycle

Your Amana washer offers a variety of wash cycles designed for different types of fabrics and levels of soiling․ Choosing the right cycle ensures effective cleaning and prevents damage to your clothes․ Here’s a breakdown of common wash cycles⁚

  • Normal/Heavy Duty⁚ Ideal for heavily soiled cotton items like towels, sheets, and work clothes․ These cycles use a longer wash time, higher water levels, and more agitation․
  • Permanent Press/Delicate: Perfect for wrinkle-resistant fabrics like polyester blends, dress shirts, and delicates․ These cycles use gentler agitation and lower temperatures to prevent shrinking or wrinkling․
  • Quick Wash/Short Cycle⁚ Designed for lightly soiled items that don’t require extensive cleaning․ This option is great for saving time and water․
  • Handwash/Wool: For delicate items like silk, lace, or wool that require a gentle wash․ This cycle uses a very gentle agitation and minimal water levels․
  • Bulky/Blanket Cycle⁚ For washing large items like comforters or area rugs․ This cycle uses a larger water level and longer wash time to ensure thorough cleaning․
  • Sanitize/Allergy: Designed for killing bacteria and allergens․ These cycles use a hotter water temperature and longer wash time to sanitize clothes․

Refer to your Amana washer’s user manual for a complete list of cycles and their specific features․ You can also find helpful tips on selecting the right cycle based on fabric type, stain level, and water temperature preferences․

Using Detergent and Fabric Softener

Selecting the right detergent and fabric softener is crucial for achieving clean, fresh-smelling laundry․ Here’s a guide to help you choose the best products for your Amana washer⁚

  • Detergent⁚ Use a high-efficiency (HE) detergent specifically formulated for front-load washers; HE detergents produce less suds, which can cause problems in front-load machines․ Avoid using traditional detergents, as they may lead to excessive sudsing and poor cleaning results․
  • Detergent Dosage⁚ Refer to your detergent’s instructions for the recommended dosage based on load size and soil level․ Overusing detergent can lead to residue buildup in your washer and clothes․
  • Fabric Softener⁚ Fabric softeners can help reduce static cling and make clothes feel softer․ Use liquid fabric softeners designed for HE washers․ Avoid using dryer sheets, as they can clog your washer’s dispenser and damage the machine․
  • Dispensers⁚ Most Amana washers have separate dispensers for detergent and fabric softener․ Add detergent to the designated compartment before starting the cycle․ Fabric softener should be added to the appropriate dispenser, typically located near the detergent dispenser․

Always check your Amana washer’s user manual for specific recommendations on detergent and fabric softener types and usage instructions․ Following these guidelines will ensure optimal cleaning performance and protect your washer from damage․

Troubleshooting Common Issues

While Amana washers are known for their reliability, you may encounter occasional issues․ Here’s a guide to troubleshooting some common problems⁚

  • Washer Won’t Start⁚ Check if the washer is plugged in, the circuit breaker is tripped, or the door is properly closed․ Ensure the water supply valves are turned on․ If the problem persists, it may be a faulty control board or motor․
  • Washer Fills With Water But Won’t Drain⁚ Examine the drain hose for kinks or obstructions․ Ensure the drain pipe is not clogged․ If the drain pump is faulty, it may need replacement․
  • Washer Makes Loud Noises⁚ Check for unbalanced loads, foreign objects in the drum, or loose parts․ Worn bearings or a broken belt can also cause loud noises․ A qualified technician can diagnose and repair these issues․
  • Washer Doesn’t Agitate or Spin⁚ Inspect the belt for wear or breakage․ Check the agitator coupling for damage․ A faulty motor or transmission could also cause these problems․
  • Washer Leaks⁚ Inspect the hoses for leaks and tighten connections if necessary․ Check the door seal for wear or damage․ A faulty water inlet valve or pump can also lead to leaks․

If you’re unable to resolve the issue after checking these points, contact Amana customer support or a qualified appliance repair technician for assistance․ Proper troubleshooting can help you identify and address the problem effectively․

Cleaning and Maintaining Your Washer

Regular cleaning and maintenance are essential for keeping your Amana washer performing at its best and extending its lifespan․ Follow these steps to keep your washer clean and in good condition⁚

  • Clean the Dispenser⁚ Regularly clean the detergent and fabric softener dispensers to prevent clogging and ensure proper dispensing․ Remove the dispenser drawer and wash it with warm, soapy water․ Rinse thoroughly and dry completely before reinstalling․
  • Wipe Down the Exterior⁚ After each wash, wipe down the exterior of the washer with a damp cloth to remove any spills or detergent residue․ Avoid harsh chemicals or abrasives that can damage the finish․
  • Clean the Drum⁚ Periodically clean the drum to remove any buildup of detergent, fabric softener, or lint․ Run an empty cycle with a cup of white vinegar to disinfect and deodorize the drum․ You can also use a washing machine cleaner product as directed․
  • Check the Hoses⁚ Regularly inspect the water inlet and drain hoses for leaks, cracks, or wear․ Replace any damaged hoses immediately to prevent water damage․
  • Clean the Lint Filter⁚ If your washer has a lint filter, clean it regularly to prevent clogging․ Locate the filter, usually behind the door or on the front of the washer, and remove any lint or debris․ Rinse the filter with water and dry it before reinstalling․

By following these maintenance tips, you can ensure your Amana washer runs smoothly and efficiently for years to come․

Amana Washer Parts and Accessories

Amana offers a range of parts and accessories designed to enhance the functionality and performance of your washer․ Here are some common parts and accessories you may need⁚

  • Detergent Dispenser⁚ If your detergent dispenser becomes damaged or clogged, you can replace it with a new one․ Amana offers a variety of dispensers compatible with different washer models․
  • Water Inlet Valve⁚ The water inlet valve controls the flow of water into the washer․ If the valve malfunctions, it can cause problems with filling the washer․ Amana offers replacement inlet valves for different washer models․
  • Drain Pump⁚ The drain pump removes water from the washer after the wash cycle․ If the pump fails, the washer will not drain properly․ Amana offers replacement drain pumps for different washer models․
  • Agitator⁚ The agitator is the part that moves the clothes around in the washer drum․ If the agitator becomes damaged or worn, it can affect the cleaning performance of the washer․ Amana offers replacement agitators for different washer models․
  • Washer Belts⁚ The washer belts connect the motor to the agitator or drum, and they can wear out over time․ If the belts break, the washer will not function properly․ Amana offers replacement belts for different washer models․

You can find Amana washer parts and accessories online through retailers like Amazon, eBay, or directly from Amana’s website․ When ordering parts, be sure to provide your washer model number to ensure compatibility․

Where to Find Amana Washer Manuals

Finding the right Amana washer manual is crucial for understanding its features, operation, and troubleshooting․ Here are several resources to access your specific model’s manual⁚

  • Amana’s Website⁚ Amana offers a dedicated “Owner Center” on their website․ You can navigate to the “Support” section and utilize their model lookup system to find your washer manual․ This is often the most reliable source for the latest versions․
  • ManualsOnline⁚ This website is a comprehensive directory for user manuals of various appliances, including washing machines․ You can search by brand, model number, or appliance type to find your Amana washer manual․
  • Sears Parts Direct⁚ If you purchased your Amana washer from Sears, their “Parts Direct” website is another excellent resource․ They offer manuals, parts diagrams, and troubleshooting guides for many appliance brands, including Amana․
  • Third-Party Websites⁚ Websites like ManualsLib and ManualsPDF often host a collection of appliance manuals․ Search for your Amana washer model number to see if it’s available․ However, be cautious as the accuracy and authenticity of these sources can vary․

Always prioritize using the official Amana website or a reputable source like ManualsOnline to ensure you’re accessing the most accurate and up-to-date manual for your Amana washer;

1 2