dyson dc24 vacuum cleaner manual
This user guide covers the following models⁚ Dyson DC24 Multi Floor, Dyson DC24 Multi Floor Complete, Dyson DC24 Animal, Dyson DC24 Multi Floor Exclusive, Dyson DC24 Drawing Limited Edition, Dyson DC24 Blitz It, Dyson DC24 Independent. This manual provides detailed information on how to set up, operate, maintain, and troubleshoot your Dyson DC24 vacuum cleaner. It also includes safety precautions, warranty information, and contact details for Dyson customer support.
Introduction
Welcome to the world of Dyson, where innovation meets performance. The Dyson DC24 vacuum cleaner is a testament to Dyson’s commitment to engineering excellence, delivering powerful suction and exceptional cleaning capabilities. This manual is your comprehensive guide to understanding and utilizing your Dyson DC24 to its full potential. Whether you’re tackling everyday dust and dirt or tackling stubborn pet hair, this manual will equip you with the knowledge and tools to achieve a cleaner, healthier home.
Throughout this guide, we’ll cover everything from assembly and setup to operation, maintenance, and troubleshooting. You’ll find detailed instructions, helpful tips, and illustrations to ensure a smooth and enjoyable experience. We encourage you to read through this manual carefully, as it contains valuable information that will help you maximize the performance and longevity of your Dyson DC24.
This user guide covers the following models⁚ Dyson DC24 Multi Floor, Dyson DC24 Multi Floor Complete, Dyson DC24 Animal, Dyson DC24 Multi Floor Exclusive, Dyson DC24 Drawing Limited Edition, Dyson DC24 Blitz It, Dyson DC24 Independent. Let’s dive in and unlock the power of your Dyson DC24.
Model Variations
The Dyson DC24 vacuum cleaner comes in a variety of models, each tailored to specific cleaning needs. Understanding the differences between these models will help you choose the perfect Dyson DC24 for your home.
The Dyson DC24 Multi Floor is a versatile model designed for general cleaning on various surfaces. It offers powerful suction and a range of attachments to tackle dust, dirt, and debris on carpets, hard floors, and upholstery. The Dyson DC24 Multi Floor Complete includes additional attachments for specialized cleaning tasks, such as crevice tools for reaching tight spaces and upholstery tools for cleaning furniture.
The Dyson DC24 Animal is specifically designed for homes with pets. It features a specialized brush head that effectively removes pet hair from carpets and upholstery, making it ideal for families with furry companions. The Dyson DC24 Multi Floor Exclusive is a premium model that includes additional features, such as a longer reach and a larger dustbin capacity.
Finally, the Dyson DC24 Drawing Limited Edition is a unique model that features a distinctive design and limited availability. It offers the same cleaning performance as other DC24 models, but with a more stylish aesthetic. No matter which model you choose, the Dyson DC24 is a powerful and reliable vacuum cleaner that will help you maintain a clean and healthy home.
Key Features
The Dyson DC24 vacuum cleaner is renowned for its innovative features and powerful performance. Here are some of the key features that set it apart⁚
Ball Technology⁚ The Dyson DC24 is built on Dyson’s signature ball technology, which allows for effortless maneuverability and 360° rotation. This makes navigating around furniture and tight spaces a breeze, giving you complete control over your cleaning path.
Cyclone Technology⁚ Dyson’s patented cyclone technology separates dust and dirt from the air using centrifugal force. This creates powerful suction and ensures that your vacuum cleaner maintains its cleaning power over time, without losing suction as the dustbin fills.
Clear Bin™ Technology⁚ The Dyson DC24 features a transparent dustbin, allowing you to visually monitor the dirt and debris being collected. This ensures you can easily tell when the bin needs emptying, preventing spills and maintaining optimal suction.
Versatile Attachments⁚ The Dyson DC24 comes with a variety of attachments, including a crevice tool, upholstery tool, and combination tool. These attachments allow you to clean different surfaces and reach hard-to-reach areas with ease.
Hygienic Dust Ejector⁚ The Dyson DC24 features a hygienic dust ejector mechanism, making emptying the dustbin a simple and mess-free process. With a single press of a button, the dustbin is emptied with minimal contact, ensuring a hygienic and convenient cleaning experience.
Assembly and Setup
Setting up your Dyson DC24 vacuum cleaner is a straightforward process. The following steps guide you through the initial assembly and setup⁚
Unpacking⁚ Carefully remove all components from the packaging, including the vacuum cleaner unit, attachments, and user manual.
Assembling the Wand⁚ Connect the wand to the vacuum cleaner unit by aligning the corresponding tabs and pushing firmly until it clicks into place.
Attaching the Tool⁚ Select the desired tool for your cleaning task and connect it to the wand by aligning the tabs and pushing until it clicks into place.
Connecting the Power Cord⁚ Plug the power cord into the vacuum cleaner unit and the other end into a standard electrical outlet. Ensure the power switch is in the off position before plugging in.
Testing the Vacuum⁚ Turn on the vacuum cleaner using the power switch and test its functionality by running it on a low-pile carpet or bare floor.
Familiarise Yourself with Controls⁚ Study the user manual to understand the various controls and features of your Dyson DC24, including the power switch, suction level adjustments, and tool release mechanisms.
Storing the Vacuum⁚ When not in use, store the vacuum cleaner in a dry and clean location.
Operation and Usage
Operating your Dyson DC24 vacuum cleaner is easy and efficient; Here’s a step-by-step guide to using it effectively⁚
Power On⁚ Flip the power switch located on the vacuum cleaner unit to the “On” position.
Suction Adjustment⁚ Adjust the suction level using the control on the vacuum cleaner handle. You can select from different levels depending on the surface you are cleaning.
Tool Selection⁚ Choose the appropriate tool for your cleaning task. Dyson DC24 offers a variety of attachments, including a crevice tool, upholstery tool, and combination tool, each designed for specific cleaning needs.
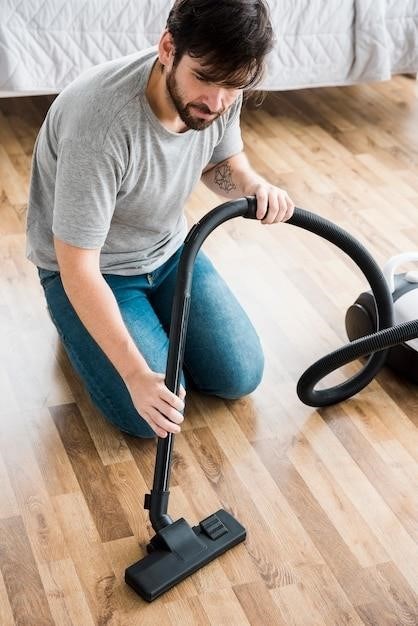
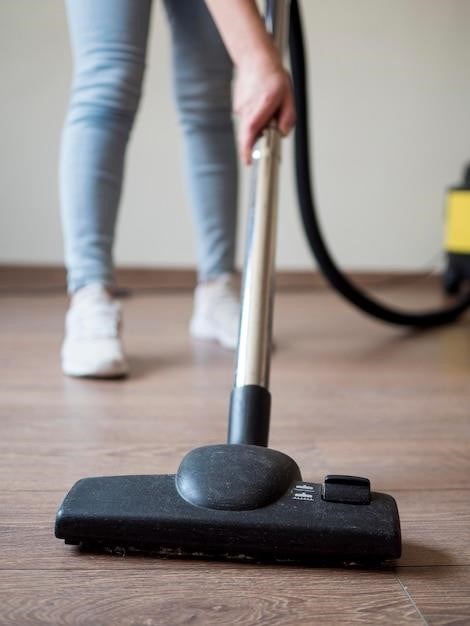
Cleaning⁚ Gently glide the vacuum cleaner over the surface you are cleaning. For carpets, use a back and forth motion to ensure thorough cleaning.
Emptying the Dust Bin⁚ When the dust bin is full, detach it from the vacuum cleaner unit by pressing the release button. Empty the contents into a trash bin and replace the dust bin.
Cleaning the Filters⁚ Regularly clean the filters according to the user manual instructions. This will help maintain the vacuum’s suction power and extend its lifespan.
Power Off⁚ Turn off the vacuum cleaner by flipping the power switch to the “Off” position.
Storing⁚ Store the vacuum cleaner in a cool, dry place.
Maintenance and Cleaning
Regular maintenance is essential to keep your Dyson DC24 vacuum cleaner operating at peak performance and extend its lifespan. Here’s a guide to proper maintenance and cleaning⁚
Emptying the Dust Bin⁚ After each use, empty the dust bin. A full dust bin can reduce suction power and affect cleaning efficiency; To empty the bin, simply press the release button and detach it from the vacuum cleaner unit. Empty the contents into a trash bin and replace the bin.
Cleaning the Filters⁚ Dyson DC24 vacuum cleaners have multiple filters, including the pre-motor filter and the post-motor filter. These filters trap dust and allergens, maintaining air quality. Regularly check and clean the filters according to the user manual instructions. A dirty filter can restrict airflow, reducing suction power.
Cleaning the Brush Bar⁚ The brush bar in the vacuum cleaner head picks up dirt and debris. Regularly check and clean the brush bar to remove hair, string, and other debris that may become tangled. Use a small tool or your fingers to remove any obstructions.
Cleaning the Vacuum Cleaner Body⁚ Wipe the vacuum cleaner body with a damp cloth to remove dust and dirt. Avoid using harsh chemicals or abrasive cleaners that could damage the plastic or finish.
Lubricating the Wheels⁚ If the vacuum cleaner wheels become stiff or noisy, lubricate them with a light oil. Follow the user manual instructions for lubrication.
Storing the Vacuum Cleaner⁚ Store the vacuum cleaner in a cool, dry place. Avoid storing it in areas with high humidity or direct sunlight.
Troubleshooting
While the Dyson DC24 is a robust vacuum cleaner, you might encounter some common issues. Here’s a guide to troubleshooting some common problems⁚
No Power⁚ If the vacuum cleaner doesn’t turn on, first check if the power cord is plugged in securely. If it is, ensure the circuit breaker hasn’t tripped. If the problem persists, it could be a faulty power cord or internal electrical issue, requiring professional assistance.
Reduced Suction⁚ Poor suction can be caused by a blocked dust bin, dirty filters, or a clogged brush bar. Empty the dust bin, clean the filters, and check the brush bar for obstructions. If the issue continues, inspect the hose for any blockages.
Brush Bar Not Rotating⁚ A jammed brush bar can prevent it from rotating. Check for hair, string, or other debris that may be tangled around the bar. Remove any obstructions. If the brush bar still doesn’t rotate, it might require repair or replacement.
Loud Noises⁚ Unusual noises from the vacuum cleaner can indicate a problem with the motor, wheels, or brush bar. Inspect the motor area for loose parts or obstructions. Lubricate the wheels if they are stiff or noisy.
Vacuum Cleaner Won’t Move⁚ If the vacuum cleaner won’t move, check if the wheels are jammed or obstructed by debris. If the wheels are clean, examine the vacuum cleaner’s base for any issues.
If you’re unable to resolve the problem after troubleshooting, contact Dyson customer support for assistance.
Accessories and Attachments
The Dyson DC24 vacuum cleaner comes with a variety of accessories and attachments designed to tackle different cleaning tasks. Understanding these tools will help you get the most out of your vacuum cleaner. Here’s a breakdown of some common accessories⁚
Combination Tool⁚ This versatile attachment features a crevice tool on one end and a brush head on the other. Use the crevice tool to reach tight spaces like corners and along baseboards. The brush head is perfect for dusting furniture, blinds, and delicate surfaces.
Upholstery Tool⁚ Designed for cleaning upholstery, carpets, and mattresses. The soft bristles gently remove dirt and dust without damaging delicate fabrics.
Stair Tool⁚ This attachment is specifically designed to clean stairs and hard-to-reach areas. Its angled design allows you to easily reach under furniture and along stairs.
Extension Wand⁚ The extension wand provides extra reach, allowing you to clean high ceilings, cobwebs, and hard-to-reach areas without straining.
Dusting Brush⁚ This soft brush is perfect for dusting delicate surfaces like lampshades, bookshelves, and artwork.
Turbine Head⁚ This powerful attachment is designed for deep cleaning carpets and rugs. Its rotating brush bar effectively removes embedded dirt and pet hair.
These are just some of the common accessories included with the Dyson DC2Consult your specific model’s user manual for a detailed list of available attachments and their uses.
Safety Precautions
Your safety is our utmost priority. Before using your Dyson DC24 vacuum cleaner, please read and understand these safety precautions to ensure a safe and effective cleaning experience.
Electrical Safety⁚ Always unplug the vacuum cleaner before cleaning, maintaining, or storing it. Never use the vacuum cleaner in wet conditions or near water. Ensure the power cord is not damaged and avoid pulling or twisting it. Do not use the vacuum cleaner with a damaged power cord or plug.
Fire Hazard⁚ Do not use the vacuum cleaner to pick up flammable liquids, hot ashes, or burning materials. Keep the vacuum cleaner away from heat sources and avoid using it near open flames.
Personal Safety⁚ Always wear appropriate footwear when using the vacuum cleaner. Keep long hair and loose clothing away from the moving parts of the vacuum cleaner. Do not use the vacuum cleaner on stairs without taking proper precautions.
Children and Pets⁚ Do not allow children or pets to play with the vacuum cleaner or its accessories. Keep the vacuum cleaner and its cords out of reach of children.
General Precautions⁚ Do not use the vacuum cleaner for purposes other than those intended. Always inspect the vacuum cleaner for damage before each use. If any damage is found, stop using the vacuum cleaner and contact Dyson customer support.
By following these safety precautions, you can help ensure a safe and enjoyable cleaning experience with your Dyson DC24 vacuum cleaner.
Warranty Information
Dyson offers a comprehensive warranty on its products to ensure customer satisfaction and peace of mind. The specific warranty terms and conditions may vary depending on the model and region of purchase. This user manual does not provide a complete and detailed description of the warranty, so it is crucial to refer to the warranty card included with your Dyson DC24 vacuum cleaner for accurate and up-to-date information.
Generally, Dyson warranties cover defects in materials and workmanship for a specific period. The warranty typically covers the vacuum cleaner’s motor, internal components, and certain accessories. However, the warranty may not cover damage resulting from misuse, neglect, unauthorized repairs, or normal wear and tear.
To make a warranty claim, you will typically need to provide proof of purchase, such as the original sales receipt or invoice. It is recommended to contact Dyson customer support for assistance with warranty claims. They can guide you through the process and provide any necessary information or documentation.
Remember that maintaining your Dyson DC24 vacuum cleaner according to the instructions in this manual can help extend its lifespan and potentially avoid warranty issues.